Have you ever sown seeds indoors with excitement, only to watch them sit in the soil doing nothing? Or worse, sprout and then suddenly collapse and die?
You are not alone. Most beginner gardeners struggle with starting seeds indoors because they skip a few critical steps without even realizing it.
The good news? Starting seeds indoors is not complicated once you know the right tricks. With the proper setup, timing, and technique, you can grow strong, healthy seedlings that are ready to thrive the moment they hit the garden.
Starting seeds indoors requires the right seed starting mix, consistent soil warmth (65 to 75°F), adequate light (14 to 16 hours per day), and proper watering technique. Most seeds should be started 6 to 8 weeks before your last expected frost date.
In this guide, you will discover 8 powerful tricks for starting seeds indoors like a pro, whether you are a first-time grower or looking to finally get consistent results this season.
Why Starting Seeds Indoors Matters?
Most gardeners think tossing seeds directly into the ground is the easiest path. And sometimes it is. But starting seeds indoors gives you a powerful advantage that outdoor sowing simply cannot match.
Here is why it matters:
Longer Growing Season: Starting seeds indoors gives your plants a head start of 6 to 10 weeks. This is especially important in colder climates where the frost-free window is short.
Big Cost Savings: A single seed packet costs a fraction of what you pay for nursery transplants. Starting seeds indoors lets you grow dozens of plants for the price of one store-bought seedling.
Access to More Varieties: Garden centers only stock common varieties. When you start seeds indoors, you unlock access to hundreds of rare, heirloom, and specialty varieties never found on store shelves.
Better Germination Control: Outdoor conditions are unpredictable. Indoors, you control the temperature, moisture, and light to give every seed the best possible chance to germinate successfully.
Starting seeds indoors simply puts you in control of your garden from day one.
What You Need Before You Start (Tools & Setup)?
Before you sow a single seed, having the right supplies in place makes all the difference. Many beginners fail at starting seeds indoors, not because of poor technique but because they are working with the wrong tools.
Here is everything you need to get started:
- Seed Starting Mix: A fine, sterile, well-draining mix specially formulated for germination. Do not use regular potting soil or garden soil.
- Cell Trays or Seed Starting Containers: Small compartments give each seed its own space to develop roots without competition.
- Humidity Dome or Plastic Wrap: Traps moisture and warmth around seeds during the germination stage.
- Heat Mat: Raises soil temperature to the ideal germination range of 65 to 85°F, depending on the crop.
- Full Spectrum LED Grow Lights: Provide the consistent, strong light seedlings need to grow compact and healthy.
- Spray Bottle or Watering Can with Fine Rose: Allows gentle watering without disturbing seeds or compacting the soil surface.
- Plant Labels and Waterproof Marker: Keeps your trays organized so you always know what is growing where.
- Timer for Grow Lights: Automates your light schedule so seedlings receive consistent daily light exposure.
Pro Tip: Budget-friendly alternatives like egg cartons, yogurt cups, and newspaper pots work perfectly well as seed starting containers.
Trick #1: Use Seed Starting Mix, Not Potting Soil

What Is the Best Soil for Starting Seeds Indoors?
This is one of the most common mistakes beginners make when starting seeds indoors. They reach for whatever bag of soil is nearby, not realizing that the wrong growing medium can ruin germination before it even begins.
Regular potting soil and garden soil are both too dense and heavy for delicate seeds. They compact easily, hold too much moisture, and often carry fungal pathogens that cause a devastating condition called damping off. This is when seedlings suddenly rot at the base and collapse overnight.
Seed starting mix is specifically designed for germination. It is:
- Fine-textured, so tiny roots can push through easily
- Sterile to eliminate harmful bacteria and fungi
- Well draining to prevent waterlogging and root rot
- Low in nutrients because seeds carry their own food supply until true leaves appear
You can also make your own seed starting mix at home using equal parts peat moss or coco coir, perlite, and vermiculite.
Pro Tip: Always pre-moisten your seed starting mix before filling your trays. Dry mix repels water and leads to uneven germination. Add water gradually and mix until the texture feels like a wrung-out sponge.
Using the right growing medium from the start gives every seed the clean, healthy foundation it needs to sprout successfully.
Trick #2: Time Your Planting with a Seed Starting Schedule
When Should I Start Seeds Indoors?
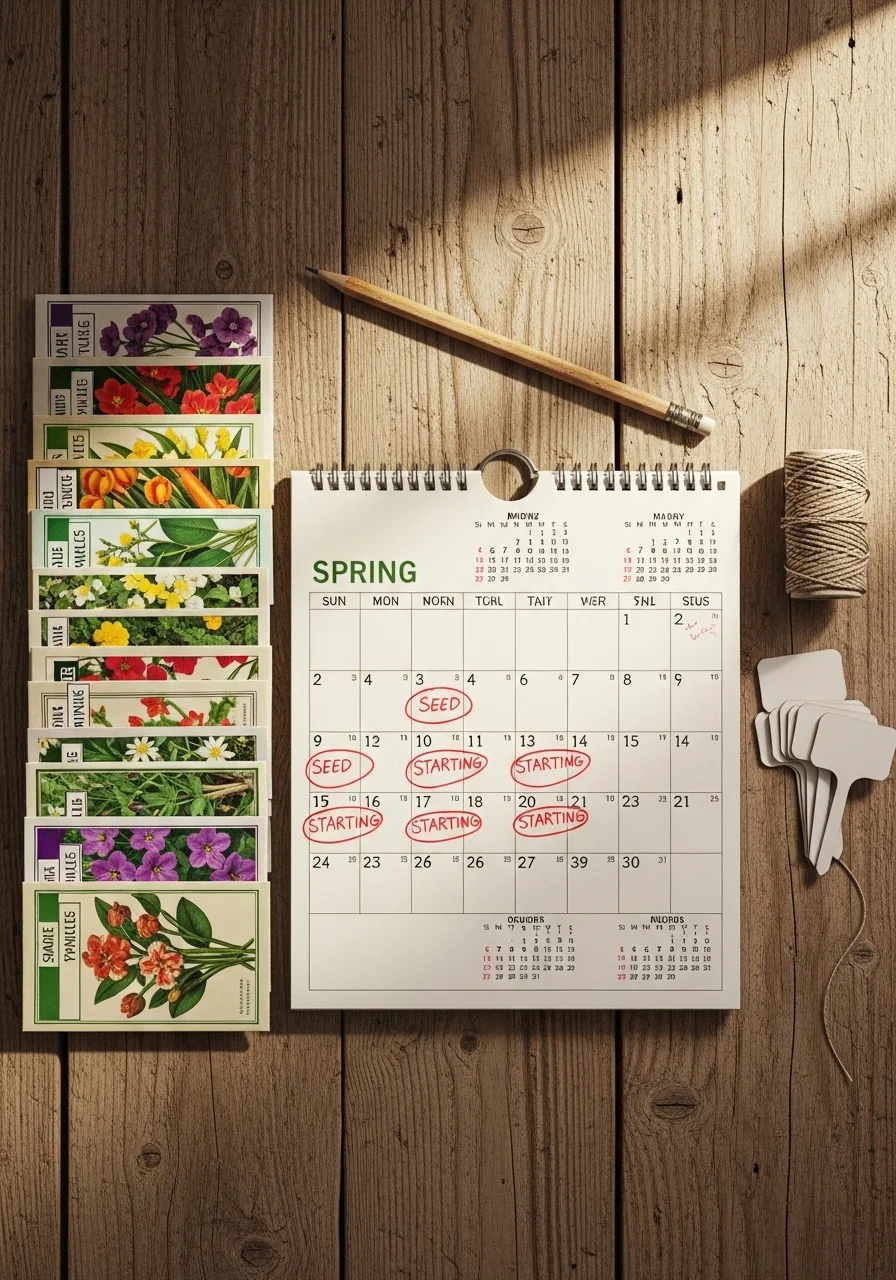
Timing is everything when it comes to starting seeds indoors. Start too early, and your seedlings become root-bound and leggy before it is safe to transplant. Start too late, and you lose the head start advantage entirely.
The golden rule is simple. Start most seeds indoors 6 to 8 weeks before your last expected frost date. However, some crops need more or less time depending on how fast they grow.
Here is a quick reference guide:
| Crop | Weeks Before Last Frost |
|---|---|
| Tomatoes | 6 to 8 weeks |
| Peppers | 8 to 10 weeks |
| Eggplant | 8 to 10 weeks |
| Broccoli | 4 to 6 weeks |
| Lettuce | 4 to 6 weeks |
| Petunias | 10 to 12 weeks |
To find your last frost date, visit the USDA Plant Hardiness Zone website and enter your zip code. This gives you a reliable target date to count back from.
Mark your seed starting dates on a calendar or use a free garden planner app to stay organized. Succession planting is also worth considering. Sowing small batches every two weeks gives you a steady supply of transplants rather than everything maturing at once.
Pro Tip: Write your target transplant date on each seed packet before the season begins. This simple habit keeps your entire seed starting schedule on track from day one.
Trick #3: Use a Heat Mat to Boost Germination Rate

Do Seeds Need Heat to Germinate Indoors?
One of the most overlooked tools in starting seeds indoors is the humble heat mat. Many beginners assume that room temperature is warm enough for seeds to germinate. In most cases, it is not.
There is an important difference between air temperature and soil temperature. A room may feel comfortable at 68°F, but the soil in your seed trays could be sitting at 58 to 60°F. Most seeds need soil temperatures between 65°F and 85°F to germinate quickly and reliably.
A heat mat sits beneath your seed trays and raises soil temperature by 10 to 20°F above the surrounding air. The results are dramatic. Seeds that might take three to four weeks to sprout at cool temperatures can germinate in just seven to ten days with consistent bottom heat.
Crops that especially benefit from heat mat use include:
- Tomatoes: Germinate best at 70 to 80°F soil temperature
- Peppers: Prefer 80 to 85°F for fast, reliable sprouting
- Eggplant: Needs consistent warmth to break dormancy
- Basil: Cold soil causes slow, patchy germination
Quick Fact: Pepper seeds germinate best at 80 to 85°F soil temperature. Without a heat mat, germination can take three to four weeks instead of seven to ten days.
Once your seeds have sprouted, remove the heat mat. Seedlings no longer need bottom heat, and keeping it on can dry out the soil too quickly.
Trick #4: Get the Lighting Right (The #1 Mistake Beginners Make)

How Much Light Do Seedlings Need Indoors?
Lighting is the single biggest factor that separates successful starting seeds indoors from frustrating failure. Most beginners place their seed trays on a sunny windowsill and assume that is enough. Unfortunately, it rarely is.
Here is the problem. Even a south-facing window provides only 4 to 6 hours of usable light in late winter and early spring. The sun angle is low, the intensity is weak, and cloudy days reduce that even further. Seedlings respond by stretching tall and thin toward the light source in a process called etiolation. The result is leggy, weak seedlings that struggle to survive transplanting.
Seedlings need 14 to 16 hours of strong, consistent light every single day. The most reliable way to provide this is with full-spectrum LED grow lights placed just 2 to 4 inches above the tops of your seedlings.
Key lighting tips to follow:
- Use a timer to automate a consistent 14 to 16-hour light cycle every day
- Raise the light as seedlings grow to maintain the correct distance
- Rotate trays every two to three days for even, balanced growth
- Watch for bleaching, which signals the light is too close to the leaves
Pro Tip: If your seedlings are tall, thin, and flopping over, insufficient light is almost always the cause. Add grow lights immediately and the next set of leaves will grow noticeably stronger and more compact.
Trick #5: Master Bottom Watering for Stronger Roots
Should I Water Seedlings from the Top or Bottom?
Watering seems simple, but it is one of the trickiest parts of starting seeds indoors. Too much water causes root rot and damping off. Too little water and seedlings dry out and die. The technique you use matters just as much as the amount.
Most beginners water from the top using a watering can or cup. This approach has several problems. It can displace tiny seeds, compact the soil surface, splash fungal spores onto leaves, and leave the lower roots dry while the top stays soggy.
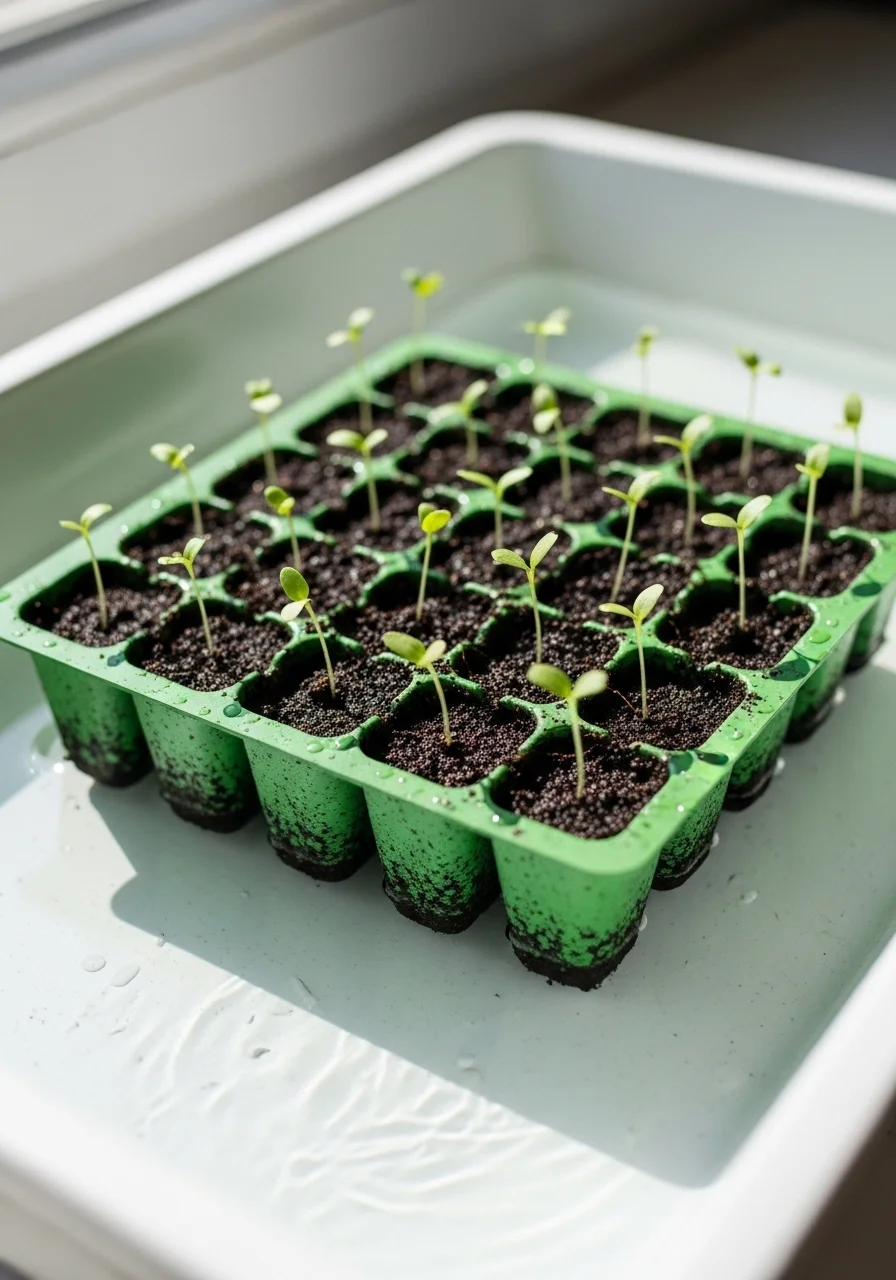
Bottom watering solves all of these problems at once. Here is how to do it correctly:
- Place your seed tray inside a shallow container or tray
- Pour about 1 inch of water into the outer tray
- Allow the seed starting mix to absorb moisture from below for 20 to 30 minutes
- Once the top of the soil feels moist, remove the tray and let the excess water drain completely
- Never let trays sit in standing water for longer than 30 minutes
Bottom watering encourages roots to grow downward in search of moisture. This builds a stronger, deeper root system that handles transplanting much better than shallow top-watered roots.
Pro Tip: Lift your seed tray to check moisture levels. A light tray means it is time to water. A heavy tray means there is still enough moisture. This simple habit prevents both overwatering and underwatering every time.
Trick #6: Thin Seedlings Without Guilt

Should I Thin Seedlings Indoors?
Thinning is one of the most emotionally difficult parts of starting seeds indoors for new gardeners. After nurturing tiny seeds into sprouts, the idea of removing healthy-looking seedlings feels wasteful and even cruel. But skipping this step is a mistake that will cost you in the long run.
When multiple seedlings grow in the same cell or container, they compete aggressively for light, water, nutrients, and root space. The result is a group of weak, stressed plants rather than one strong, healthy seedling ready for transplanting.
Thinning is not killing plants. It is investing in the ones that remain.
Here is how to thin seedlings correctly:
- Wait until seedlings develop their first set of true leaves. These are the second set of leaves that appear after the initial seed leaves, called cotyledons.
- Identify the strongest, most upright seedling in each cell
- Use a small pair of clean scissors to snip the unwanted seedlings at the soil level
- Never pull seedlings out by the roots, as this disturbs the roots of the seedling you are keeping
- Aim for one strong seedling per cell in most cases
Quick Tip: When to thin seedlings. Once seedlings show their first set of true leaves, thin to one plant per cell by snipping extras at the base with clean scissors. Do not pull them out.
Thinning feels tough at first, but the stronger plants you are left with will make it completely worth it.
Trick #7: Label Everything (Seriously)

How Do I Keep Track of Seeds Started Indoors?
It sounds like a small detail, but proper labeling is one of the most practical habits you can build when starting seeds indoors. Skip it once, and you will quickly understand why experienced gardeners never skip it twice.
Here is the reality. In the early stages of growth, almost all seedlings look identical. Tomato seedlings look like pepper seedlings. Broccoli looks like cauliflower. Basil looks like dozens of other herbs. Without clear labels, your entire seed-starting operation can turn into a guessing game that leads to frustration at transplant time.
What to write on each label:
- Variety name: Be specific. Write “Roma Tomato”, not just “Tomato.”
- Date seeded: Helps you track germination speed and plan transplant timing
- Expected germination days: So you know when to start watching for sprouts
- Sowing depth: Useful reference if you are starting multiple crops with different requirements
Use waterproof plant labels and a permanent marker. A regular pen or pencil fades quickly with watering. Popsicle sticks and masking tape are not reliable for the same reason.
For gardeners managing large seed starting setups, a simple spreadsheet or free garden planner app works brilliantly alongside physical labels. Record everything digitally as a backup.
Quick Tip: Label your trays before you sow the seeds not after. Once trays are filled and seeds are planted everything looks the same and mistakes happen very easily.
Trick #8: Harden Off Seedlings Before Transplanting

How Do I Harden Off Seedlings Before Planting Outside?
The final and most critical trick in starting seeds indoors is one that many gardeners skip in their excitement to get plants in the ground. Hardening off is the process of gradually introducing your indoor-grown seedlings to outdoor conditions before transplanting them permanently.
Here is why it matters. Seedlings raised indoors live in a sheltered, controlled environment with stable temperatures, no wind, and artificial light. Moving them directly into the garden exposes them to intense direct sun, fluctuating temperatures, and outdoor wind all at once. The result is transplant shock, which causes wilting, leaf scorch, stunted growth, and sometimes death.
Follow this simple hardening off schedule for best results:
| Day | Outdoor Exposure |
|---|---|
| Day 1 to 2 | 1 to 2 hours in a shaded spot with no wind |
| Day 3 to 4 | 2 to 3 hours with gentle morning sun |
| Day 5 to 6 | 4 to 5 hours with direct sun and light wind |
| Day 7 to 10 | Full day outside in the chosen planting spot |
Start the process about 10 days before your planned transplant date. Choose a mild, calm day to begin and always bring seedlings back inside if temperatures drop unexpectedly.
Pro Tip: Never place seedlings in full direct sun on the first day outside. Even one hour of intense midday sun on unhardened seedlings can cause severe leaf scorch that sets plants back by weeks.
Common Mistakes to Avoid When Starting Seeds Indoors
Why Are My Seeds Not Germinating Indoors?
Even with the best intentions, small errors can derail your entire starting seeds indoors journey. The good news is that most of these mistakes are completely avoidable once you know what to watch for.
Here are the most common mistakes gardeners make and how to avoid every single one:
1. Planting Too Deep
Seeds planted too deeply exhaust their energy before reaching the surface. Follow the general rule of planting seeds at a depth of two times their diameter.
2. Using Old or Expired Seeds
Seed viability decreases with age. Always check the packed date on your seed packets and do a quick germination test on older seeds before committing to a full tray.
3. Overwatering
This is the single most common seedling killer. Soggy soil suffocates roots and invites damping off fungus. Always check moisture levels before watering.
4. Not Enough Light
Insufficient light produces tall, weak, leggy seedlings that struggle to survive transplanting. Always use full-spectrum grow lights indoors.
5. Starting Too Early
Seedlings started too far ahead of the last frost date, become root-bound, and are stressed before they can go outside.
6. Skipping Hardening Off
Moving seedlings directly outdoors causes transplant shock. Always follow a gradual hardening off schedule.
7. Using Garden Soil
Garden soil is too dense and carries disease. Always use a sterile seed starting mix.
8. Ignoring Soil Temperature
Air temperature and soil temperature are not the same. Always use a heat mat to maintain optimal soil warmth for germination.
FAQ
What Seeds Are Best to Start Indoors?
The best seeds to start indoors are tomatoes, peppers, eggplant, broccoli, cauliflower, celery, lettuce, kale, and flowering annuals like petunias and snapdragons. These crops need a long growing season and establish much stronger root systems when given an indoor head start before transplanting outdoors.
What Month Should I Start My Seeds Inside?
For most gardeners, the best months for starting seeds indoors are January through March. The exact month depends on your USDA hardiness zone and last expected frost date. Count back 6 to 8 weeks from your last frost date to find your perfect seed starting month.
What Seeds Can I Start Indoors Right Now?
Check your last frost date first, then count back the weeks listed on your seed packet. In late winter start peppers, eggplant and onions. In early spring, start tomatoes, broccoli, and lettuce. In mid-spring, start cucumbers, squash, and melons, which only need 2 to 4 weeks indoors before transplanting.
What Seeds Should You Not Start Indoors?
Root vegetables like carrots, beets, radishes, parsnips, and crops like peas, beans, corn, and sunflowers should not be started indoors. These plants develop sensitive taproots that are easily damaged during transplanting and produce poor results when moved from indoor trays to the garden.
Why Is Replanting Seeds Illegal?
Replanting seeds is only illegal when those seeds are protected by a plant patent or covered by a licensing agreement from the seed company. Saving and replanting seeds from open-pollinated and heirloom varieties is completely legal and has been practiced freely by gardeners for thousands of years.
What Are Common Seed Starting Mistakes?
The most common seed starting mistakes are using regular potting soil instead of seed starting mix, overwatering, not providing enough light, starting seeds too early, skipping the hardening off process, ignoring soil temperature, and forgetting to label trays. Avoiding these mistakes dramatically improves your success rate when starting seeds indoors.
Conclusion and Call to Action
You Are Now Ready to Start Seeds Indoors Like a Pro
Starting seeds indoors does not have to be overwhelming or frustrating. With the right supplies, correct timing, proper lighting, and a few proven techniques, you can grow strong, healthy seedlings that give your garden a powerful head start every single season.
Here is a quick recap of everything you learned today:
- Use seed starting mix, not potting soil
- Time your planting with a seed starting schedule
- Use a heat mat to boost germination rate
- Get your lighting right with full-spectrum grow lights
- Master bottom watering for stronger roots
- Thin seedlings without guilt
- Label everything from day one
- Always harden off before transplanting outdoors
Now it is your turn to take action. Pick one trick from this list and put it into practice this week.
Which trick are you going to try first? Drop your answer in the comments below and let us know how your seed starting journey is going.

Shahid Nawaz is a home and garden content writer at Garden Skillz with over 4 years of experience researching and writing about gardening, plant care, and DIY home improvement. He specializes in turning complex horticultural topics into practical, easy-to-follow guides for beginners and experienced growers alike. Shahid has written extensively on flowering plants, indoor greenery, and seasonal garden care.