I remember standing in my backyard three summers ago, staring at a perfectly good swimming pool surrounded by cracked concrete, a rusted ladder, and a sad plastic lawn chair that had seen better days in 2009. The pool itself was fine. But the area around it? It looked like an afterthought. Like someone installed the pool and said, “Okay, that’s enough work for the decade.”
My neighbor had just finished renovating her outdoor pool area, and honestly, every time I walked past her fence, I felt a little embarrassed about mine. She had string lights, a pergola, a proper lounge zone — the whole thing looked like a boutique hotel had set up shop in her backyard.
That summer, I made it my mission to transform my pool area. I spent months researching, making mistakes (more on those later), spending money on things that didn’t work, and eventually landing on a setup that genuinely impresses guests every single time.
So if you’re sitting there with a pool and a “meh” setup around it, this one’s for you. These are the ten ideas that made the biggest difference — not just visually, but in how much we actually use the space.
1. Build a Pergola or Shade Structure First — Seriously, Do This First
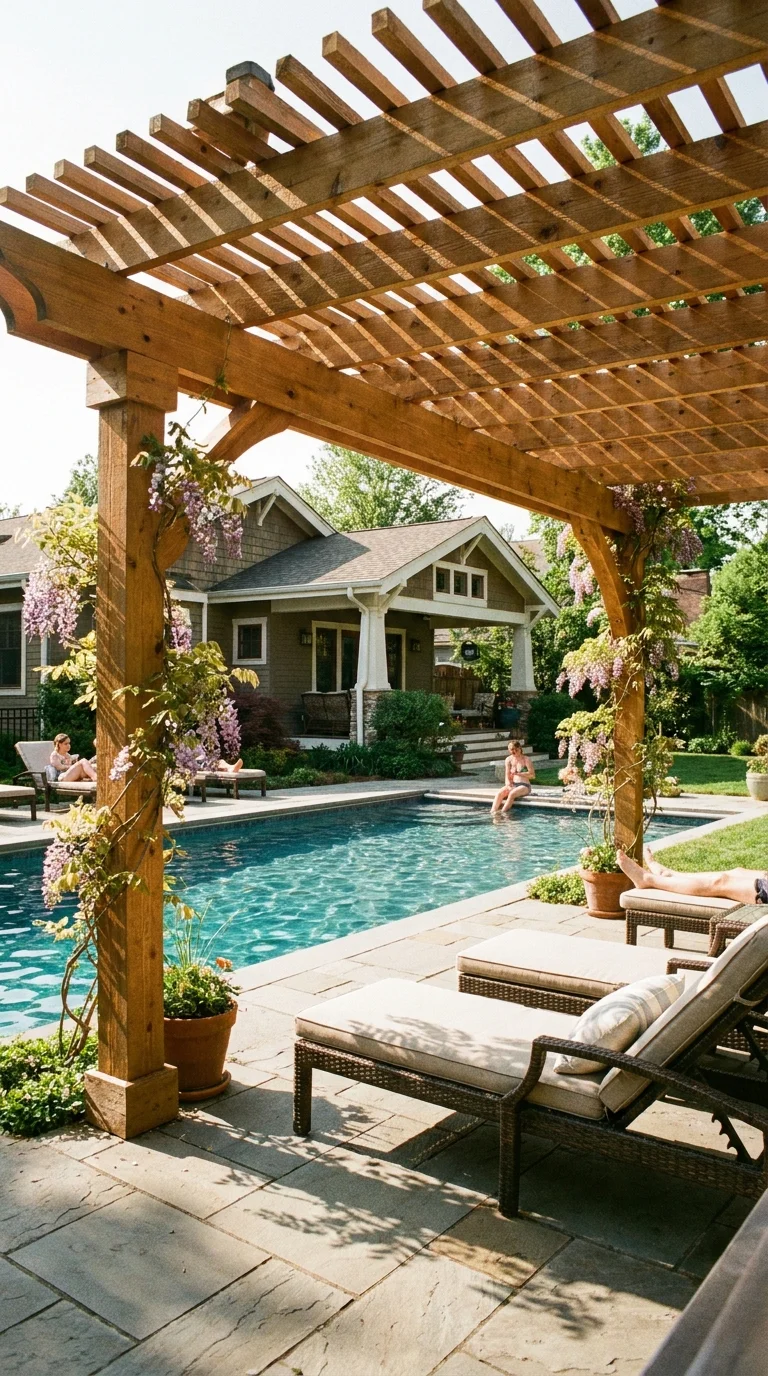
This was my biggest regret: I did everything else first and added the pergola last.
Shade is the non-negotiable foundation of any outdoor pool area. Without it, your beautiful lounge chairs become unusable between 11 am and 4 pm in summer. And that’s exactly when you want to be out there.
I went with a freestanding cedar pergola — about 12 feet by 14 feet — positioned at one end of the pool. It cost around $800 in materials (I built it myself with a friend over two weekends using plans from a free PDF I found on Family Handyman’s website). A contractor-built version would run anywhere from $2,500 to $8,000, depending on your region and materials.
What I did wrong: I installed mine too far from the pool. You want the pergola close enough that you can drip your way to a chair without crossing a football field of hot concrete. Lesson learned — keep it within 6 to 8 feet of the pool edge.
For a more budget-friendly option, a sail shade (those triangular tension canopies) works surprisingly well. You can grab a quality one on Amazon for $60–$120. They’re not as permanent or as stunning-looking, but they solve the sun problem on day one while you plan the bigger build.
If your climate is rainy, consider a pergola with a louvered roof — the kind where you can open and close the slats with a crank. Brands like Palram make affordable versions, and some smart ones even have rain sensors that close automatically. Pricier upfront, but incredibly practical.
2. Add Outdoor String Lights (The Transformation Is Shocking)

I almost skipped this because it seemed too “Pinterest-y.” I’m so glad I didn’t.
String lights are probably the highest ROI upgrade you can make to any outdoor pool area. For about $30–$60 worth of weatherproof Edison bulb string lights, your pool area goes from “nice backyard” to “wow, can we stay out here all night?”
The key is how you hang them. Don’t just drape them from one corner to another. Create a canopy effect — run them back and forth in parallel lines about 18 inches apart. Anchor them to the pergola, to wooden posts, or even to tall shepherd’s hooks you push into the ground.
I use the Brightech Ambience Pro outdoor string lights (around $45 on Amazon). They’ve survived two full winters and two summers without a single bulb failure. The warm white (2700K) color temperature is what you want — avoid cool white, it makes everything look like a parking lot.
Plug them into a smart outdoor outlet (I use the Kasa EP25 — about $15) so you can schedule them to come on at dusk automatically. You will genuinely forget your phone exists once you’re sitting out there at 9 pm with these on.
3. Create Defined “Zones” — Don’t Just Scatter Furniture
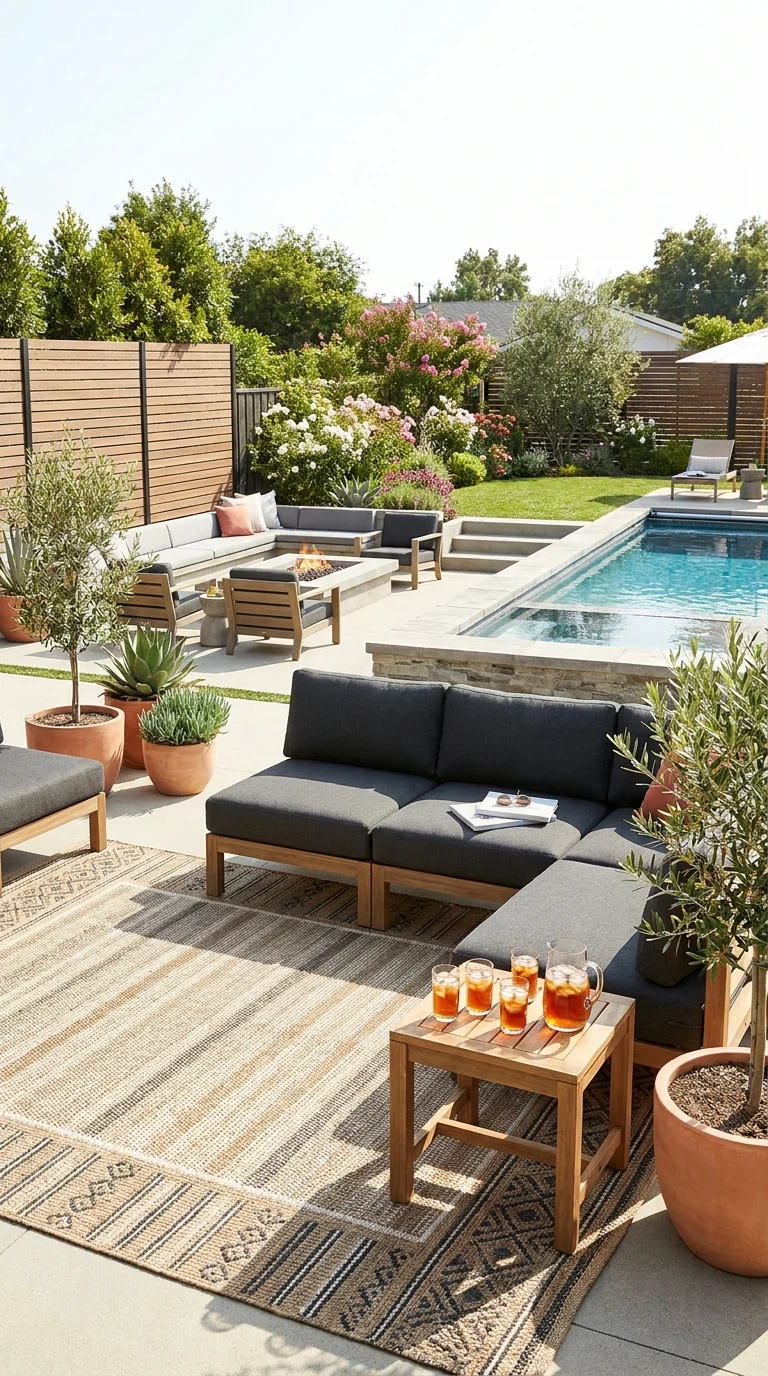
This was the single most important design lesson I learned.
Before my renovation, I had a random scattering of chairs around the pool with no real logic to any of it. It looked messy and felt uncomfortable because there was no sense of place.
The trick is to treat your pool area like a set of rooms — even without walls. You want at minimum:
A lounging zone — flat sun chairs where people can actually lie down and soak. These should be closest to the water with clear sun exposure.
A social zone — a table with chairs (or a deep seating set with a coffee table) where people sit upright, eat, drink, and have real conversations. This is where the magic happens.
A shade zone — this is where the pergola or umbrella goes. It should overlap slightly with both other zones so people can move in and out of the sun naturally.
Use an outdoor rug to anchor each zone. This is the cheapest way to signal “this is its own space.” A good outdoor rug (polypropylene, so it handles moisture) on Amazon runs $40–$80 and makes a genuinely huge visual difference.
I made the mistake of buying a rug that wasn’t specifically rated for outdoor/wet use. It grew mold within three weeks. Only buy rugs labeled “outdoor” or “indoor/outdoor” — these are typically made from polypropylene or olefin and resist moisture and UV.
4. Install Pool Deck Pavers Instead of Living With Plain Concrete
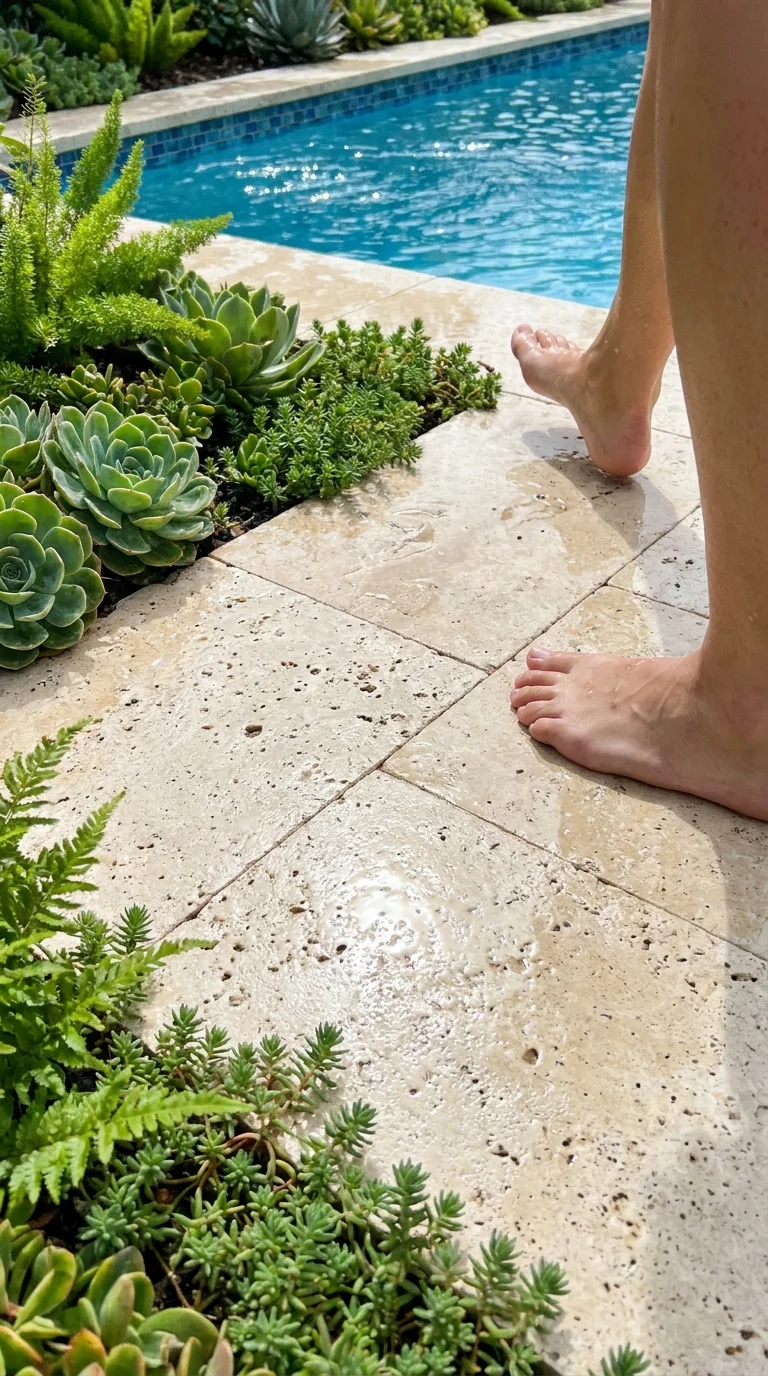
If you have the budget for one major structural upgrade, make it this.
Poured concrete around pools looks fine when it’s new. But it stains, cracks, and becomes slippery over time. It also holds heat like crazy — walking barefoot on light gray concrete at 2 pm in July is its own kind of suffering.
Pavers — whether natural stone, travertine, or concrete pavers — solve all of this at once. They look dramatically better, they’re cooler underfoot (especially travertine, which barely absorbs heat), and if one breaks, you replace just that piece instead of the whole slab.
Travertine pavers are the gold standard for pool areas. The porous surface naturally resists slipping even when wet. You can find them at tile supply stores or places like BuildDirect.com, starting around $3–$6 per square foot (budget about $8–$15 installed if you hire someone).
For a DIY-friendly option, concrete interlocking pavers from Home Depot or Lowe’s are surprisingly good-looking now. The “Brussels Block” style from Unilock looks legitimately like natural stone from 10 feet away.
I did a partial paver install — just the area around the pergola and the main lounging zone (about 200 square feet). Cost me around $600 in materials and two full days of labor (my back hated me, but my pool area looked incredible). The contrast between the new pavers and the old concrete actually looked intentional, like a design choice.
5. Add a Water Feature — Even a Small One Changes Everything

This one surprised me more than anything else.
I added a small spillover fountain — basically a stacked stone waterfall that trickles water into the pool — and it completely changed the feel of the space. The sound of moving water is something I never realized I was missing.
You don’t need to go big. A simple pool fountain that attaches to your existing return jets (the jets that push water back into the pool after filtration) costs $30–$80 and takes 10 minutes to install. No plumber required. Brands like Custom Molded Products make these, and they’re widely available on Amazon or at pool supply stores.
If you want something more dramatic — a raised spillway feature or a grotto-style waterfall — that’s a bigger project requiring a contractor, starting around $1,500 and climbing fast. For most people, the simple jet-powered fountain is more than enough.
The unexpected bonus: the sound of moving water masks street noise and neighbor noise pretty effectively. My pool area went from feeling suburban to feeling genuinely serene.
6. Build or Buy an Outdoor Bar or Snack Station

Nothing kills pool party momentum like constantly going inside to grab drinks.
The outdoor bar or snack station doesn’t need to be elaborate. Even a simple bar cart on wheels, stocked with a portable cooler and some plastic drinkware, changes how people interact with the space. They stay outside longer. The party actually happens outside.
I built a simple bar counter using cedar fence pickets and some 4×4 posts — total material cost was about $120, and a Saturday afternoon. I mounted it against the back fence, added a shelf underneath for cooler storage, and hung a few hooks for towels on the side.
If building sounds like too much, look for teak or eucalyptus outdoor bar carts (IKEA’s ÄPPLARÖ bar cart is around $200 and genuinely weathers well). Or repurpose an old dresser with a few coats of exterior paint and polyurethane.
A detail I wish I’d done from the start: add an outdoor-rated power outlet nearby. This lets you plug in a mini fridge, a Bluetooth speaker, or a small fan without running an extension cord across your patio. An electrician can add an outdoor GFCI outlet for $100–$200, typically.
7. Use Landscaping to Frame the Pool — Not Just to Fill Space

Most people treat landscaping around a pool as an afterthought. They plant random bushes and call it a day.
But intentional landscaping can make your pool area look like it was professionally designed — even if you did it yourself.
The key is layering: you want tall plants or trees at the back (for privacy and visual framing), medium plants in the middle zone (for texture and color), and low ground cover or decorative gravel closest to the pool deck (for a clean, finished edge).
For pool-friendly plants, you want low-litter varieties so you’re not fishing leaves out of your filter every day. Good choices include ornamental grasses (like Karl Foerster or Blue Oat Grass), agapanthus, lavender, rosemary, and succulents. All of these are drought-tolerant, low-maintenance, and genuinely beautiful.
What to avoid: willow trees (root systems love water and will destroy your pool plumbing), cottonwood or poplar (constant fluff in your pool), and anything with berries that attract birds (you know why).
I planted three tall arborvitae on one side of my pool for privacy — they grew from 4-foot plants to about 9 feet in three years. Combined with a few ornamental grasses at the base and some lavender near the deck, that side of my pool looks like a completely different yard now.
8. Sort Out the Lighting — Day and Night Are Two Different Designs

Pool lighting is an area where most people set it up once and forget about it. But if you think about it differently — that your pool area needs to work as two separate environments — you’ll end up with something much more impressive.
Daytime: This is mostly about shade, color, and comfort. Bright umbrellas, colorful cushions, and clean sightlines matter most.
Nighttime: This is where lighting design transforms the space entirely. The three types of lighting you want:
Ambient lighting — the string lights we talked about earlier. These set the overall mood.
Task lighting — actual functional light for the bar, the steps, and any cooking area. Solar-powered post cap lights or low-voltage landscape fixtures work perfectly and don’t require an electrician.
Accent lighting — underwater pool lights are the showstopper. If your pool has old incandescent underwater lights, upgrading to color-changing LED versions is an evening project that completely transforms night swimming. A good color LED pool light, like the Hayward ColorLogic, runs $150–$200 and snaps into the existing niche. The effect is genuinely magical — you can set it to slow color cycles or hold a steady blue or warm white.
I added a couple of low-voltage LED spotlights pointed up at my arborvitae — the dramatic uplighting effect at night makes the whole area feel like a resort. Total cost for the uplights: about $40 for a set of four from Amazon.
9. Add a Poolside Shower — Guests Will Thank You
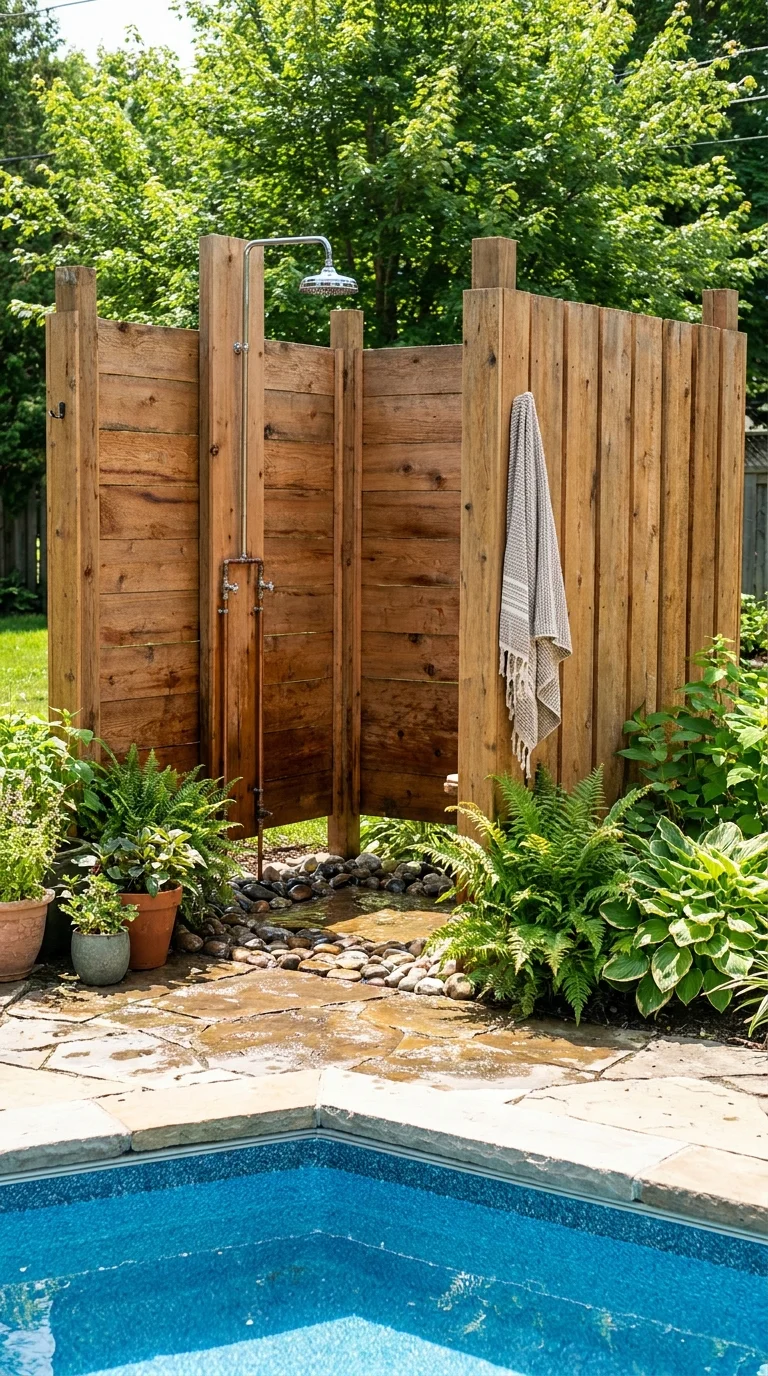
I genuinely didn’t realize how much we needed an outdoor shower until we had one.
The obvious use: rinsing off before getting into the pool (better for water chemistry) and after (so you don’t track chlorine and sunscreen into the house). But it became so much more than that. Quick post-gardening rinse. Kids rinsing off after running through the sprinklers. Washing the dog. It gets used constantly.
An outdoor shower doesn’t have to be complicated. The simplest version is a wall-mounted cold water shower — basically a faucet hookup with a showerhead attached to a wooden or metal frame. If you have an outdoor spigot, a plumber can extend it to an outdoor shower location for $200–$400.
I built a simple enclosure using three cedar privacy fence panels — no gate, just three sides for visual privacy while standing. The whole thing cost about $180 in materials and an afternoon’s work. I found a free-standing shower kit on Amazon (the Zenna Home brand) for cold water that attaches directly to a garden hose for around $45 if you want something even simpler to start.
Hot water outdoors is a bigger project — it requires running a hot water line — but if you’re already doing plumbing work, it’s worth adding.
10. Invest in Quality, Weatherproof Outdoor Furniture (And Cushions You’ll Actually Keep)

I cannot tell you how many times I bought “outdoor furniture” that looked destroyed after one season.
The truth: most affordable outdoor furniture is not actually built for outdoor conditions. The metal rusts, the plastic fades, the cushion fabric grows mildew, and the whole set looks embarrassing within 18 months.
Here’s what I’ve learned after buying three different sets in five years:
For frames, teak, eucalyptus, powder-coated aluminum, or high-density polyethylene (HDPE) resin are the only materials worth buying for a true outdoor pool environment. Everything else is a compromise.
For cushions, look for covers made from Sunbrella fabric. It’s a brand name that’s become the gold standard — UV-resistant, mildew-resistant, and surprisingly easy to clean with soap and water. Cushions with Sunbrella covers typically run $30–$60 each, but they genuinely last 5–7 years outdoors.
For a budget option, the POLYWOOD brand makes HDPE furniture that legitimately looks like painted wood, resists everything, and comes with a 20-year warranty. Their Adirondack chairs are around $200–$250 each. Not cheap, but you buy them once.
My current setup is two POLYWOOD Adirondack chairs, a teak coffee table I found at an estate sale, and a deep seating sectional from Outer (a brand that makes outdoor furniture with Sunbrella covers standard). The sectional was expensive — around $2,800 — but we’ve had it three years, and it looks the same as the day it arrived.
Common Mistakes to Avoid (I Made Most of These)
Buying everything at once before testing the layout. Spend one weekend just moving cheap folding chairs around to figure out where you actually want to sit before buying real furniture. The “perfect” spot in your head is usually not where you actually end up.
Ignoring drainage. Water needs somewhere to go when it leaves the pool deck. I added pavers without checking the grading and ended up with a small flood near my pergola every time it rained. Always make sure new hardscaping slopes away from structures, at least 1–2% grade.
Choosing style over slip resistance. Smooth porcelain tiles look stunning and are an absolute hazard when wet. Always check the DCOF (Dynamic Coefficient of Friction) rating for any tile going near a pool — you want at least 0.42 for wet areas.
Over-planting near the pool. That gorgeous weeping tree you love? Its roots and leaves are your pool filter’s enemy. Keep any significant tree planting at least 10 feet from the pool edge.
Forgetting storage. You need somewhere to put pool floats, toys, noodles, and chemicals. A weatherproof deck box (Keter makes great ones starting around $80) is non-negotiable. Buy it before you need it because once you have a pool area you actually use, stuff accumulates fast.
The Stuff That Surprised Me Most
Honestly, the biggest surprise was how the upgrades made us use the pool more.
Before the renovation, our pool was a “maybe twice a week” situation. Now it’s almost every evening in summer. The pergola means we can sit outside comfortably even in the afternoon heat. The string lights mean evenings out there are actually more appealing than going inside. The outdoor bar means we don’t break the flow of the evening to restock drinks.
A nice pool area isn’t really about impressing guests — though it does. It’s about creating a space you actually want to spend time in.
The other thing I didn’t expect: how much the improvements changed the way we feel about our home. We stopped looking at our backyard and seeing “maintenance burden.” We started seeing it as the best room in the house.
Where to Start If You’re Overwhelmed?
If all ten ideas feel like too much, start here:
First weekend: Hang string lights and buy an outdoor rug for the main seating area. Total cost: $80–$120. The visual improvement will shock you.
First month: Add a shade structure (pergola or sail shade) and rearrange furniture into proper zones.
First season: Tackle the big-ticket item — pavers, landscaping, or the outdoor bar — whichever bothers you most.
Don’t feel like you need to do everything at once. Every one of these ideas works independently. The goal is just to start, because even one upgrade has a compounding effect on how much you enjoy the space.
Your pool area deserves to be more than an afterthought. Trust me — once you’ve sat under string lights next to a trickling fountain at 9 pm on a July evening, you’ll wonder how you waited this long.
Have a pool area upgrade that worked brilliantly for you? Drop it in the comments — I’m always looking for new ideas to try.

Shahid Nawaz is a home and garden content writer at Garden Skillz with over 4 years of experience researching and writing about gardening, plant care, and DIY home improvement. He specializes in turning complex horticultural topics into practical, easy-to-follow guides for beginners and experienced growers alike. Shahid has written extensively on flowering plants, indoor greenery, and seasonal garden care.