Let me tell you about the summer I almost cried over concrete.
We’d just moved into our house, and the backyard was a mess. There was an above-ground pool that the previous owners had left behind, sitting on bare dirt, surrounded by weeds, and fenced off with this ugly chain-link thing that looked like it belonged at a construction site. My kids were begging to swim every single day. My wife just kept walking past it, wincing.
I knew I needed to build a deck around it. I got one quote — $11,400. Then another — $9,800. I remember sitting at the kitchen table staring at those numbers, thinking, there has to be a better way.
There was. Several, actually.
Over the next two summers, I tried a bunch of different approaches — some worked beautifully, some were disasters, and one nearly broke a bone (more on that later). What you’re about to read is the real, honest, no-fluff guide I wish someone had handed me back then. These are cheap pool deck ideas that actually hold up, look good, and won’t make you feel like you cut corners — even when you absolutely did.
Why Most “Budget Pool Deck” Advice Falls Flat?
Before we get into the ideas themselves, I want to address something. A lot of the “budget deck” content out there is written by people who have never actually built one. They’ll say things like “use pallets!” without mentioning that untreated pallets rot in one season, harbor bugs, and can give your barefoot kids a splinter the size of a pencil.
Or they’ll suggest gravel, without mentioning that gravel migrates into your pool filter and destroys the pump over time.
I’ve made those mistakes. I’ve also talked to neighbors, watched more YouTube DIY videos than I care to admit, and spent a lot of time at Home Depot asking questions. So everything in this list is either something I’ve personally done or something I’ve seen done well by people I know.
1. Composite Deck Tiles (Snap-Together Style)

Cost estimate: $3–$7 per square foot
This was the first thing I tried, and honestly? I’m still surprised at how well it worked.
Composite deck tiles are those interlocking squares — usually about 12×12 inches — that you just click together on a flat surface. No nails, no screws, no special tools. You literally snap them together like giant puzzle pieces.
I used them around the perimeter of my above-ground pool. The base was compacted crusher run (a kind of gravel mix) that I leveled myself. Took me a weekend to prep the base and about three hours to lay the tiles.
They’re made from a composite of wood fiber and recycled plastic, which means they don’t rot, don’t splinter, and don’t need staining every year. After three seasons, mine still look decent. They’ve faded a bit — I’ll be honest about that — but they’re still structurally solid.
Watch out for: The cheap versions from Amazon. I made this mistake my first time. The plastic brackets that hold them together were so flimsy that they cracked in the first frost. Spend a little more and get a brand with solid reviews, like Teak Isle or Vifah. The price difference between junk and decent is about $1–2 per tile.
Pro tip: Lay down a thick weed barrier fabric before you set the tiles. Without it, you’ll be pulling grass out from between the gaps by midsummer.
2. Pea Gravel With a Defined Border

Cost estimate: $1–$3 per square foot
I know I said gravel can be a problem. Let me clarify — loose gravel with no containment is a problem. Properly installed, bordered pea gravel is one of the most affordable and surprisingly attractive pool surround options out there.
The trick is containment. You need to install a solid border — either wooden landscape edging, concrete edging blocks, or even treated 4×4 boards set on edge — so the gravel stays where you put it. You also want to keep it at least 18 inches back from the pool’s edge so it doesn’t migrate in.
For drainage, pea gravel is fantastic. Rain doesn’t pool around it. It dries fast. And it stays cooler underfoot than concrete or pavers on a hot day — which is a bonus nobody tells you about.
My neighbor did this around his inground pool. Used tumbled pea gravel in a warm tan color, edged it with simple concrete pavers, and planted creeping thyme in the gaps along the edging. The whole thing cost him about $600 for a 300 square foot area. It looks like something out of a magazine.
Watch out for: Going too fine on the gravel size. Anything smaller than 3/8 inch gets tracked inside constantly. Stick with 3/8 inch or the larger river rock style.
3. Concrete Pavers on a Sand Base

Cost estimate: $2–$5 per square foot
This is probably the most “traditional” cheap pool deck approach, and it earns that reputation for a reason — it genuinely works.
You don’t need to hire a contractor to lay pavers. I did mine myself. Here’s basically how it goes:
- Mark out your area with stakes and string
- Dig down about 4 inches
- Add 3 inches of compacted crushed stone as a base
- Top with 1 inch of leveled sand
- Set your pavers, checking the level as you go
- Fill the joints with polymeric sand and compact it in
The most physically demanding part is digging. Rent a plate compactor — they’re usually about $60–80 for a day — and it makes the job dramatically faster and better. Don’t try to compact by hand. I tried that once. The pavers shifted, and I had to redo a whole section.
For pavers themselves, the standard concrete ones from a big box store are incredibly affordable. I paid about $0.60 per paver for basic 12×12 gray concrete blocks. For 200 square feet, the materials came in around $400, including the sand, gravel base, and polymeric sand for the joints.
A lesson I learned the hard way: Don’t skip the polymeric sand. I used regular sand the first time, and ants made a colony in the joints within two months. Polymeric sand hardens slightly when wet and keeps bugs and weeds from moving in.
4. Treated Lumber Floating Deck

Cost estimate: $8–$15 per square foot DIY
Now we’re getting into real deck territory, and yes, you can absolutely build one yourself, even with basic carpentry skills.
A floating deck — meaning it sits on the ground rather than being attached to your house — is far simpler to build than it looks. You don’t need footings dug below the frost line (in most cases), no permits are required in many municipalities (always check yours), and no structural engineer is needed.
The basic structure: pressure-treated 4×4 or 4×6 posts set on concrete deck blocks, with 2×8 or 2×10 beams across them, and then your decking boards on top. For an above-ground pool, this approach lets you create a lovely raised platform around the edge.
I built a 12×16 platform on one side of our pool using this method. Total lumber cost was around $900, and I rented a miter saw for $45 for the weekend. Used 5/4 x 6 pressure-treated decking boards. The whole build took my brother-in-law and me one long weekend.
Is it beautiful? Not magazine-worthy. But it’s solid, safe, and it’s been standing for four years through Minnesota winters without warping or sagging.
The one mistake that almost sent someone to the hospital: I didn’t double-check my post spacing on the first section, and ended up with a span that was too long for the beam size I used. It flexed noticeably when you walked on it. Nothing collapsed, but it was genuinely sketchy. I had to add an extra row of posts underneath to fix it. Always follow span tables — they’re free online and take five minutes to check.
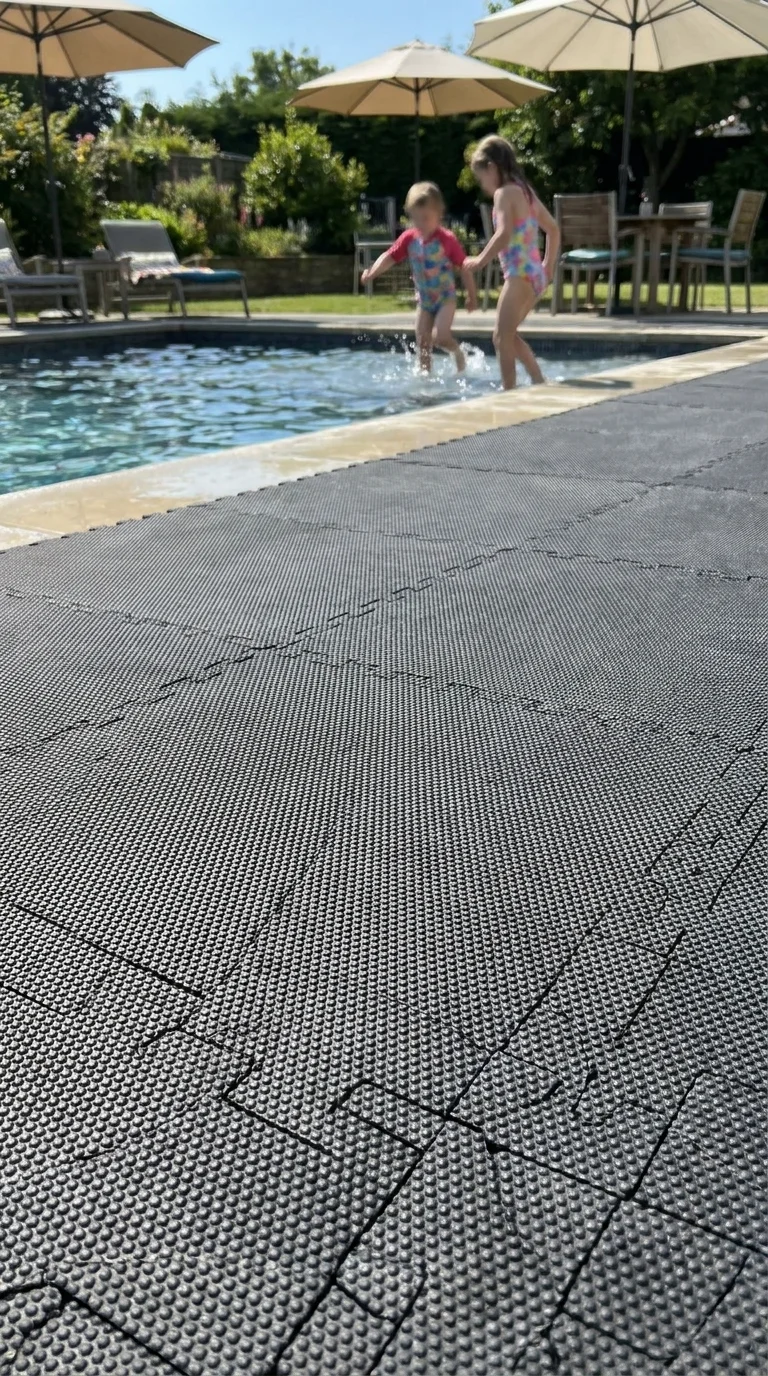
5. Rubber Pavers (Recycled Tire Material)
Cost estimate: $3–$8 per square foot
This one surprised me. Rubber pavers — made from recycled tires — look better than you’d expect and have some genuine advantages for pool areas.
They’re slip-resistant even when wet. They’re cushioned, so if a kid slips and falls (and they will), it’s a softer landing than concrete. They don’t heat up as much as stone or concrete in direct sun. And they don’t rot.
You can find them at home improvement stores or online through places like RubberFlooringInc. They come in different colors — usually black, dark brown, or gray — and install similarly to composite tiles. Some interlock, others just lay flat.
They work best on a flat, firm surface. Concrete slab, compacted gravel, or even a solid wood deck beneath them. Don’t lay them directly on soft soil — they’ll shift, and the gaps will let weeds through.
One honest downside: They can smell faintly of rubber in very hot weather. It’s not overwhelming, but it’s there. If you’re sensitive to smells, maybe test one before buying a full pallet.
6. Painted or Stained Existing Concrete

Cost estimate: $0.50–$2 per square foot
Got an existing concrete patio or slab near your pool that looks terrible? Before you rip it out or cover it up, consider that a gallon of concrete paint or acid stain can completely transform the surface for very little money.
Concrete paint is the budget option — about $30–40 a gallon, covers around 300 square feet. Choose a formula made specifically for outdoor concrete (not interior floor paint), and make sure it has a slip-resistant additive or apply a non-slip topcoat. Wet concrete is a lawsuit waiting to happen.
Acid staining is a step up. It reacts chemically with the concrete to create a mottled, variegated color that looks almost like natural stone. It’s permanent, doesn’t peel like paint, and honestly looks fantastic. The downside is it takes more prep work, and you need to neutralize and seal it properly afterward.
My friend Danielle did this to the cracked, stained concrete pad around her in-ground pool. She rented a pressure washer, filled the cracks with concrete caulk, applied a charcoal gray acid stain, and sealed it with a water-based concrete sealer. Total cost: about $180. The transformation was genuinely jaw-dropping.
What to avoid: Painting over concrete that has moisture coming up from below. The paint will bubble and peel within months. You can test for this by taping a piece of plastic sheeting down and checking for condensation underneath after 24 hours.
7. Wood Pallets (Done Right, Not the Lazy Way)

Cost estimate: Free to $100
I know. I know I said pallet decks can be a disaster. And they can be — if you do it wrong. But done correctly, pallets can actually create a functional, surprisingly decent-looking pool surround. Let me explain what “correctly” means.
First, you need heat-treated pallets only. Look for the stamp “HT” on the side. Avoid pallets marked “MB” (methyl bromide treatment) — those have been treated with a pesticide you do not want your kids barefooting on.
Second, you need to treat and seal the wood before installation. Sand them smooth, apply an exterior wood stain/sealer (something like Thompson’s WaterSeal or Cabot Australian Timber Oil), and let them dry completely.
Third, raise them off the ground on a gravel base or concrete blocks. Pallets sitting directly on soil will rot in one season. Raised even two inches, with airflow underneath, they last dramatically longer.
And fourth — this is crucial — screw the slats down before installation. Pallet slats are nailed, and those nails work their way up over time. Pre-screwing with exterior-grade screws solves that problem.
Done this way, a pallet deck can last two or three seasons before needing major work. It’s a genuinely temporary solution, but sometimes temporary is exactly what you need while you save up for something more permanent.
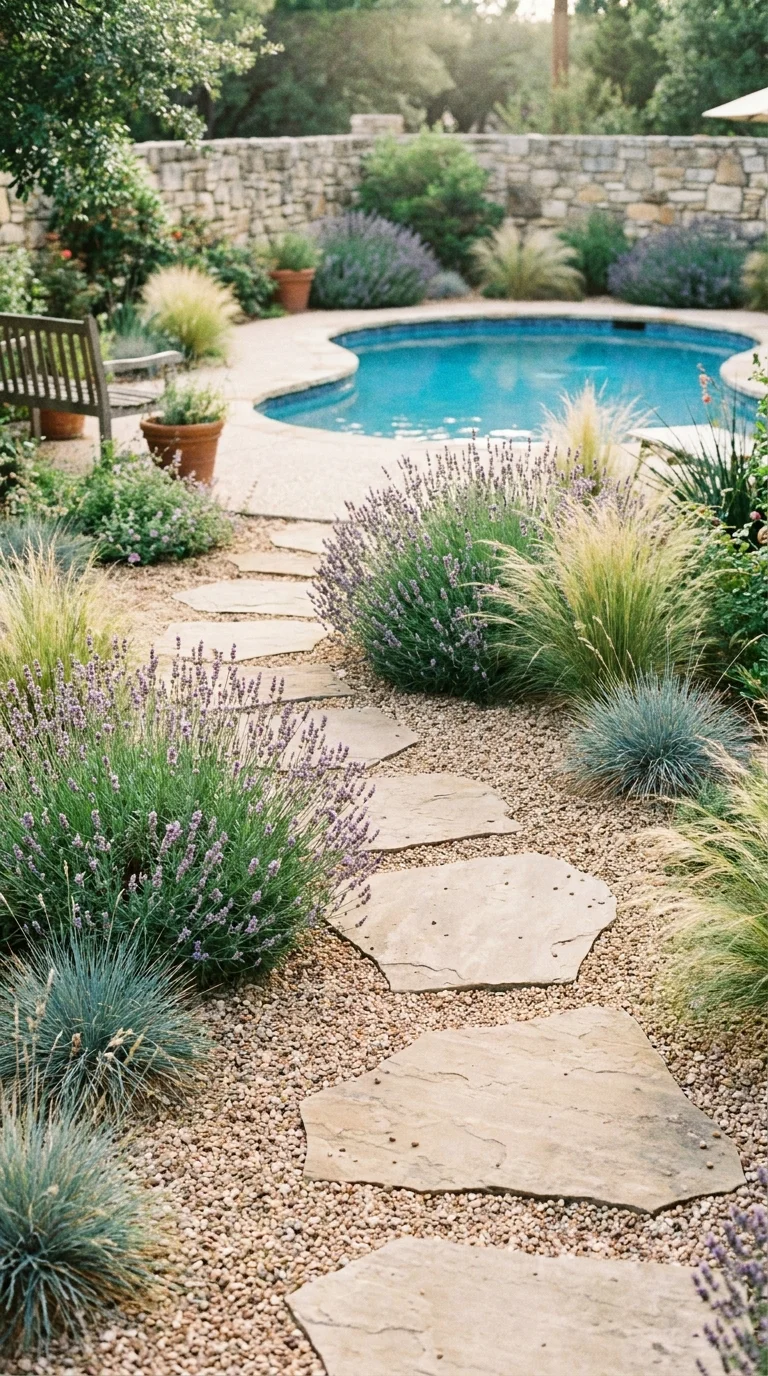
8. Gravel With Stepping Stones
Cost estimate: $2–$4 per square foot
This is the combination approach — and it’s one of my favorites for larger pool areas where cost really starts to add up.
Fill the main area with contained pea gravel (following the tips from idea #2), and then add large stepping stones to create defined pathways. The stones give you a solid footing where you’re walking, and the gravel handles the in-between spaces.
It creates a natural, slightly cottage-garden feel that actually looks intentional rather than budget-driven. Use irregular flagstone pieces for a more rustic look, or uniform concrete stepping stones for something cleaner.
You can source flagstone cheaply by checking Facebook Marketplace or Craigslist — people give away flagstone constantly when they’re doing landscaping overhauls. I’ve picked up hundreds of pounds of flagstone for free just by scrolling Marketplace and being willing to load it myself.
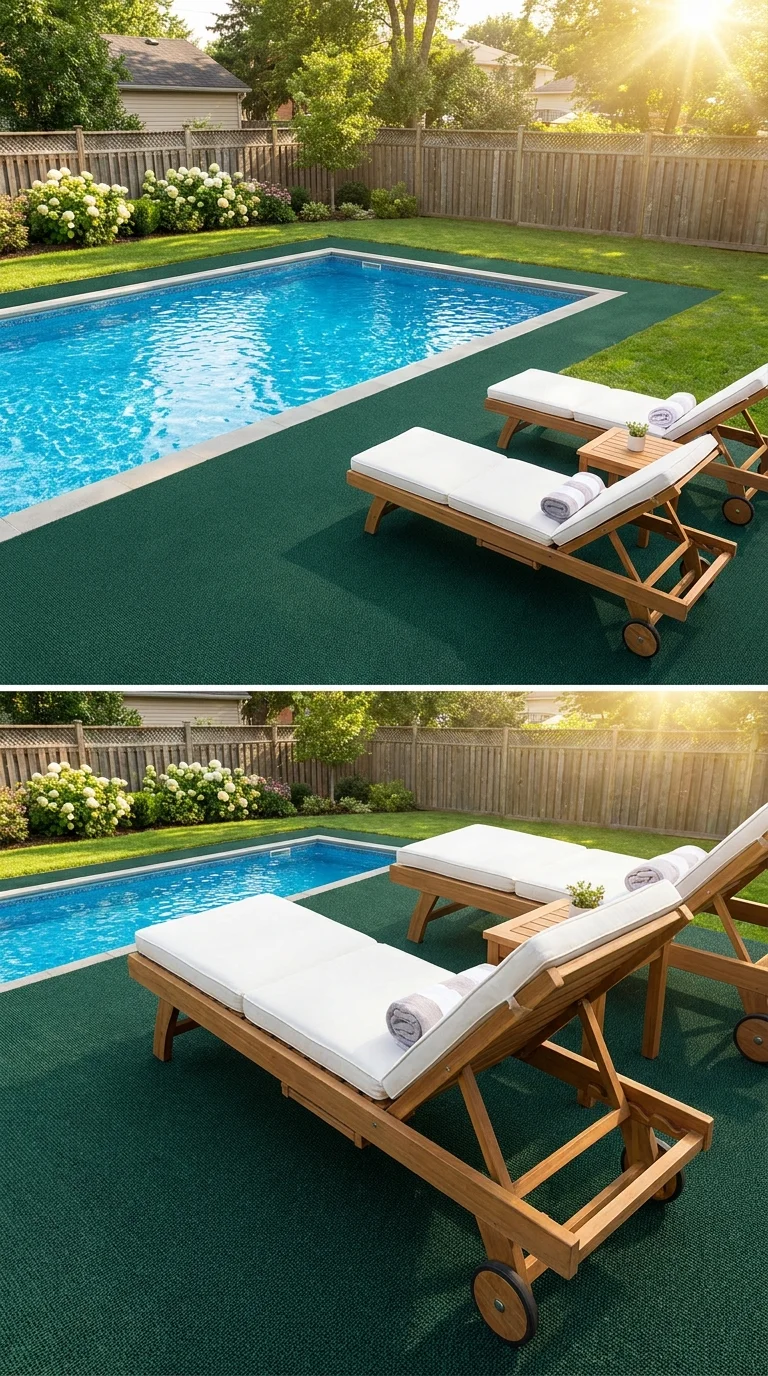
9. Outdoor Carpet Over a Solid Base
Cost estimate: $1–$3 per square foot
Hear me out on this one. I know “carpet near a pool” sounds ridiculous. But outdoor carpet — specifically the kind designed for marine and pool applications — is actually a practical choice in some situations.
It’s made to get wet repeatedly without rotting. It provides excellent slip resistance. It’s gentle on bare feet. And it’s cheap.
The key is that it needs a solid base — concrete, wood deck, or composite tiles — and it needs to be the right product. Avoid anything marketed as “indoor-outdoor carpet” with a loop pile — that stuff traps moisture and grows mildew. Look for marine carpet or pool-deck carpet with a drainage backing. It’s designed to wick water away and dry quickly.
Installation is straightforward: cut to fit, apply outdoor carpet adhesive or double-sided tape around the edges to stop curling, and done.
It won’t last forever — expect 3–5 years before it starts looking rough — but for that price point, it’s hard to beat for comfort and safety.
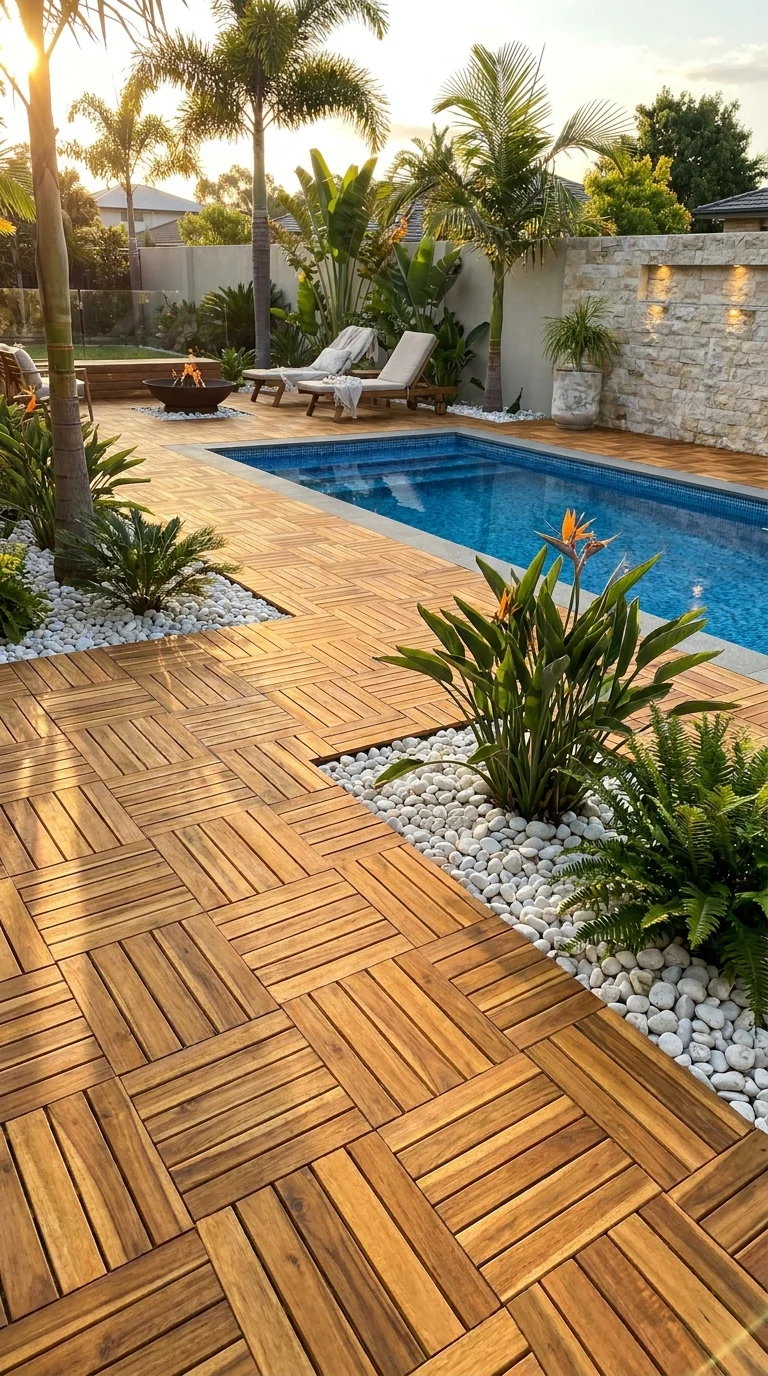
10. Interlocking Wood Deck Tiles (Acacia or Teak)
Cost estimate: $4–$9 per square foot
These are different from the composite tiles I mentioned in idea #1. These are actual wood — typically acacia, eucalyptus, or teak — and they look genuinely beautiful. Like, actually beautiful.
They click together the same way composite tiles do, but the natural wood grain and warmth give them a high-end look that composite materials just can’t match. Set them against the blue of a pool, and the visual effect is really striking.
The maintenance requirement is higher than composite — you’ll want to apply teak oil or similar once a year — but they’re still dramatically lower maintenance than a full wood deck.
The key is buying from a reputable source and making sure the wood is actually what they claim. Some “teak” tiles on Amazon are no such thing. Brands like Cali Bamboo, Vifah, or Bare Decor have solid reputations. Yes, they cost a bit more. But with these, the quality difference is worth it.
11. Recycled Composite Lumber Deck

Cost estimate: $10–$18 per square foot DIY
This is the “do it once, do it right” option for people who want a real deck but still want to save money versus hiring a contractor.
Composite lumber — brands like Trex, Fiberon, or Deckorators — is made from a mix of wood fiber and recycled plastic. It doesn’t rot, doesn’t splinter, doesn’t need staining, and has a 25-year warranty on most product lines. It looks like real wood.
You build the frame the same way as a regular wood deck, using pressure-treated lumber for the structural parts. The composite material is only used for the visible decking surface.
Yes, the composite boards cost more than regular wood upfront. But when you factor in zero maintenance cost and the longer lifespan, the math works out pretty favorably over time.
I helped my cousin build a Trex deck around her in-ground pool two years ago. The material cost was around $2,800 for a 250-square-foot deck (we built the frame ourselves with PT lumber). A contractor had quoted her $14,000. She’s already seen savings beyond the DIY labor cost.
The framing work is the same as any regular deck — you just follow the composite manufacturer’s guidelines for joist spacing (usually closer together than wood decking requires).
12. Poured Concrete With a Broom Finish

Cost estimate: $4–$8 per square foot DIY
The classic. Permanent, durable, and lower cost than most people think — if you’re willing to do the work yourself.
Mixing and pouring concrete is genuinely heavy labor. I won’t sugarcoat it. But it’s not technically complicated, and the result is a surface that will last literally decades with minimal maintenance.
The broom finish is important for safety — you drag a concrete broom across the surface while it’s still wet to create a textured finish. Without it, cured concrete around water is dangerously slippery.
For a small to medium area, you can rent a concrete mixer for about $60 a day and use bagged concrete mix from the hardware store. For larger areas, ordering ready-mix concrete delivered by truck is actually more efficient and still cheaper than having contractors do the whole job.
Key things to get right:
- Proper slope for drainage (about 1/8 inch drop per foot, away from the pool)
- Expansion joints every 8–10 feet to control cracking
- Wire mesh or rebar in the slab for strength
- Keep it moist for the first week while it cures (cover with plastic or burlap)
If you rush the cure or skip the drainage slope, you’ll have problems within a year. Take your time on this one.
Mistakes I Made (So You Don’t Have To)
Since I promised to be honest, here’s my personal hall of shame:
I used regular deck screws instead of exterior-grade. Rust stains bled through the wood within one season. Use stainless steel or coated exterior screws. Every time.
I skipped the base prep on my first tile project. Laid snap-together tiles directly on dirt. By mid-summer, they’d shifted so much that the whole thing was uneven. Everything needs a flat, firm, level base.
I didn’t account for drainage on my paver project. After a heavy rain, water pooled between the pavers and the pool wall. I had to redo a section to improve the slope.
I bought the cheapest pressure-treated lumber I could find. It was wet — freshly treated lumber often is — and it warped like crazy as it dried. For decking boards, either buy kiln-dried lumber or let it acclimate for several weeks before installing.
I underestimated how long everything takes. Every project took me roughly twice as long as I planned. Plan accordingly, especially if you’re doing it in a hot summer.
What I’d Actually Recommend Based on Your Situation?
After all of this, here’s my honest advice:
If you need something this weekend and have very little money, Snap-together composite or wood tiles on a leveled gravel base. You can have this done in a day for a few hundred dollars.
If you want something permanent and are willing to put in work, consider concrete pavers on a sand base, or poured concrete with a broom finish. Both will outlast you.
If you want low maintenance and a high-end look on a DIY budget: Composite lumber deck — build it yourself with a PT lumber frame. It’s the biggest upfront investment on this list, but the long-term value is real.
If you’re renting or unsure about your space, consider an outdoor carpet over existing concrete or gravel with stepping stones. Both are removable, both are affordable, and both look decent.
One Final Thing
The most expensive mistake you can make with a pool deck isn’t choosing the wrong material. It’s waiting.
I waited two full summers before doing anything because I kept thinking I had to do it “right” — meaning $10,000 and a contractor. Meanwhile, my kids were walking on bare dirt to get to the pool, I was constantly chasing muddy footprints through the house, and the whole space looked miserable.
A $400 snap-tile deck would have solved 90% of those problems immediately. Don’t let perfect be the enemy of good — or in this case, the enemy of actually swimming in your own pool.
Pick one of these ideas, start small, and build from there. Your feet — and your bank account — will thank you.
Have questions about a specific project? Drop them in the comments. I try to respond to everyone.

Shahid Nawaz is a home and garden content writer at Garden Skillz with over 4 years of experience researching and writing about gardening, plant care, and DIY home improvement. He specializes in turning complex horticultural topics into practical, easy-to-follow guides for beginners and experienced growers alike. Shahid has written extensively on flowering plants, indoor greenery, and seasonal garden care.