The Summer I Fell in Love with Backyard Waterfalls
Three summers ago, I was sitting in my backyard staring at a pile of old fieldstones my neighbor had left by the curb with a “FREE” sign on them. My yard at the time was just… flat. Boring. A rectangle of grass that needed mowing every week and offered nothing in return emotionally.
My wife had been dropping hints about wanting “something relaxing back here.” I thought she meant a hammock. She meant water.
I’d seen backyard waterfalls on Pinterest a hundred times and always assumed they were the kind of thing rich people hired landscapers to build. Big budget, heavy equipment, complex plumbing. Not for a guy whose most ambitious DIY project to date had been installing a ceiling fan (which, I’ll be honest, wobbles a little).
But I grabbed those free stones, watched about six hours of YouTube videos across three evenings, spent a weekend at the hardware store, and somehow ended up with a working backyard waterfall that my kids now fall asleep listening to through their bedroom windows in summer.
Did it go perfectly? Absolutely not. Did I flood a section of my lawn on Day 1? Yes. Did I use the wrong kind of pump and have to replace it two weeks later? Also yes. But the thing works, it looks great, and it cost me less than $200 total.
If I can do it, you can do it. Let me walk you through 10 homemade waterfall designs — from the dead simple to the more ambitious — along with real lessons I (and some friends who caught the bug after seeing mine) have picked up along the way.
Before You Pick a Design: A Few Things Worth Knowing
Before jumping into the designs, let me save you some headaches I wish someone had saved me from.
The pump is everything. Whatever design you choose, the pump is the heart of it. Too weak and the water barely trickles. Too strong and you’ll splash water out of your basin faster than it can recirculate. A good rule of thumb: for every inch of waterfall width, you want roughly 100 gallons per hour (GPH) of pump flow. A 12-inch-wide waterfall needs at least a 1,200 GPH pump.
I personally like the VIVOSUN submersible pumps for smaller builds — solid reliability, decent price on Amazon, and the flow is adjustable. For bigger builds, I’ve heard great things about the Pond Boss brand.
Liner matters more than rocks. A lot of beginners (me included) obsess over what the waterfall looks like and forget that what’s underneath is what makes or breaks it. A punctured liner means a constantly emptying reservoir and a soggy yard. Use a proper EPDM rubber pond liner — not a cheap plastic tarp — especially if you’re building anything with a natural stone look.
Level your basin. If your reservoir container isn’t level, water will slosh to one side and overflow constantly. I used a basic bubble level and shimmed the container with landscape blocks. Problem solved.
Check your local utility lines before digging anything. Seriously. Call 811 (in the US) before you put a shovel in the ground. It’s free, and it keeps you from hitting gas or electrical lines.
Now, let’s get into the designs.
1. The Stacked Stone Waterfall (Best for Beginners)
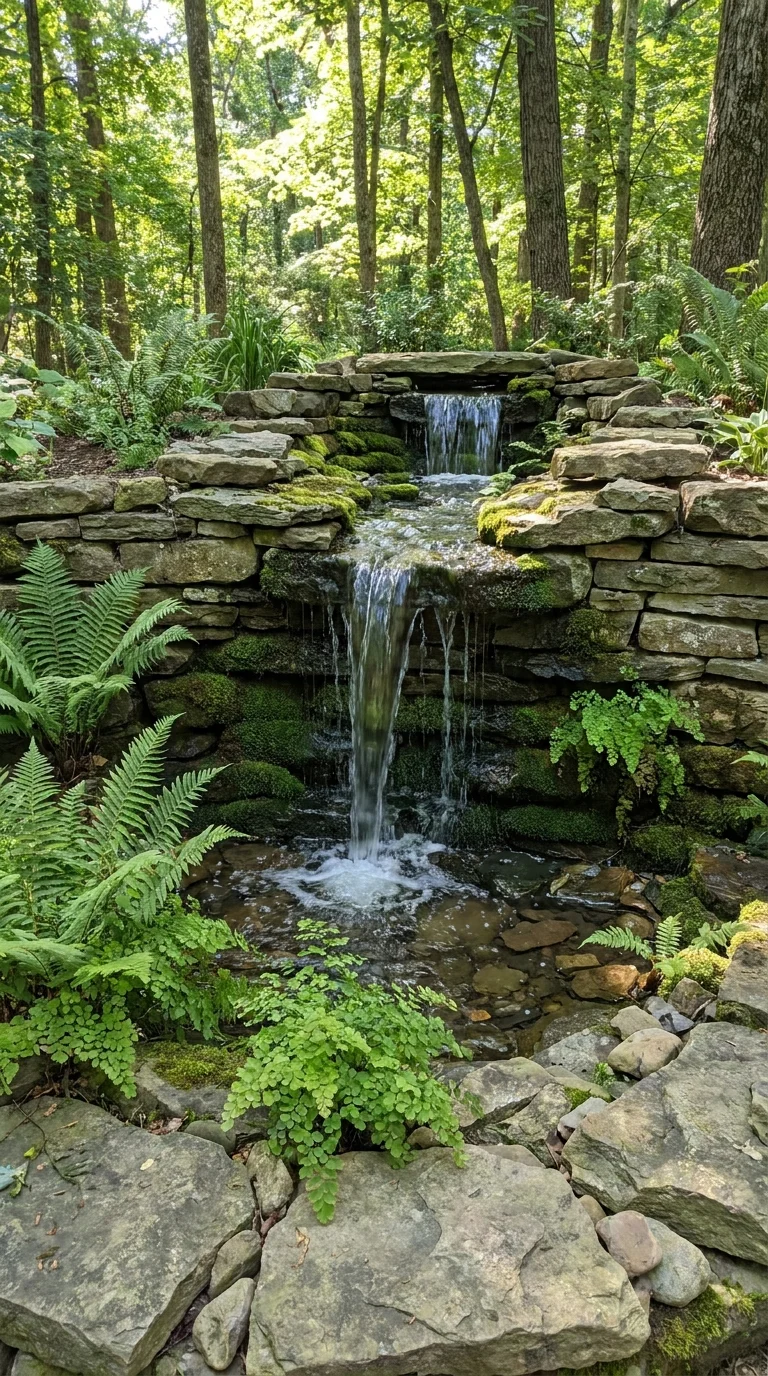
This is the one I built first, and honestly, it’s still my favorite. It’s forgiving, looks gorgeous, and you can build the whole thing in a weekend.
What you need:
- A large plastic planter pot or a pre-formed pond basin (15–25 gallons)
- A submersible pump (800–1,200 GPH for a small build)
- Clear vinyl tubing (1/2 inch or 3/4 inch — match it to your pump outlet)
- A pile of flat fieldstones or flagstones
- Expanding foam sealant (the dark-colored “pond foam” variety — don’t use regular spray foam, it’s bright yellow and will look terrible)
- Gravel for the base
How to build it:
- Dig a shallow hole for your basin, just deep enough that the top sits about 2 inches below grade. This way, water that splashes out drains back toward the basin naturally.
- Set the basin in place, level it, and fill it with water to check — watch for any natural low spots where water runs away from the basin.
- Place your pump in the basin and run the vinyl tubing up through the center of where your stone stack will go.
- Stack your stones around the tubing, staggering the joints like brickwork. Leave a gap or channel at the top for water to flow over.
- At the top, arrange your “spill stone” — a flat piece that will direct water in a nice sheet or trickle over the edge.
- Use pond foam to seal gaps between stones, particularly at the back, where you don’t want water escaping sideways.
- Connect the tubing to the pump, plug it in, and adjust the flow rate until you get the look you want.
The whole thing can be hidden in a garden bed so it looks totally natural. My neighbor thought I had hired a professional landscaper until I showed her the Amazon boxes in my recycling bin.
What I’d do differently: I used round river rocks my first time, and they were slippery and hard to stack stably. Flat fieldstones are so much easier to work with.
2. The Whiskey Barrel Fountain Waterfall

This one’s charming, compact, and perfect for a small patio or deck corner. You’ve probably seen these at garden centers for $300 or more. You can make one for about $60.
What you need:
- A half whiskey barrel planter (or a large ceramic pot — at least 15 gallons)
- A small submersible pump (300–600 GPH is plenty)
- A stacked stone riser or a bamboo spout (bamboo spouts are available on Amazon for under $15)
- Optional: a small piece of wire mesh to lay over the top to keep debris out
The concept is simple: the barrel IS the reservoir. The pump sits at the bottom, tubing runs up through the spout or riser, and water cascades back down into the barrel. Drop some decorative river rocks in the barrel to hide the pump, and you’ve got a handsome little feature that sounds amazing on a quiet evening.
One friend of mine who rents an apartment put this on her apartment balcony. She uses a ceramic pot instead of a whiskey barrel and runs the pump through a smart outlet timer so it only runs during evening hours. She says it’s the thing she talks about most when people visit.
Tip: Seal the inside of a wooden whiskey barrel with a pond-safe sealant before filling. The wood will eventually rot otherwise. Or just use a plastic barrel liner insert — they make those specifically for this purpose.
3. The Disappearing Waterfall (No Visible Pond)

This one looks seriously professional and is actually more beginner-friendly than people think, because there’s no open pond to maintain.
The idea: water falls over rocks and seems to disappear into the ground. In reality, it’s draining into a buried reservoir basin covered by a steel grate and decorative gravel.
What you need:
- An Aquascape Pondless Waterfall Kit (these come with the basin, pump, and fitting — saves a lot of figuring out) or a DIY version with a large plastic storage bin and overflow grate
- Stones and gravel
- Liner
- Pump (size depends on waterfall width)
The look is stunning, and maintenance is minimal — no algae to deal with, no fish to worry about, no toddlers falling into ponds. If you have young kids, this is honestly the design I’d recommend.
I helped my brother-in-law build one of these in his backyard last spring. We used a 30-gallon storage container buried about 18 inches deep, covered it with a steel grate from a farm supply store, laid river rock over the top, and stacked a stone waterfall behind it. His neighbors have asked him twice who he hired.
The one thing to watch for: Make sure your underground basin is big enough. If it’s too small, on a hot summer day with evaporation, the water level drops, and the pump starts sucking air, which kills the pump fast. I’d say go one size bigger than you think you need.
4. The Tiered Terracotta Pot Waterfall
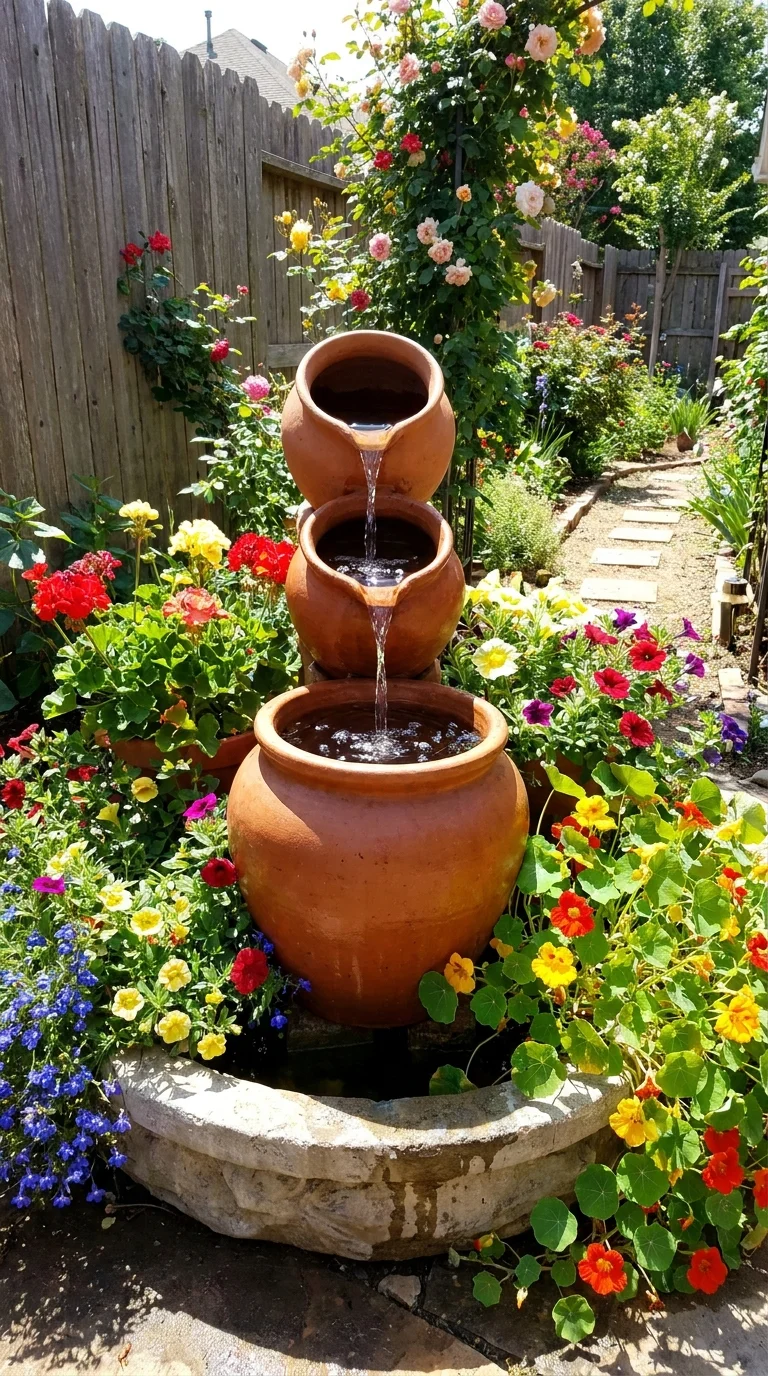
Stack three or four terracotta pots of decreasing size, tilt each one slightly, run a tube up through the center, and water cascades from pot to pot. This design has been around forever for good reason — it’s easy, affordable, and looks beautiful surrounded by flowering plants.
Sizes to aim for: A 16-inch pot on the bottom, 12-inch in the middle, and 8-inch on top works really well proportionally.
The pots need to be tilted slightly toward the front so water spills forward rather than back. Use a small wedge of foam or a folded piece of plastic under the back lip of each pot to angle them.
Important: Terracotta is porous and heavy when waterlogged. Over one winter, my friend’s terracotta stacked pot features cracks because of freeze-thaw cycles. If you live somewhere with cold winters, bring this one inside or use fiberglass pots that look like terracotta but won’t crack.
5. The Bamboo Shishi-Odoshi (Deer Scarer)

This is a Japanese garden element that most people recognize but don’t know the name of. It’s a bamboo tube that slowly fills with water, tips forward to spill into a basin, then clunks back to its resting position with a satisfying knock. Then repeats.
The sound is rhythmic and deeply relaxing. It’s also supposedly used in Japanese gardens to scare away deer — though in my neighborhood, the deer just watch it curiously.
You can buy kits for this online (search “shishi-odoshi kit” on Amazon or Etsy — there are some really nice handmade ones from small sellers). Or you can make one with bamboo poles from a garden center and a hacksaw.
It pairs beautifully with a small rock garden and some Japanese-style ground cover like moss or ornamental gravel.
This is the one my wife actually liked best. She put it in the corner of the garden near the back fence and planted Japanese forest grass around it. That corner went from “forgotten dead zone” to her favorite spot in the yard.
6. The Natural Creek-Style Waterfall

This is a bigger project, but the results are breathtaking. The idea is to create a winding shallow stream that ends in a small pond or reservoir. The waterfall is at the “head” of the creek, and the whole thing looks like a natural feature that’s always been there.
Planning is everything here. Before moving a single rock, sketch it out. Mark where the stream will run, where the pond will sit, and how far the pump tube will need to reach. Then calculate your total head height (the vertical distance water needs to travel) and your run length to size your pump correctly.
Use landscape fabric under the liner to protect against sharp roots and rocks. EPDM liner in 45-mil thickness is what you want for this kind of build. Don’t cheap out here — a pinhole leak in a buried liner is a nightmare to find and fix.
Stock your pond with a few aquatic plants like water hyacinth or water lettuce. They naturally filter the water, reduce algae, and look beautiful. I added a few goldfish to my natural pond, and they’ve become the highlight of the whole garden. My kids feed them every morning.
Budget reality check: A full creek-and-pond setup will run you $400–$1,000 depending on size. But it’s a permanent feature that adds real value to your property. And once it’s in, the maintenance is genuinely low — I spend maybe 20 minutes a week on mine.
7. The Millstone or Boulder Fountain Waterfall

This one looks absolutely stunning, and people always assume it costs thousands. The concept: water bubbles up through the center of a flat stone (real millstone, fake cast millstone, or even a large flat boulder with a hole drilled through it) and cascades over the edges into a hidden reservoir below.
Drilling through stone sounds scary, but it’s very doable with a diamond-tipped hole saw bit and a drill. Go slow, keep the bit wet, and it takes about 10–15 minutes for a soft stone like sandstone. Harder granite takes longer and wears through bits faster.
If drilling stone feels like too much, companies like Campania International sell pre-drilled decorative stones and fountainheads made from cast stone that look totally natural and cost $80–$150.
The reservoir, like with the disappearing waterfall design, is buried underground and covered with a grate and rocks. So from the outside, you just see this beautiful flat stone with water mysteriously bubbling up and over it.
This is probably the most “wow” to effort ratio of any design on this list. It looks expensive and complex, but once you understand the hidden-reservoir concept, it’s actually pretty straightforward.
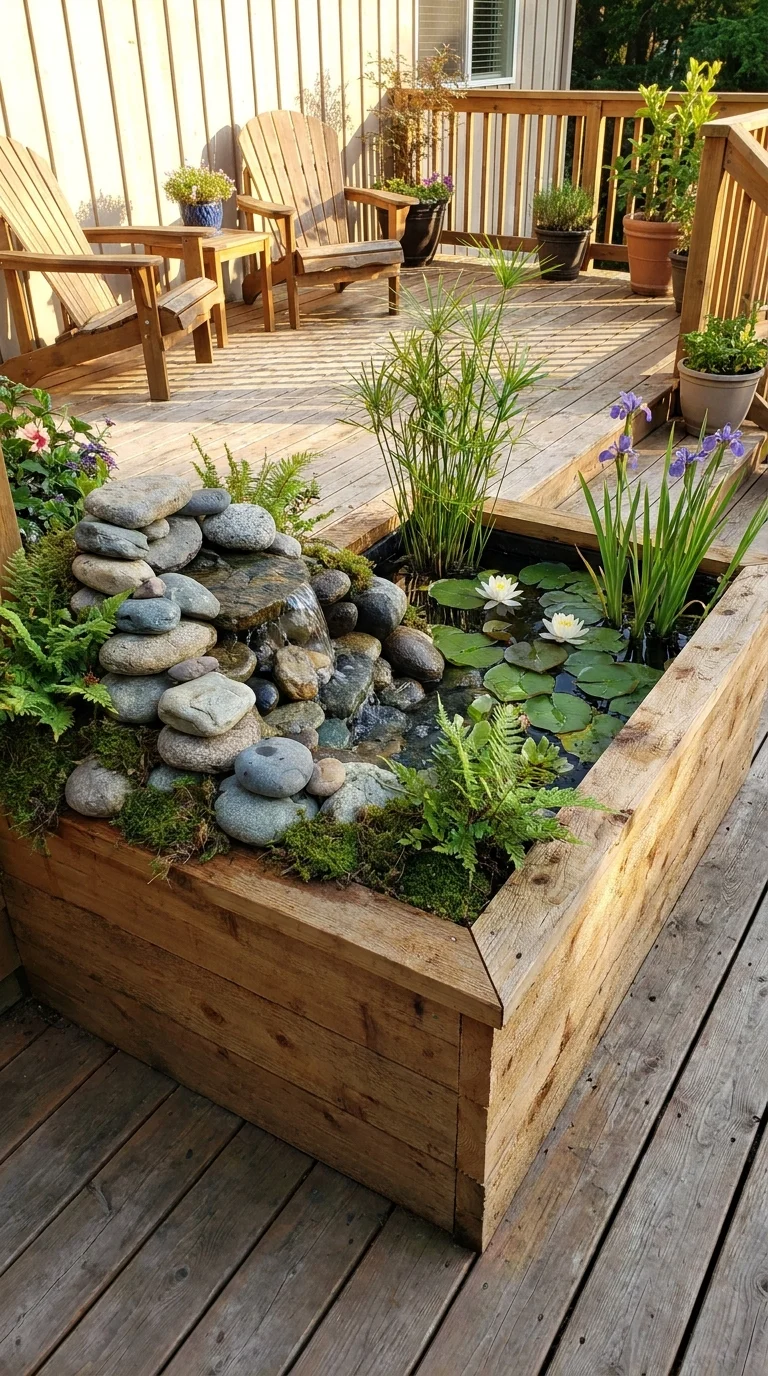
8. The Raised Planter Box Waterfall

If you don’t want to do any ground digging at all, this is your design. Build (or buy) a raised wooden planter box, line it with a pond liner, fill it with water, plant some aquatic plants around the edges, and install a small waterfall feature on the back wall — basically a stacked stone or bamboo spout that spills into the water below.
The box keeps everything contained and above ground. No digging, no underground reservoirs, no liner buried in your lawn. If you move, you can take it with you.
Cedar or redwood is the best wood choice because they’re naturally rot-resistant. Use exterior-grade screws and waterproof the outside of the box with a wood sealant. Line the inside with a rubber pond liner stapled to the top edge of the box.
I built one of these on my deck using cedar fence boards from the lumber yard. The whole box cost me about $45 in lumber, and it’s been holding water perfectly for two years now.
9. The Wall-Mounted Waterfall
This is sleek, modern, and perfect for people who want a contemporary look rather than a natural/rustic one. Basically, a flat panel (copper, slate, or even a decorative concrete slab) is mounted on a fence or wall. Water is pumped up behind it through a hidden pipe and flows in a thin sheet over the face of the panel, down into a narrow channel or basin at the base.
The sound is different from other waterfalls — smoother, more like white noise than splashing. My wife says it sounds like rain against a window, which she loves.
For the panel, copper sheeting ages beautifully and develops a gorgeous patina. Slate tiles are cheaper and look more natural. You can even use large pieces of tempered glass for an ultra-modern look — the water flowing down the glass is visually striking.
The engineering is simple: a pump in the base channel, a pipe running behind the panel, a “weir box” at the top (basically a narrow trough) that lets water overflow in a uniform sheet, and the panel itself.
The hardest part is making sure the weir box at the top is perfectly level. Any slight tilt and water will run to one side instead of sheeting evenly across the full width.
10. The Reclaimed Materials Waterfall

My personal favorite category — not one design but an approach: look around you, find materials that would otherwise be thrown away, and build something beautiful.
Old colander + vintage watering can + copper pipe = a funky layered fountain. A broken birdbath basin repurposed as a reservoir. Old wine barrels, cinder blocks, salvaged timber, galvanized stock tanks from a farm supply store — all of these have been used by creative DIYers to make jaw-dropping water features.
The key is to make sure whatever you use is safe for water. Some metals leach into water (avoid anything painted with unknown paint or anything that might have held chemicals). Galvanized metal is generally fine. Copper is excellent. Untreated wood needs to be sealed.
I once saw a water feature at a friend’s house built entirely from an old cast-iron bathtub that had been half-buried at an angle in a hillside. Water bubbled up from a pump in the drain end, flowed down the length of the tub, and cascaded out of the overflow end into a small gravel-bottomed pond. It looked like something from a fairy tale.
The cost? The tub was free from a demolition site. The pump was $35. Total investment: maybe $80 and a very creative afternoon.
Common Mistakes to Avoid (Trust Me on These)
1. Undersizing the pump. I cannot stress this enough. When in doubt, go bigger. You can always throttle down a pump with a valve. You can’t make a weak pump push more water.
2. Forgetting to plan for evaporation. A waterfall loses water to evaporation, especially in summer heat. Plan to top off your reservoir once a week or invest in an auto-fill valve. If your pump runs dry, it burns out fast.
3. Skipping the pond foam. Every gap between stones is a potential water escape route. Foam every joint at the back of your waterfall. It dries dark and blends in with the stone beautifully.
4. Placing it where you can’t hear it. Think about where you actually sit and spend time in your yard. Build your waterfall where you can enjoy the sound — not just where it’s convenient to install.
5. Using the wrong extension cord. If you’re running power outside, use a heavy-duty outdoor-rated extension cord rated for the pump’s wattage. And make sure it’s plugged into a GFCI outlet (the kind with the little test/reset buttons). Water and electricity require you to be smart about safety.
6. Planting too close. It’s tempting to surround your new waterfall with plants immediately. But leave some clearance for maintenance access. You’ll need to clean the pump filter every few weeks, and you don’t want to be crawling through a rose bush to get to it.
Maintaining Your Waterfall Through the Seasons
Once your waterfall is built, ongoing care is pretty minimal — but here’s what to stay on top of.
Every week or two: Top off the water level (or check your auto-fill). Remove fallen leaves and debris that could clog the pump.
Monthly: Pull out the pump and rinse the filter/impeller with clean water. A clogged impeller is the number one cause of reduced flow and early pump burnout.
Seasonally (spring): Do a full cleanout. Drain the basin, remove any gunk that’s accumulated, scrub the liner if you have a pond, and replace the water. This is also a good time to inspect the liner for any small leaks.
Winter (cold climates): You have two choices — keep it running (moving water resists freezing better than still water) or shut it down for the season. If you shut it down, remove the pump, drain the lines, and store the pump indoors. A pump left in frozen water WILL crack.
Where to Shop for Supplies?
- For pumps and liners: Amazon has solid options, and Aquascape products specifically are well-regarded in the pond community.
- For stones and gravel: Local landscape supply yards are always cheaper than big-box stores for bulk material. You can often pick up bags of fieldstone or flagstone for a fraction of what Home Depot charges.
- For plants: Local garden centers usually have better aquatic plant selections than national chains. Or check out local Facebook Marketplace groups — pond hobbyists often divide and sell aquatic plants very cheaply.
- For inspiration: Pinterest boards on “DIY backyard waterfall” and “pondless waterfall ideas” are a goldmine. The YouTube channels of Aquascape Inc. and Greg Wittstock (Pond Guy) are also genuinely excellent if you want to go deep on technique.
Final Thoughts
There’s something about the sound of moving water that changes the feeling of an outdoor space completely. My backyard went from a place I mowed reluctantly to a place I actually want to be. We eat dinner outside more. We linger on the patio after the kids go to bed. The dog sits next to the waterfall like he’s meditating.
None of the 10 designs in this list requires professional skills, heavy equipment, or a big budget. What they require is a free weekend, a willingness to get a little dirty, and the acceptance that your first attempt probably won’t be perfect — but it’ll be yours, and you’ll be proud of it.
Start simple. The stacked stone design is perfect for a first build. Get comfortable with the basics — the liner, the pump, the tubing — and then go bigger on your next project.
The rocks in my backyard are still there. They’ve just been rearranged into something that makes my family happy every single day. That’s worth a weekend of work and a pump that I had to return once.
Happy building.
Have a question about your specific build? Drop it in the comments — I read every one and try to respond within a day or two.

Shahid Nawaz is a home and garden content writer at Garden Skillz with over 4 years of experience researching and writing about gardening, plant care, and DIY home improvement. He specializes in turning complex horticultural topics into practical, easy-to-follow guides for beginners and experienced growers alike. Shahid has written extensively on flowering plants, indoor greenery, and seasonal garden care.