Last summer, I made the mistake of thinking my kids would entertain themselves for three months.
Ha.
By the second week of July, I had two bored children, a half-melted popsicle on my couch, and a very real desire to hand them a pile of craft supplies just to have five minutes of quiet. That’s when I started going down the rabbit hole of summer DIY crafts — and honestly? It changed everything.
What I didn’t expect was how into it they’d get. My 7-year-old, who normally can’t sit still for more than eight minutes, spent two and a half hours decorating rocks one afternoon. My 10-year-old started a “craft journal” to track which projects she wanted to try next. These weren’t just time-fillers — they became the highlights of our summer.
So if you’re heading into the warmer months looking for ideas that’ll actually hold a kid’s attention (and won’t require you to order some impossible kit online), this list is for you. I’ve personally done every single one of these with my kids, and I’ll tell you the truth about each — what worked, what flopped, and what made them beg to do it again.
Why Summer DIY Crafts Are Actually Worth Your Time?
Before I get into the list, let me say: I was not a “crafty mom” before this. I didn’t have a craft room. I didn’t own a Cricut. My idea of arts and crafts was handing them a coloring book.
But there’s something about summer that makes DIY crafts hit different. Kids have time. They’re not rushing to get to school. You’re not hovering over homework. The energy is slower and more curious — and that’s the perfect environment for making things with your hands.
Beyond the fun of it, there’s real value happening under the surface. When kids follow craft steps, they’re building focus and sequencing skills. When they mix paint colors, and it doesn’t turn out how they planned, they learn to problem-solve. When they make something and hold it up at the end, you can see the pride on their face — and that feeling of I made this is genuinely good for them.
Alright, enough of my parenting soapbox. Let’s get to the good stuff.
The 12 Summer DIY Crafts Your Kids Will Obsess Over
1. Tie-Dye T-Shirts (The Classic That Never Gets Old)

I’ll be honest — I put this off for years because I thought it would be a disaster. Spoiler: the first time we did it, my daughter’s shirt turned out looking like abstract modern art, and she wore it to school for literally three weeks straight.
What you need:
- Plain white cotton t-shirts (100% cotton works best — polyester blends barely take the dye)
- A tie-dye kit (Tulip brand is the one we use — you can grab it at Walmart or Amazon for under $15)
- Rubber bands
- Plastic gloves (the ones in the kit usually aren’t great — get extra)
- Plastic bags or plastic wrap
How to do it:
Start by soaking the shirts in a mixture of warm water and soda ash (comes in most kits) for about 20 minutes. This is the step most people skip, and it makes a HUGE difference in how vibrant the colors turn out.
While the shirt is soaking, decide on your pattern. The classic spiral: lay the shirt flat, pinch the center, and twist the whole shirt into a tight spiral. Wrap rubber bands around it like spokes of a wheel.
Apply the dye in sections — one color per section, working from the center outward. Squeeze the bottles slowly and really saturate the fabric.
Wrap the dyed shirt in plastic wrap or pop it in a zip-lock bag, and let it sit for at least 8 hours. Overnight is even better. We usually do this before bed and unwrap in the morning. The suspense is half the fun.
Lesson learned the hard way: Rinse each shirt separately under cold water until the water runs clear before washing. The first time we dumped them all in the laundry together, one shirt bled onto another, and we had some very tie-dye socks we didn’t plan for.
2. Painted Rocks (Deceptively Addictive)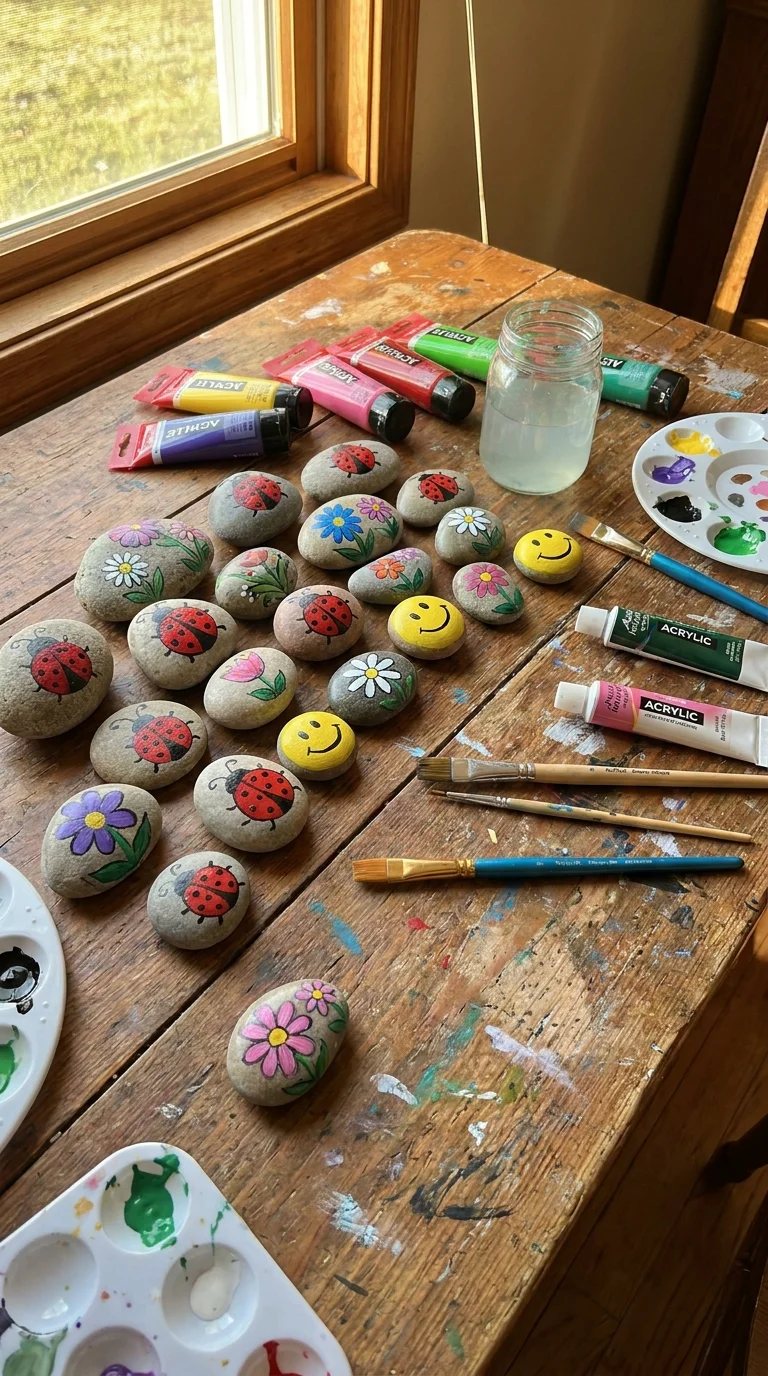
This sounds simple — maybe too simple — but I promise you, once you start this one, you will not stop. My kids now have a box of over forty painted rocks and they still ask to do it.
What you need:
- Smooth rocks (collected from outside, or grab a bag of river rocks from the dollar store or craft store)
- Acrylic paint (we use Apple Barrel from Walmart — cheap and works great)
- Small and medium paint brushes
- A fine-tip black Sharpie or paint pen for details
- Mod Podge or clear sealant spray to finish
How to do it:
Wash and dry the rocks first. Paint a base coat and let it dry completely — this is key, otherwise the design gets muddy. Once dry, let the kids go wild with patterns, faces, animals, inspirational words, mini landscapes, whatever.
The Sharpie outline trick is a game-changer. After the paint dries, tracing over the edges and adding details with a black marker makes even a wobbly design look intentional and cool.
Seal it when done so the paint doesn’t chip — a light coat of Mod Podge brushed on top works well, or a quick spray of clear acrylic sealant (used outdoors).
Fun extension: We started leaving our painted rocks around the neighborhood as a “rock hunt” for other kids to find. My daughter drew a little map. It became a whole summer project.
3. Homemade Playdough (Better Than Store-Bought, Actually)
My son was DONE with his store-bought playdough by June — it had dried out into a crumbly mess. So we made our own, and now he refuses to go back.
What you need:
- 2 cups all-purpose flour
- ½ cup salt
- 2 tablespoons cream of tartar
- 2 tablespoons vegetable oil
- 1.5 cups boiling water
- Food coloring
How to do it:
Mix the dry ingredients in a bowl. Add the oil, then carefully pour in the boiling water (this is an adult step). Stir until it comes together, then knead it on a clean surface for a few minutes until smooth. Divide into portions and knead in food coloring to each one.
That’s it. It takes about 15 minutes total and costs almost nothing.
What I love about this: You can customize it. Add glitter to the mix for sparkle playdough. Mix in a few drops of essential oil (lavender is calming) for scented playdough. Add a tiny bit of fine sand for texture. My kids spent an entire afternoon just experimenting with variations.
It keeps for months in an airtight container or zip-lock bag, way longer than store-bought.
4. Sun-Print Art (Science and Art in One)
This one genuinely blew my kids’ minds the first time we did it. It’s part science experiment, part art — and the results are stunning.
What you need:
- Sun-print paper (also called cyanotype paper — available on Amazon, about $12 for a pack of 40 sheets)
- Flat objects to arrange: leaves, flowers, feathers, keys, cut-out shapes, lace
- A sunny day
- A tray of water
How to do it:
Take the paper outside (keep it out of direct sunlight until you’re ready). Arrange your objects on top of the paper, press them flat, and place it in direct sunlight for 2–5 minutes. You’ll see the paper start to fade where the sun hits it.
Bring it inside and immediately submerge it in a tray of water for about a minute. As it rinses, the image develops — where your objects blocked the sun stays dark blue, and the exposed areas turn white. It’s genuinely magical to watch.
Tip: Press flowers or leaves in a book for a day before using them so they lie flat. Wrinkled leaves make blurry prints.
My daughter did a whole series using different types of leaves and ferns. We framed three of them, and they’re hanging in her room. They look like real art.
5. DIY Bird Feeders (That They’ll Actually Check on Every Day)
This started as a one-afternoon project and turned into a summer-long obsession. We built four feeders, hung them around the yard, and my kids became full-on amateur birdwatchers with a notebook and everything.
What you need:
- Empty plastic bottles or toilet paper rolls
- Peanut butter (or sunflower butter for nut-free households)
- Wild birdseed mix
- Twine or string
- A stick or wooden dowel (for perching)
Toilet paper roll version (for younger kids): Spread peanut butter all over the outside of a toilet paper roll. Roll it in birdseed until covered. Thread a piece of twine through the center and hang it from a tree branch.
Bottle version (lasts longer): Clean and dry a plastic bottle. Poke a hole near the bottom on each side and slide a wooden dowel through for a perch. Cut small openings just above the dowel on each side for seed access. Fill with birdseed, cap it, and hang with twine.
What surprised us: The different birds that visited were genuinely distinct — we started looking them up using the Merlin Bird ID app (it’s free and excellent, even lets you identify birds by sound). My kids spent mornings sitting quietly by the window, watching and identifying species. Honestly, one of the most peaceful things we did all summer.
6. Watercolor Resist Paintings (The Magic Trick Craft)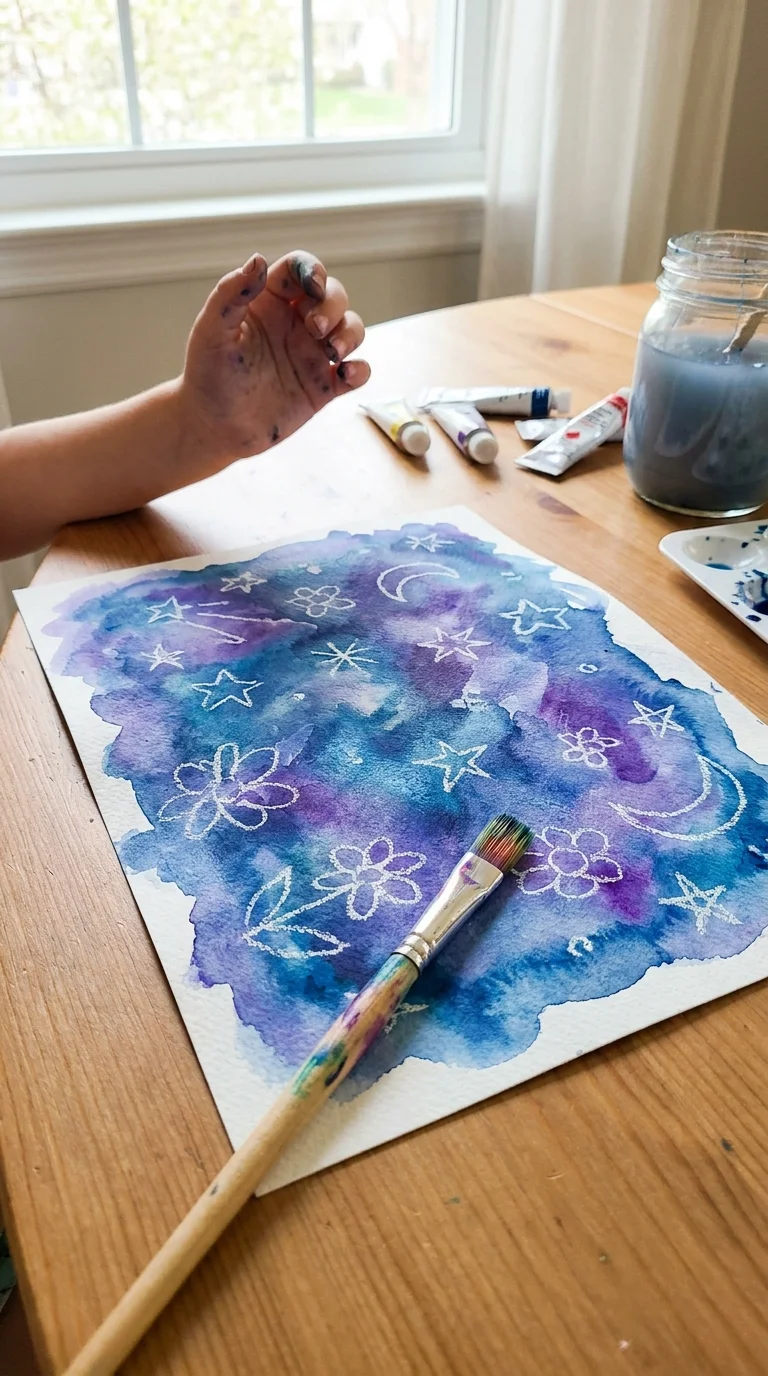
This one gets a huge reaction from kids because it looks like actual magic when the reveal happens.
What you need:
- Watercolor paints
- White crayons or oil pastels
- Watercolor paper (regular printer paper works, but warps a lot — watercolor paper from a craft store is worth it)
- Paintbrushes
- Water cups
How to do it:
Use the white crayon or white oil pastel to draw a design on the watercolor paper. Press firmly. You can do anything — stars, a name, flowers, a simple animal outline. The design will be nearly invisible.
Now brush watercolor paint over the whole page. As the color spreads, the white crayon areas resist the paint, and the hidden design appears.
My son’s favorite version: he’d write secret messages in white crayon, then have me or his sister paint over them to reveal the message. He called it his “spy art.”
Tip: For extra drama, use a darker color like navy, deep purple, or forest green — the contrast against the white resist is most striking.
7. Homemade Bubble Wands and Giant Bubbles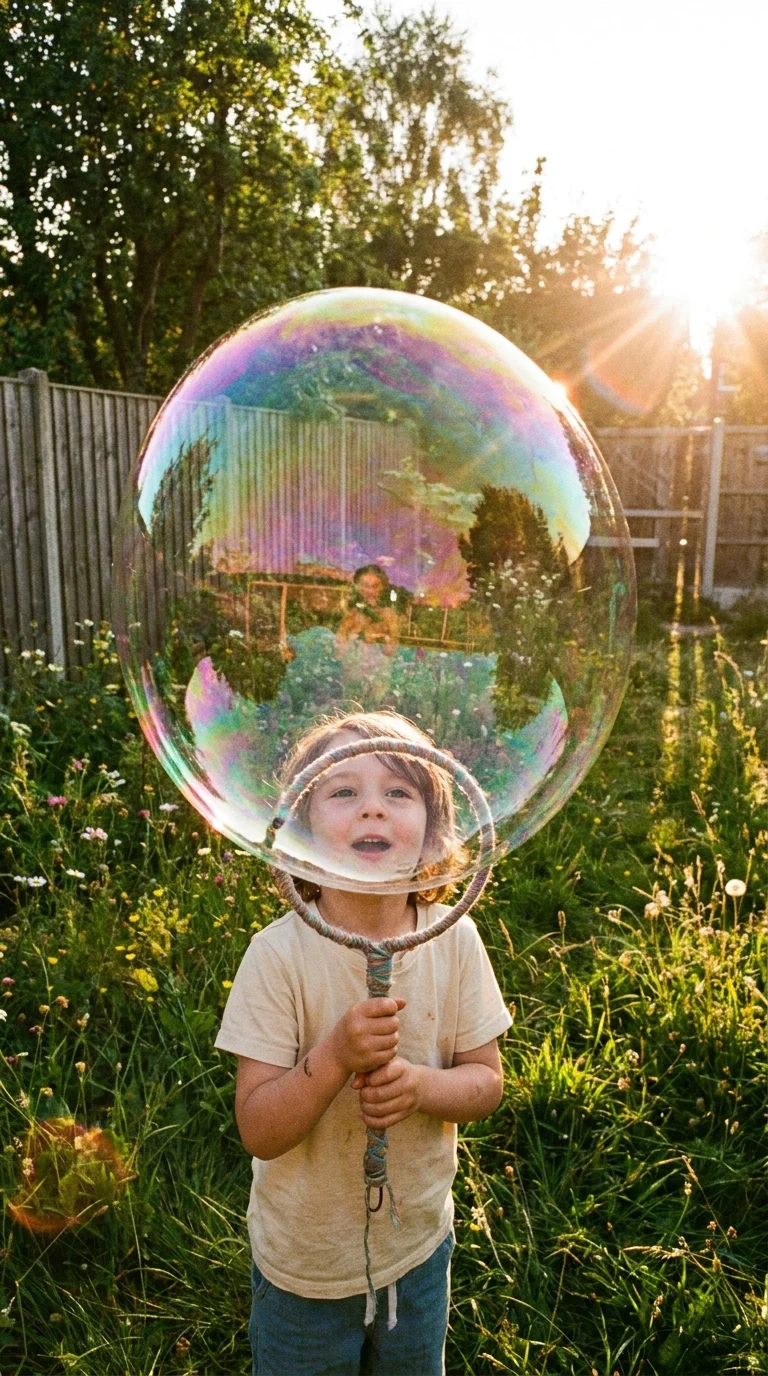
Store-bought bubble solution never makes the really giant, floating, impossibly perfect bubbles. This recipe does.
Bubble solution recipe:
- 6 cups water (distilled works best, but tap is fine)
- 1 cup dish soap (Dawn works best)
- 1 tablespoon glycerin (find this at pharmacies or craft stores)
Mix gently — you don’t want to create foam, just combine. Let it sit for an hour before using. Overnight is even better.
DIY wands: For giant bubbles, bend a wire coat hanger into a loop shape with a handle. Or tie a piece of cotton string between two sticks or chopsticks to make a loop. Dip and lift slowly.
For smaller kids, pipe cleaners twisted into loops on the end of a stick work perfectly and are soft and safe.
What I learned: The glycerin is the secret ingredient. It makes the bubbles more elastic and longer-lasting. Without it, bubbles pop almost immediately.
We took this to a park one afternoon and had a full crowd of kids gathered around trying to make the biggest bubbles. Easily one of the best $3 craft supplies I ever bought.
8. DIY Wind Chimes (Surprisingly Soothing)
These look impressive, they’re totally doable with kids of almost any age, and they make a lovely sound on a summer breeze.
What you need:
- A piece of driftwood or a thick stick
- Collected items: shells with holes (beach finds work great), old keys, metal washers, small painted rocks, wooden beads
- String or twine
- Drill or hole punch (for any items that need holes added)
- Acrylic paint (optional, for decorating the stick)
How to do it:
Decorate and paint the stick if you want. Let it dry. Cut varying lengths of string — some long, some short — and tie or knot one end to the stick. Thread your shells, keys, beads, and other items along each string, knotting below each one so they don’t slide down. The varied lengths create different tones when they clink together.
Tie two equal lengths of string to the ends of the stick to hang it from.
My experience: My daughter did a beach-themed one after we went to the shore — small shells, bits of sea glass, and a few smooth pebbles. It’s been hanging on our porch for over a year. Every time the wind picks up, she goes to the back door and smiles.
9. Frozen Watercolor Paints (Yes, With Ice)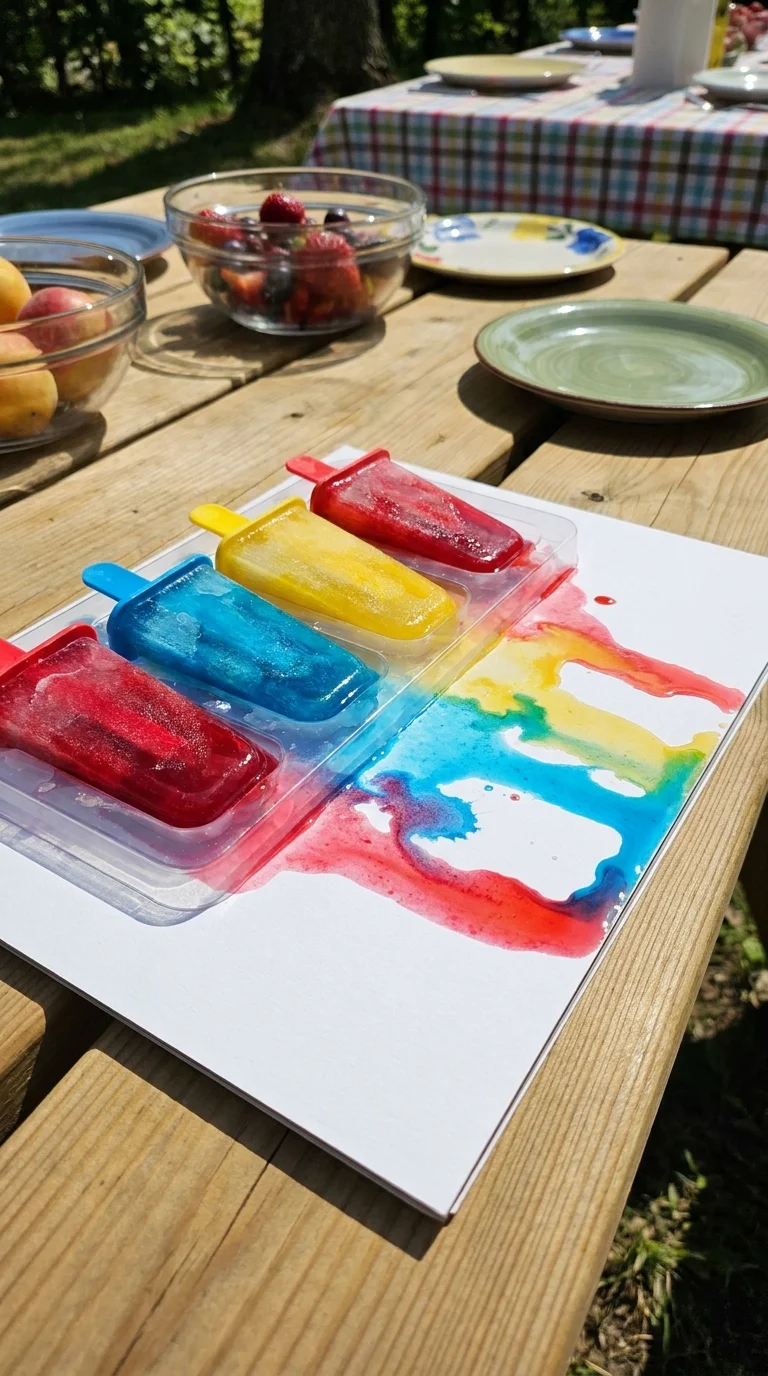
I stumbled on this one by accident — I froze leftover watercolor paint one day, and my son found it and asked what it was. That accident became one of his favorite summer art activities.
What you need:
- Ice cube trays
- Watercolor paints or food coloring
- Popsicle sticks
- Thick paper or cardstock
How to do it:
Mix watercolor paint with a small amount of water in each compartment of an ice cube tray. Stick a popsicle stick in each one and freeze until solid (a few hours or overnight).
Pop them out and use them like paint sticks on paper. As they melt, the color bleeds and blends in this gorgeous, unpredictable way that you genuinely can’t replicate with brushes. Colors run into each other and create effects that surprise even the person making them.
Works best on a hot day outdoors, so they melt at a good pace.
What the kids said: My son called this “painting with cold fire.” I don’t know exactly what he meant, but I wrote it down.
10. Mason Jar Lanterns (Great for Summer Evenings)
These are beautiful, and they make your outdoor space feel like something out of a movie on summer evenings. Kids are SO proud of these when they glow at night.
What you need:
- Clean mason jars (any size)
- Tissue paper in various colors
- Mod Podge and a brush
- Battery-operated tea lights or fairy lights (never use real flame — important)
- Optional: glass paint for a different effect
How to do it:
Tear tissue paper into irregular, small pieces. Brush Mod Podge onto a section of the jar, then press tissue paper pieces on top. Brush another coat of Mod Podge over the tissue paper to seal. Work in sections, layering colors and overlapping pieces until the whole jar is covered. Let dry completely (a couple of hours).
Drop a battery-operated tea light or a small string of fairy lights inside.
The effect: When the light turns on, it glows through the tissue paper like stained glass. It’s genuinely beautiful. We put ours along the back porch railing for a summer BBQ, and everyone kept asking where we bought them.
Tip: Use darker and more saturated tissue paper colors — the lighter ones almost disappear when lit. Deep red, cobalt blue, orange, and purple look best.
11. Nature Weaving (Quiet, Meditative, Gorgeous)
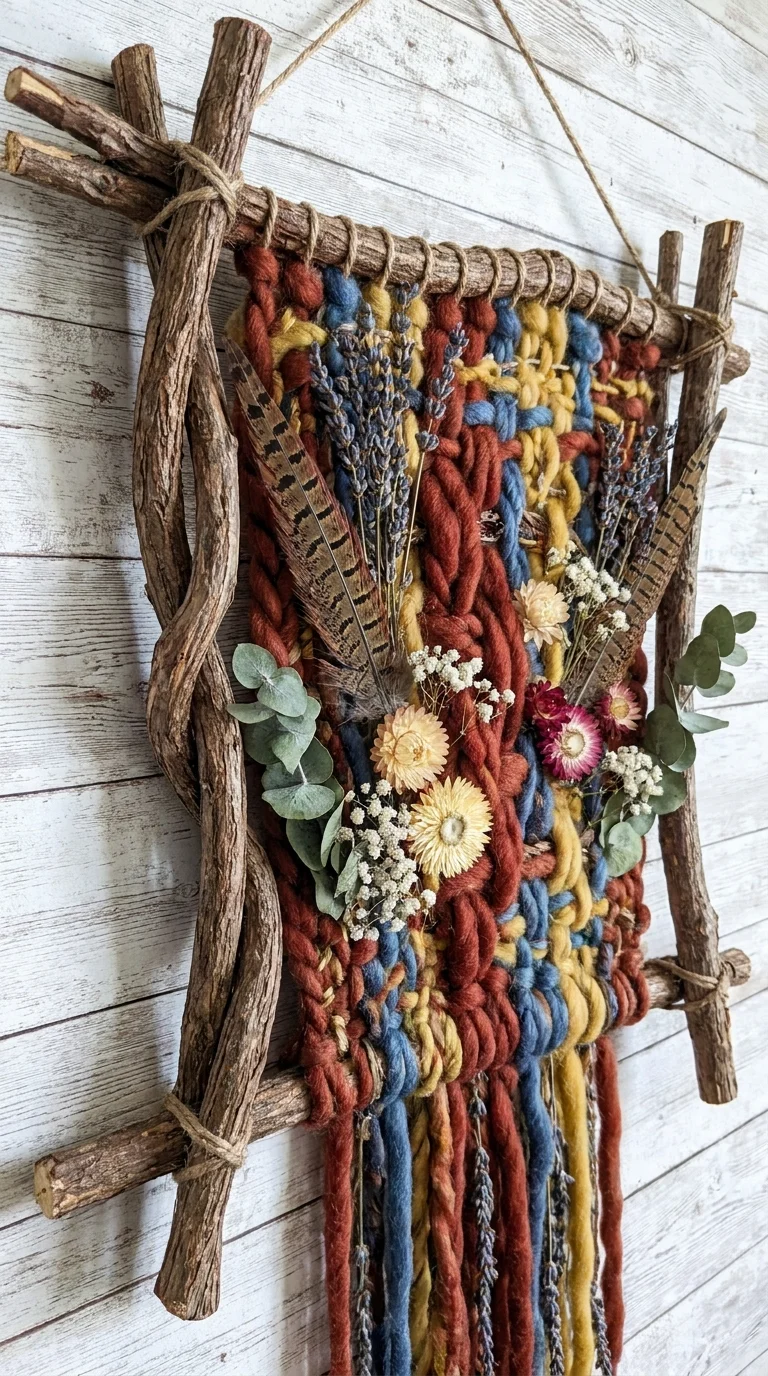
This is the craft that surprised me most. I thought my kids would try it for five minutes and move on. Instead, they sat with it for an hour and a half, and the results looked like something from a craft boutique.
What you need:
- A Y-shaped stick or a simple frame made from four sticks and some twine
- Natural materials: thin twigs, long blades of grass, feathers, strips of bark, flower stems, leaves, bits of yarn
- Yarn or string to wrap the base weave
How to do it:
If using a frame: Lash four sticks into a rectangle. Tie vertical strings from top to bottom to create the warp (the base threads).
Weave horizontal materials over and under the warp strings, alternating with each row. Pack each row gently downward as you go. Mix natural items with yarn for color contrast.
If using a Y-stick: Wrap yarn between the three branches to create a web, then weave smaller natural items through the spaces.
What to collect: On a morning walk before crafting, send the kids to gather materials. This becomes part of the activity — they’re more invested in weaving things they found themselves.
12. Homemade Sidewalk Chalk Paint (Better Than Regular Chalk)

Regular sidewalk chalk is fine. But sidewalk chalk paint? The coverage is better, the colors are more vivid, it washes off with water, and kids treat it like a serious outdoor art project.
Recipe:
- 1 cup cornstarch
- 1 cup water
- Food coloring or liquid watercolor
Mix cornstarch and water until smooth. Divide into containers (old muffin tins work great). Add food coloring to each and stir.
Apply with foam brushes, regular paintbrushes, or sponges. On a hot day, it dries to a chalky matte finish within minutes. On a cloudy day, it stays wet longer, which some kids actually prefer — easier to blend.
What’s great about this: It scales up perfectly. Want to paint a huge mural? Double or triple the batch. It’s cheap enough that you don’t have to worry about kids using “too much.”
My kids once spent an entire afternoon painting our whole driveway — they called it a “sidewalk museum.” Neighbors stopped to look. We hosed it off that evening, no trace left.
A Few Things I Wish Someone Had Told Me First
Set up a dedicated craft space. Even if it’s just a folding table in the garage or a corner of the kitchen covered with a plastic tablecloth, having a designated spot changes the whole vibe. Kids take it more seriously, and cleanup becomes way simpler.
Stock a basic supply kit. You don’t need much: white school glue, Mod Podge, acrylic paint in primary colors plus white and black, a few brush sizes, Sharpies, scissors, tape, rubber bands, and a stack of cardstock. With just these on hand, you can do half the crafts on this list without any additional shopping.
Let go of the outcome. This was hard for me. My daughter’s rock once looked more like a potato than the ladybug she intended. But she loved it anyway. The goal isn’t a perfect result — it’s the making. Once I stopped hovering and trying to help them “fix” things, they got more creative, and I got more relaxed.
Don’t do all twelve in one week. Spread them out. Save a few for when you’re in that third week of August slump. The anticipation makes them even better.
Making It a Summer Tradition
One of the best decisions we made was creating what my daughter now calls the “Summer Craft Jar.” At the start of June, we wrote each craft on a slip of paper and put them in a mason jar. Every few days, she gets to pull one out to do next.
The randomness makes it exciting. She doesn’t know what’s coming, so she can’t get bored waiting for a specific one. And when she pulls out a favorite — the tie-dye, the sun prints — it feels like a little win.
We’ve added to the jar every year. Some crafts from last summer are still in there on repeat because they asked for them again. That’s the best kind of feedback.
Summer doesn’t have to mean endless screen time or an expensive camp schedule. Some cardstock, paint, a few craft supplies, and a sunny afternoon — that’s genuinely all it takes to create memories that stick.
My kids don’t remember the days we spent scrolling. But my daughter still talks about the afternoon we made mason jar lanterns and sat on the porch watching them glow while fireflies appeared in the yard.
That’s the kind of summer that’s worth making.
Have a favorite summer craft that’s not on this list? I’d love to hear what works for your family.

Shahid Nawaz is a home and garden content writer at Garden Skillz with over 4 years of experience researching and writing about gardening, plant care, and DIY home improvement. He specializes in turning complex horticultural topics into practical, easy-to-follow guides for beginners and experienced growers alike. Shahid has written extensively on flowering plants, indoor greenery, and seasonal garden care.