Mine was a mix of cracked concrete, random stepping stones that had sunk into the mud, and a patch of weeds that I swear grew back overnight, no matter what I did. My neighbour Tariq — who has an almost annoyingly tidy garden — once made an offhand comment about how the side of a house “tells you more about the owner than the front does.” I tried to laugh it off, but it stuck with me.
So I started researching. Then planning. Then spending. Then regretting some of those spending choices, and eventually figuring out what actually works when you’re trying to make a sidewalk look charming without spending a fortune.
What I discovered is that the side walkway is actually one of the highest-impact, lowest-cost improvements you can make to the exterior of your home. It’s small enough that even budget materials go a long way. It’s often overlooked, which means almost anything you do there will look like a dramatic transformation. And it connects your front and back spaces in a way that makes your whole yard feel intentional.
This article walks you through 12 real, doable styles — from gravelled cottage paths to modern flagstone strips — with honest budget estimates and the kind of practical detail I wish someone had given me before I made three trips to the hardware store in a single weekend.
Before You Spend a Single Dollar
I know you want to jump straight to the pretty styles. But stick with me here for just a few minutes, because the planning phase is where most budget walkway projects go sideways.
Measure Your Space Honestly
Sidewalks are usually anywhere from 3 to 5 feet wide. That sounds like nothing, but it changes your material calculations dramatically. Measure your actual width in three or four spots — older homes especially tend to have slightly tapered passageways. Length matters too: a 30-foot path versus a 50-foot path is the difference between a one-weekend project and a two-weekend one.
Check for Drainage Issues
Before I laid my first paver, I should have noticed that one section of my side yard collected water after rain. I didn’t notice until I’d already laid half my path, and then had to redo that section with a slight raised grade. Spend ten minutes walking the space after a rainy day. If water pools anywhere, you’ll need to address drainage first — either with a French drain, crushed aggregate base, or by building up the grade slightly toward the fence.
Decide on Function Before Form
Is this path mainly for foot traffic? Do you wheel a wheelbarrow or a lawn mower through? Do the bins go this way? A path that handles bin day needs a firmer, wider surface than one that’s just for walking to the back garden. Getting clear on this stops you from choosing a beautiful but impractical material.
Quick tip: Take photos of your side walkway in the morning and evening light before you start. The way shadows fall between houses can make certain materials look completely different than they do in bright showroom lighting.
Set Your Real Budget
For a typical 40-foot side walkway about 3.5 feet wide, a basic but attractive gravel or stepping stone path can be done for under $200. A more polished look with concrete pavers might run $400–$700 in materials. Professional installation adds labour costs that often double those numbers. Everything in this article assumes you’re doing it yourself, with help from a friend on heavier tasks.
The 12 Charming Styles (Honest Thoughts on Each)
1: Pea Gravel with Timber Edging
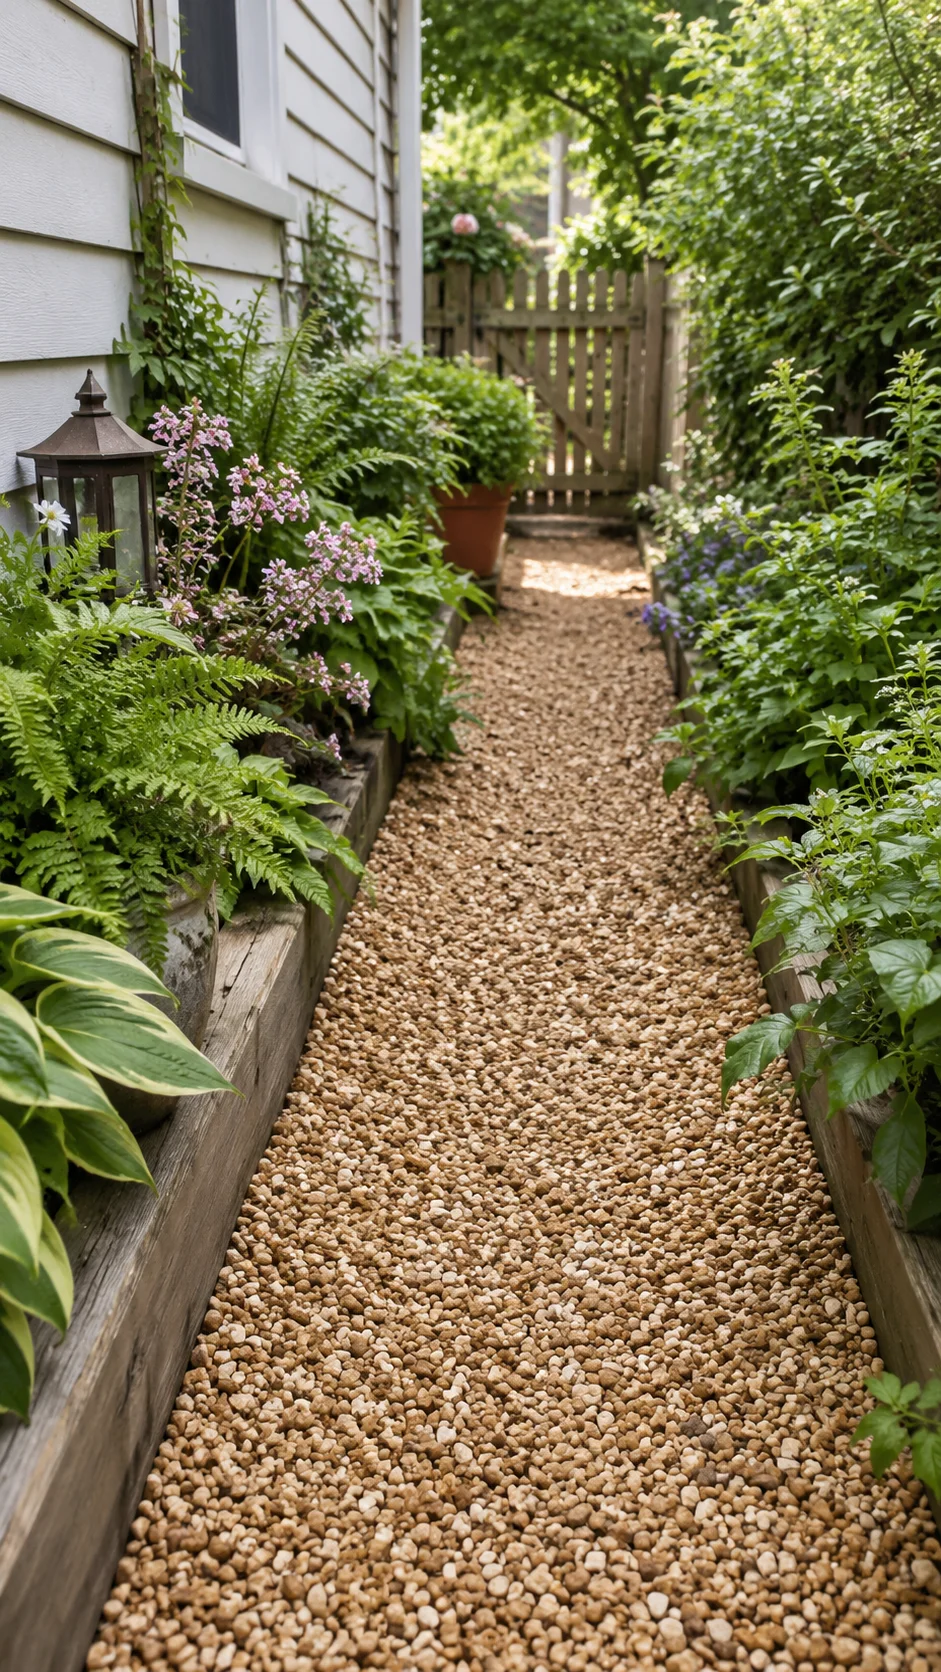
Budget: $50–$120
This is hands-down the most budget-friendly path that still looks intentional and designed. You lay landscaping fabric, pour 2–3 inches of pea gravel, and border it with pressure-treated 4×4 timbers or cheap pine sleepers staked into the ground.
What makes it charming is the sound — that satisfying crunch when you walk on it — and the way it catches light in a way that bare concrete never does. I’ve seen this style in cottage-style gardens and in clean modern yards alike. It’s that adaptable.
The honest downside? Gravel migrates. You’ll find it kicked into your lawn edges, and after a winter, you may need to top it up slightly. Get a good quality landscape fabric (I like the woven geotextile type, not the cheap plastic sheet) and you’ll minimise gravel sinking into the soil.
2: Irregular Flagstone Stepping Path
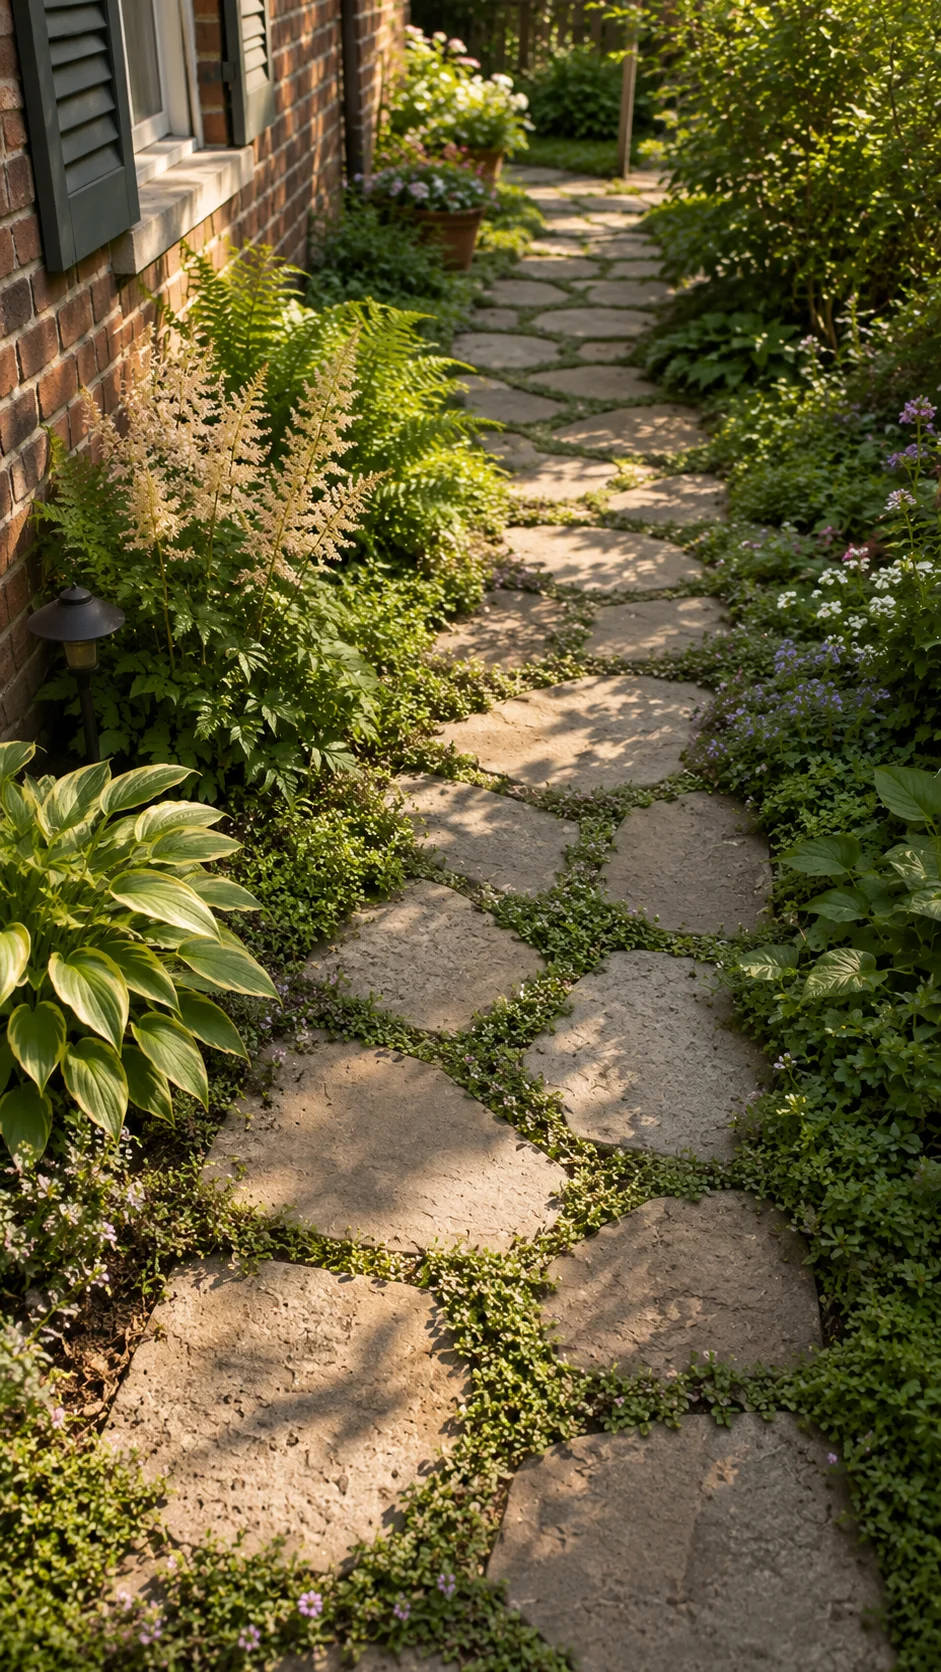
Budget: $80–$180
Flagstone — whether real Pennsylvania bluestone or the more affordable concrete-cast imitation versions — gives you that timeless, slightly rustic look that makes a sidewalk feel like it’s been there for generations.
The irregular style (as opposed to neatly cut slabs) is actually easier and cheaper to work with because you’re not trying to achieve perfect geometry. You lay them in sand or gravel, adjusting so they sit firm and level, and let low-growing plants like thyme or moss fill the gaps naturally over time.
I planted creeping thyme between mine. By the second summer, it had filled in, and the whole thing smelled faintly herby every time you walked through. It’s one of those touches that costs almost nothing but makes a huge impression.
3: Concrete Stepping Stones in Mulch
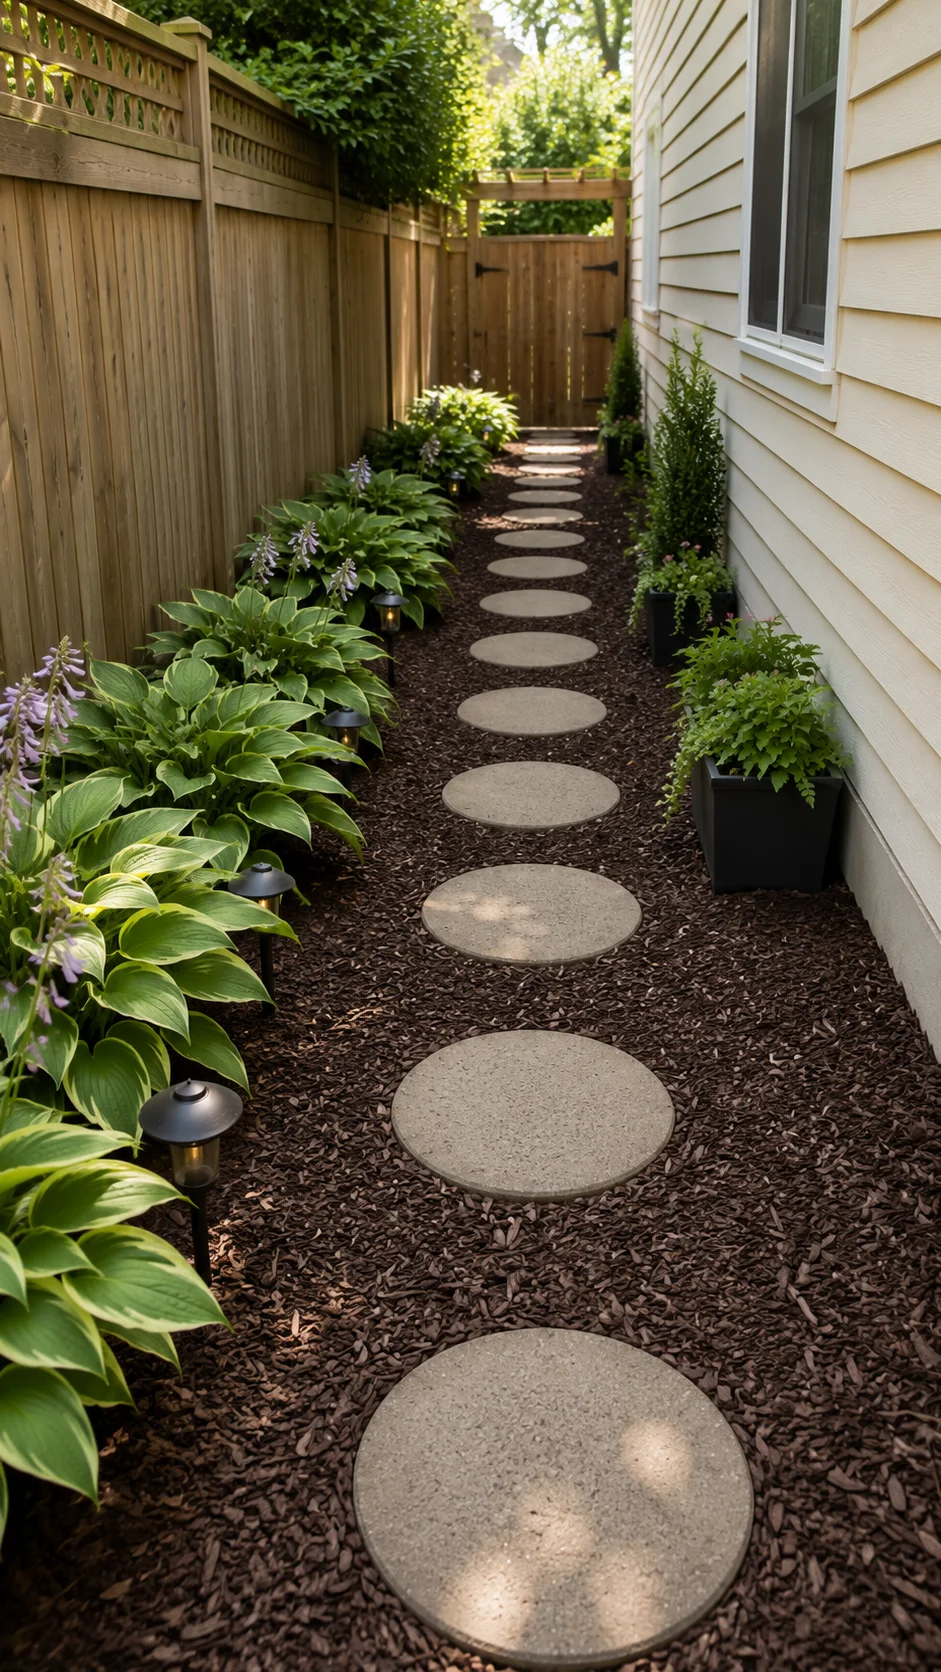
Budget: $60–$150
This is the style that surprises people the most — not because it’s unusual, but because it’s so simple and it still looks genuinely lovely. Round or square concrete pavers spaced evenly in a bed of dark brown hardwood mulch create a clean, park-like walkway that photographs beautifully and takes maybe an afternoon to install.
The dark mulch makes the light-coloured concrete pop. Add a border of low-growing hostas or ornamental grasses along one side, and you’ve turned a forgotten alley into a garden feature.
This style is also the easiest to adjust and remove if you change your mind — nothing is permanent.
4: Concrete Block Pavers in Herringbone Pattern
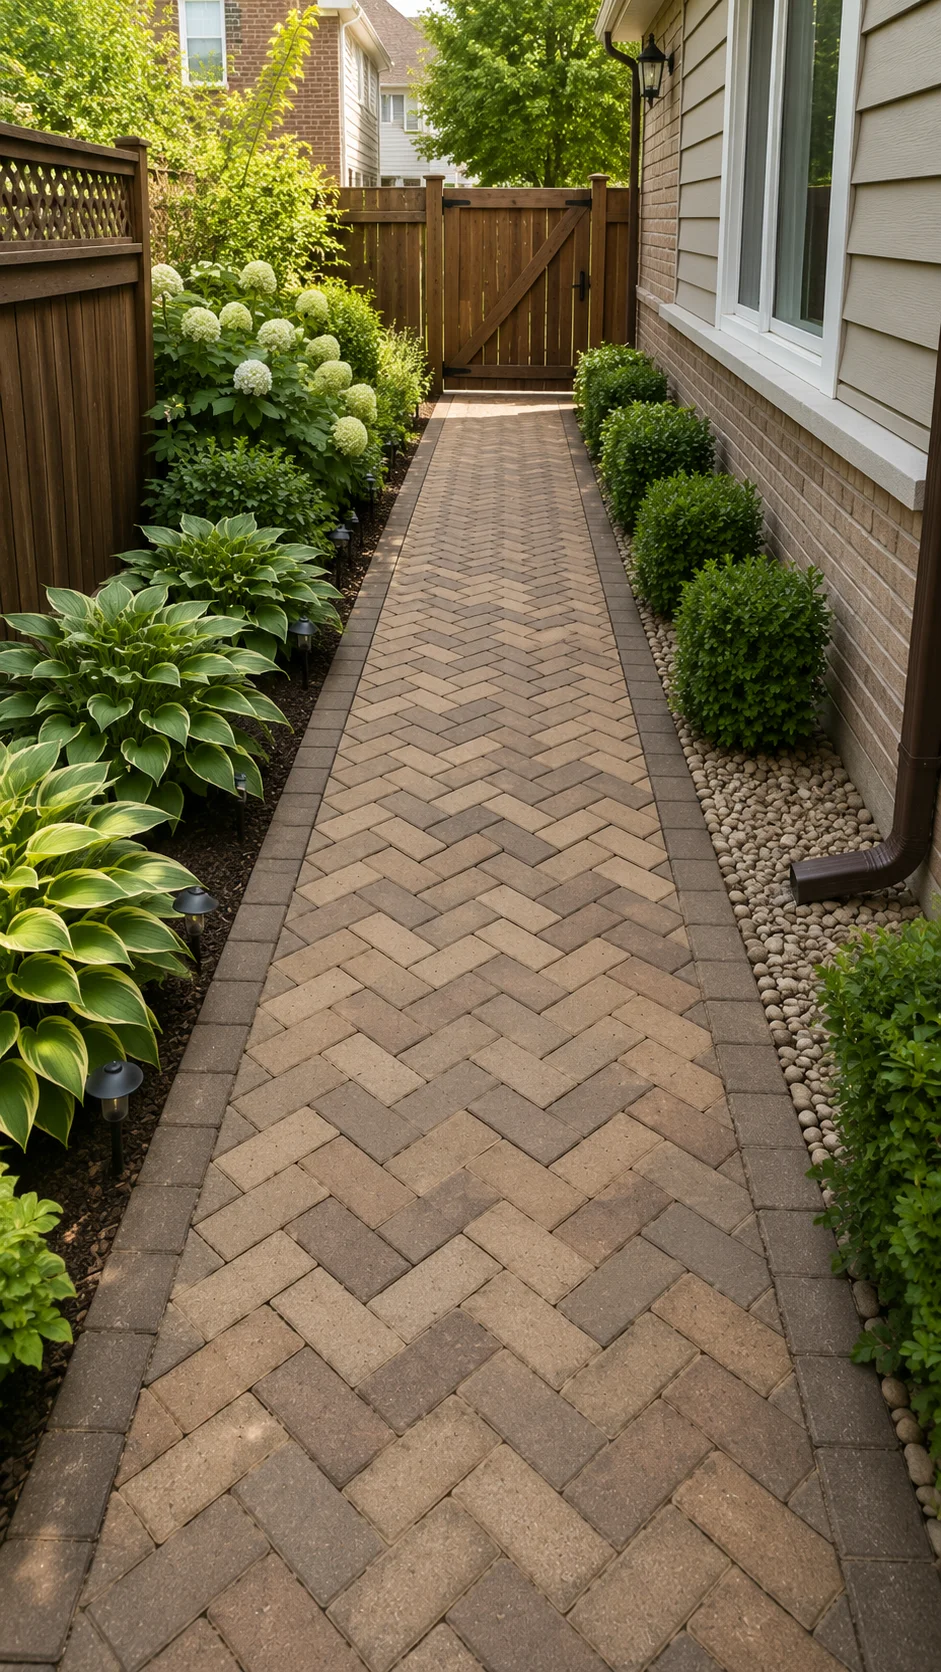
Budget: $150–$350
If you want something that looks like it cost serious money but didn’t, the herringbone paver pattern is your answer. Standard concrete block pavers are one of the cheapest materials per square foot, but when laid in a herringbone or running bond pattern, they look like quality hardscaping.
The key is prep. You need a well-compacted base of crushed stone (usually 4 inches) and a 1-inch sand setting bed. The work is physical but not technically difficult. Rent a plate compactor for a day — it’s usually about $50–$70 — and it makes all the difference in preventing future settling.
My biggest mistake on my first paver project was skimping on the base depth. Six months later, I had three pavers that had sunk visibly. I had to pull them up and redo that section. Do the base properly the first time.
5: Bark Chip Natural Path
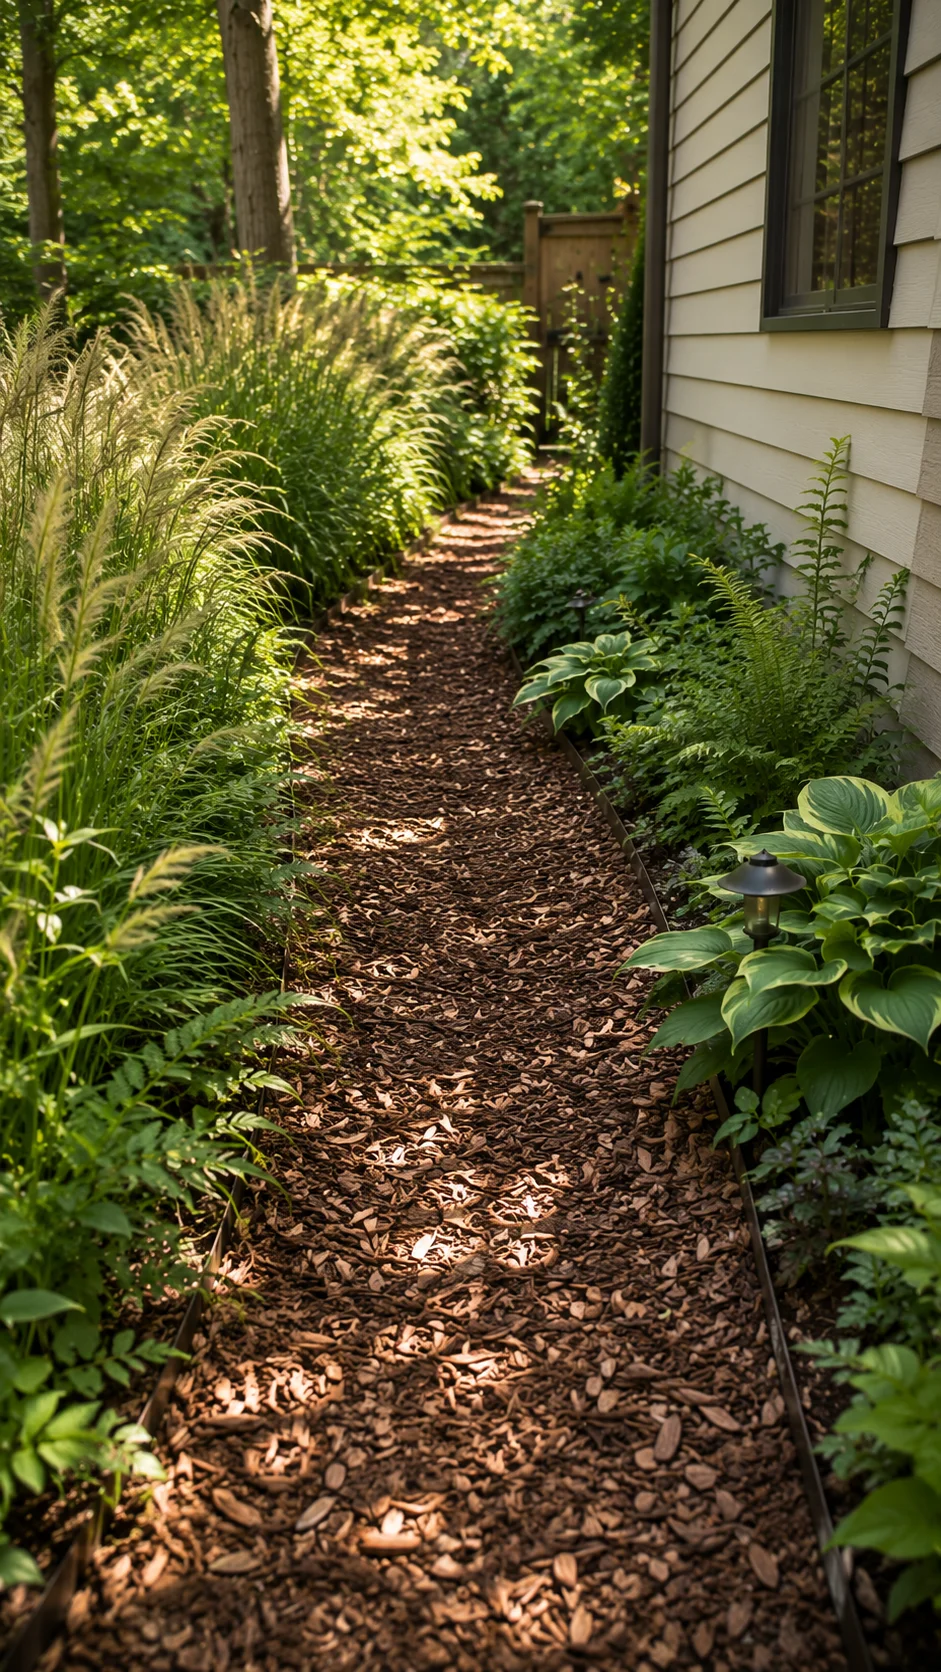
Budget: $30–$90
This is the style for anyone who wants maximum charm with minimum effort or cost. A thick layer of bark chips — 3 to 4 inches deep — edged with a simple garden border creates a woodland-feel path that suits cottage gardens, native plant gardens, and shaded side yards especially well.
Bark chips are often available very cheaply or even free from tree surgeons who need to offload them. Check platforms like Chip Drop, where arborists will drop a truckload of fresh chips at your address for free, because it saves them the disposal cost. It’s genuinely one of the best garden hacks I know.
The downside is longevity — bark breaks down over 2–3 years and needs topping up. But in a low-traffic sidewalk, that’s not really a burden.
6: Reclaimed Brick Pathway
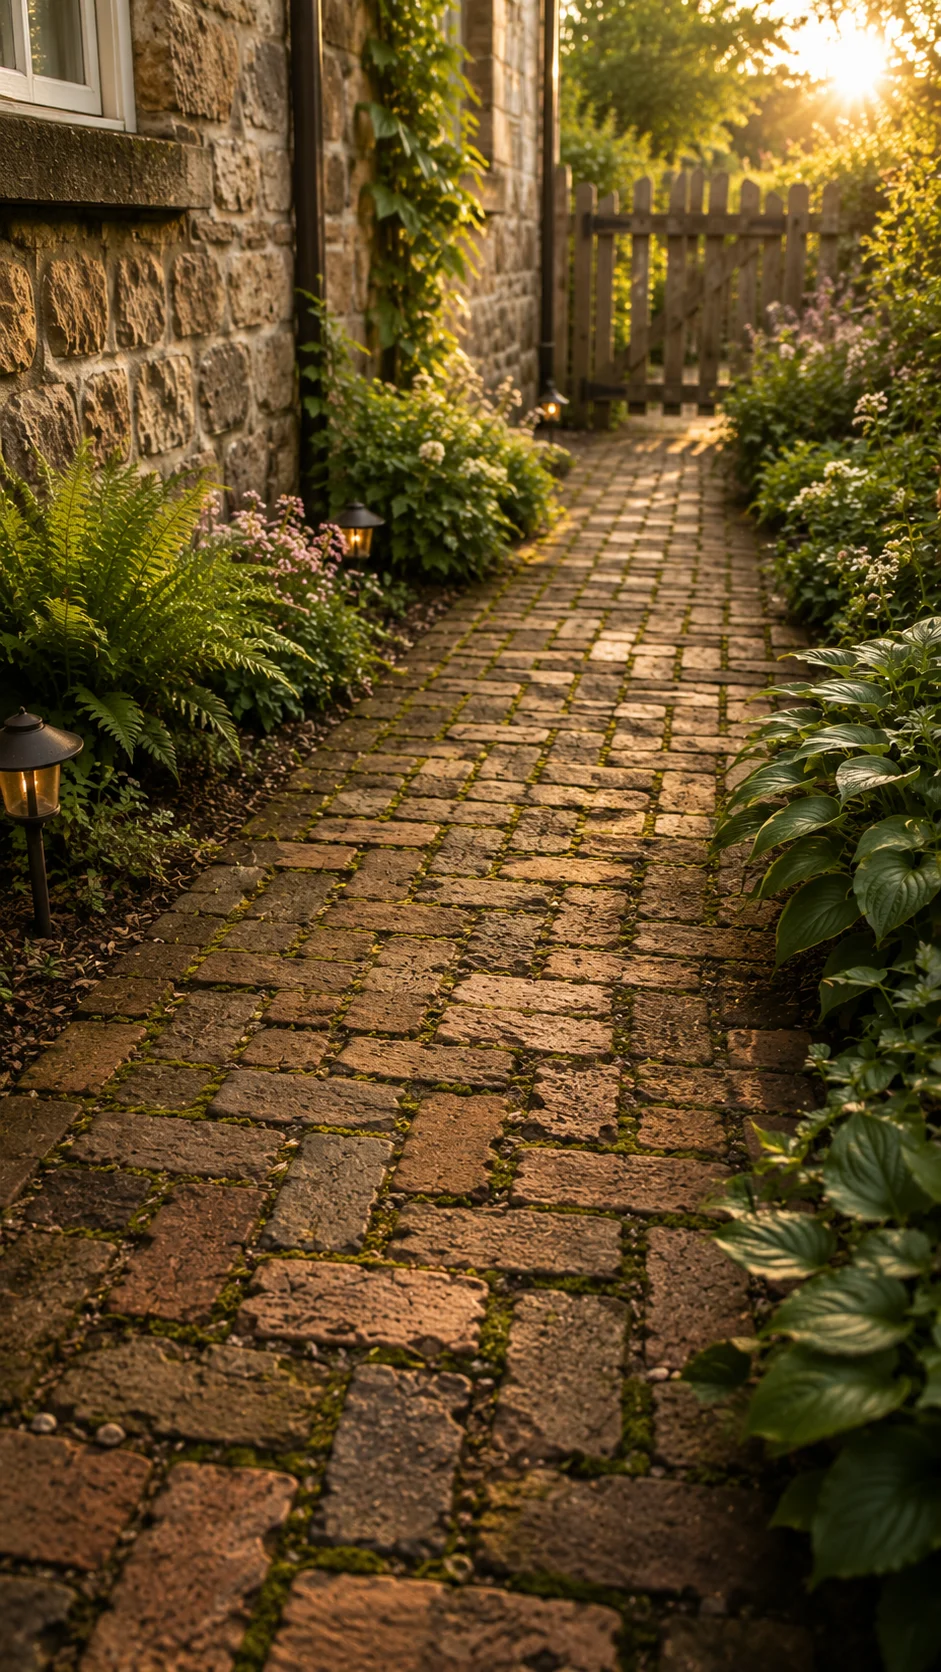
Budget: $200–$500
There is something about old brick that no new material can replicate. The colour variation, the slightly uneven surface, the feeling that these bricks have a history — it adds a warmth and character that’s genuinely difficult to fake.
Reclaimed bricks can often be sourced from demolition salvage yards for less than the cost of new pavers. They’re set in sand or dry-laid on a compacted base, and imperfect edges and slight variations in size are part of the charm rather than a problem.
This style suits older homes especially well. If your house has any exposed brick, matching or complementing it on the side walkway ties the whole exterior together in a really satisfying way.
7: Decomposed Granite with Metal Edging
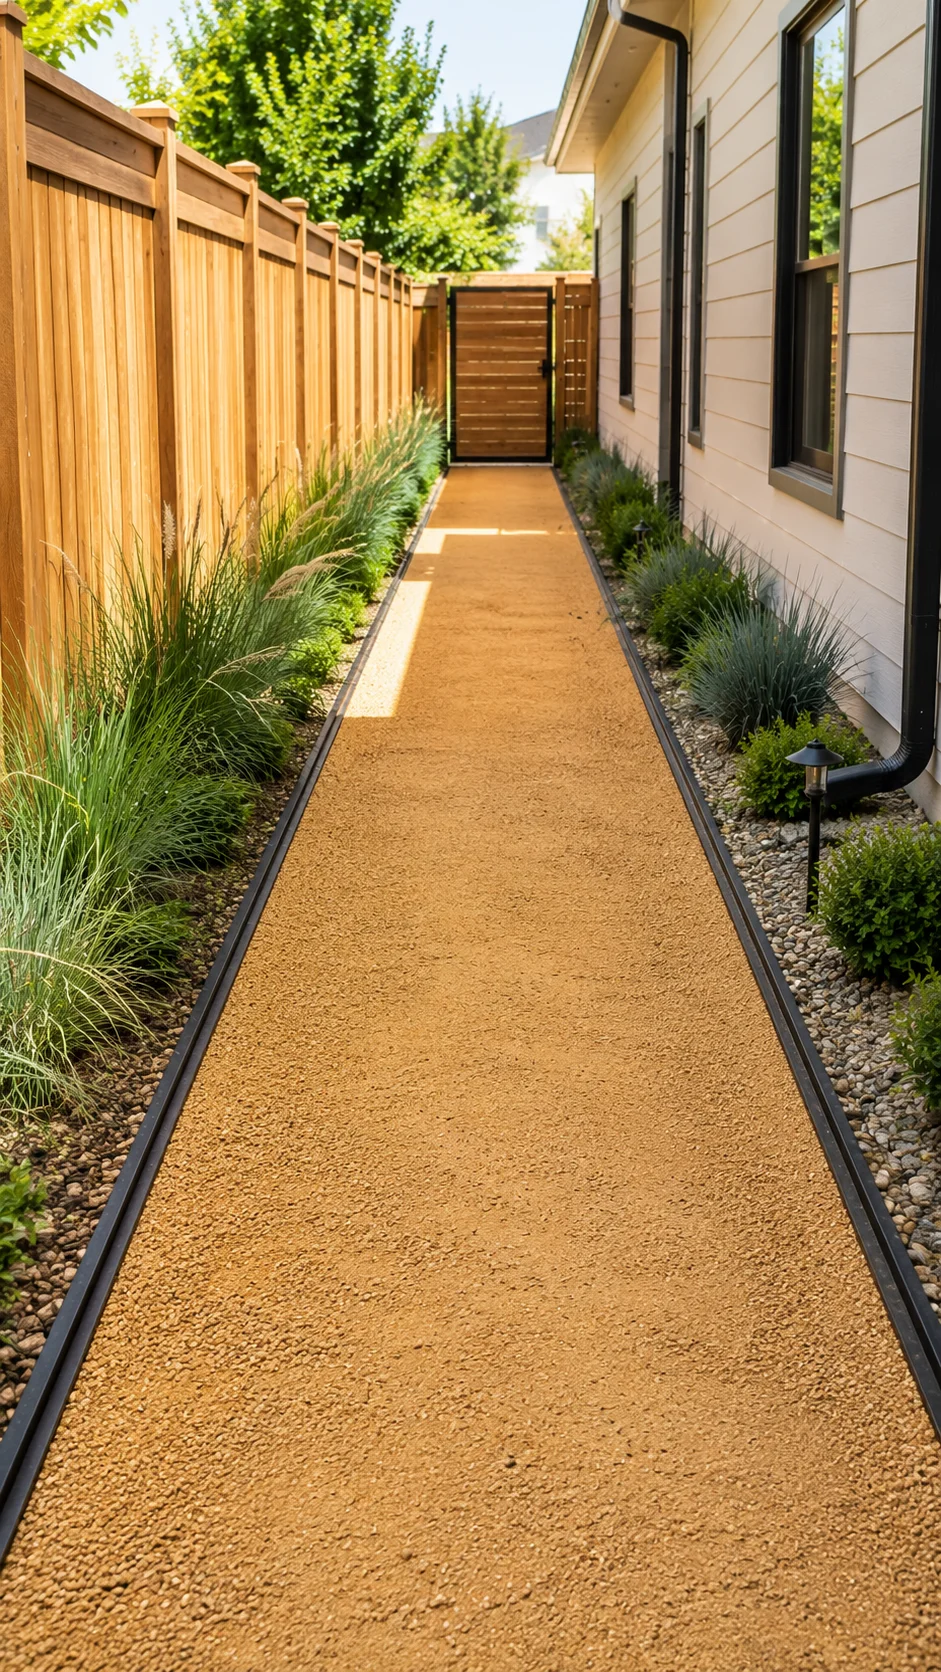
Budget: $100–$250
Decomposed granite — sometimes called DG — is a finely crushed rock that compacts into a firm, stable surface. It’s popular in drought-tolerant and southwestern-style gardens, but it works beautifully in almost any setting when paired with clean metal lawn edging strips.
The metal edging (available in landscape supply stores in flexible rolls) gives you that crisp, architectural line that makes the whole path look designed. The DG itself, in shades of tan, brown, or gold, adds warmth to shaded side passages.
Unlike loose gravel, properly compacted DG with a stabiliser added doesn’t migrate as badly. It does need occasional re-leveling after heavy rain, but it’s genuinely low maintenance.
8: Grass Pathway with Stepping Stone Ribbon
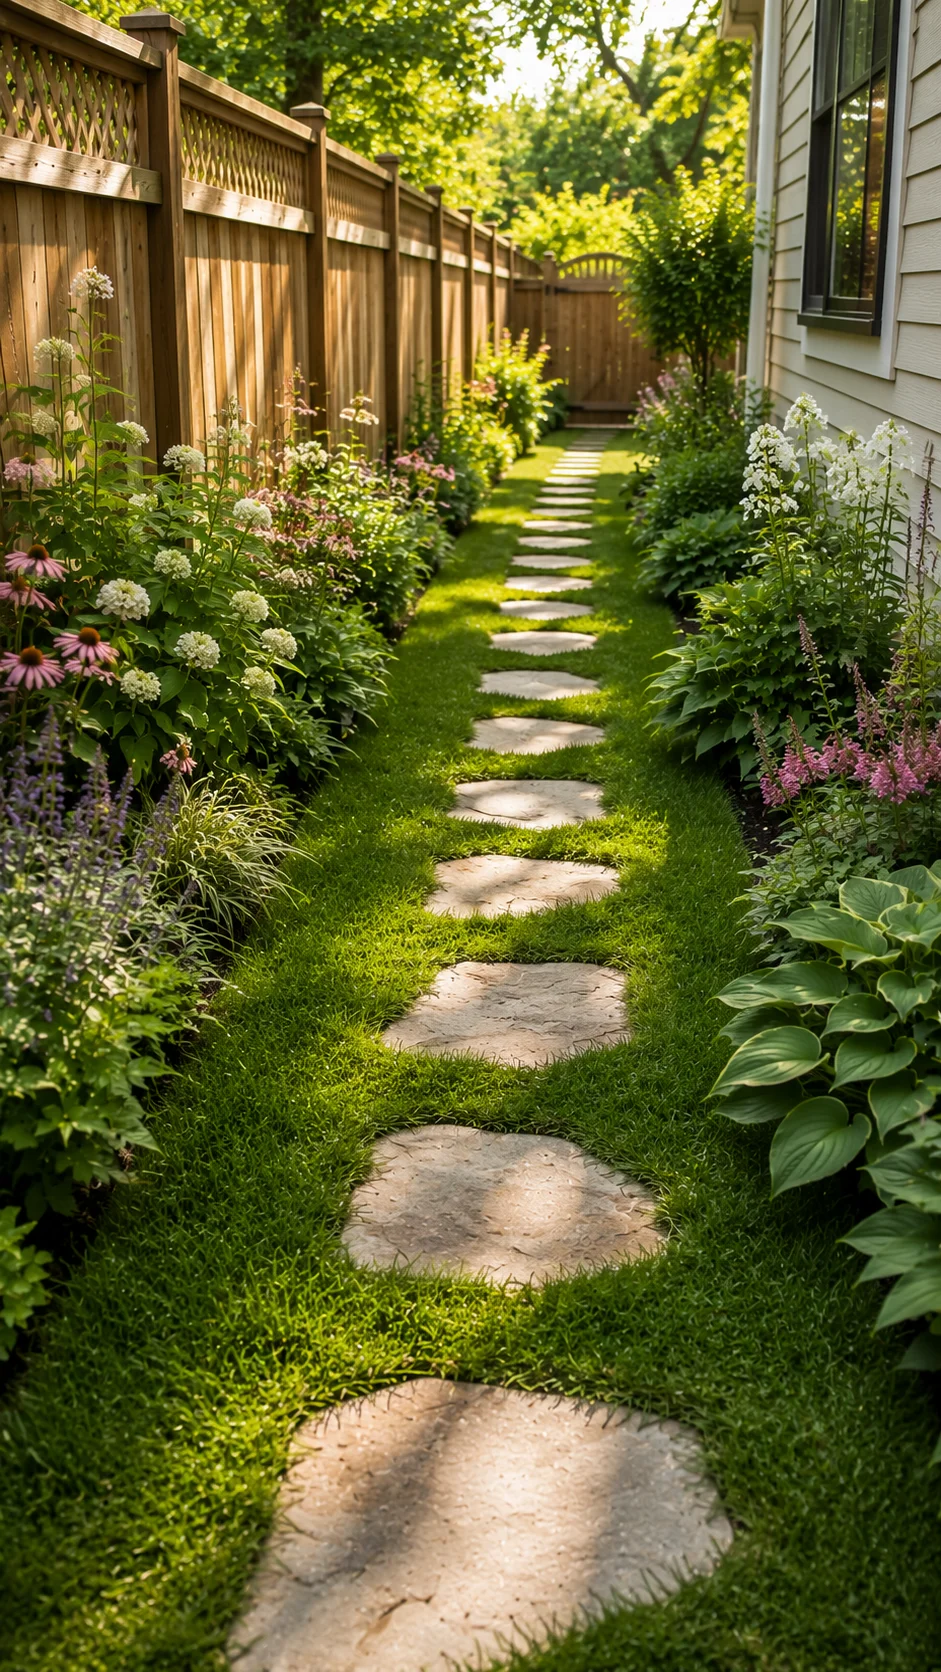
If your side yard gets enough light and you don’t mind a bit of lawn maintenance, a simple grass path with a single ribbon of stepping stones down the centre is quietly one of the most attractive styles you can choose. It looks soft, it looks lived-in, and it feels completely different from any kind of hard surface.
The stones keep your feet dry and protect the turf from becoming worn in a muddy track. You just mow around them as part of your regular lawn routine.
The catch is light — this only works if the side passage gets at least 4–5 hours of direct sun. In a north-facing or heavily shaded gap, grass will struggle, and you’ll end up with muddy, moss-covered ground.
9: Cinder Block or Concrete Sleeper Edged Gravel
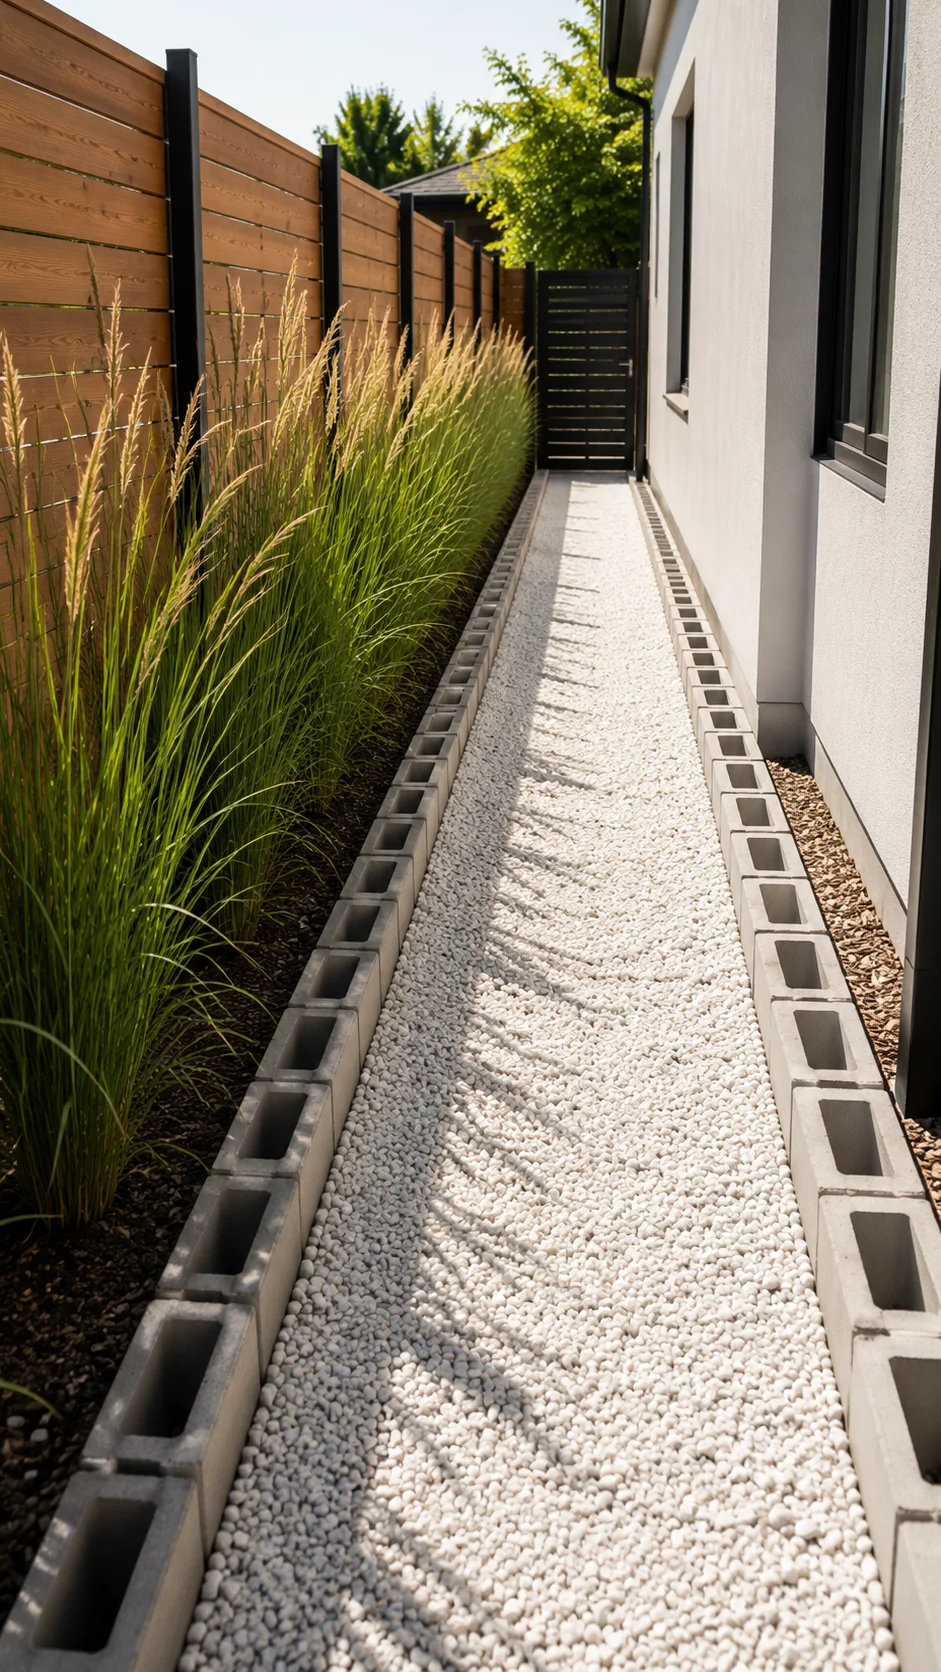
Budget: $80–$200
This one sounds industrial and actually looks really smart in the right setting. Concrete sleepers or CMU (cinder) blocks laid on edge as a border, filled with white or light-coloured gravel, create a strongly geometric, almost modernist path that suits contemporary homes very well.
The contrast between the angular concrete edge and the loose gravel infill is part of the visual appeal. Add a single row of ornamental grasses or lavender along the fence side, and you’ve balanced the hardness with something green and living.
10: Permeable Resin-Bound Gravel
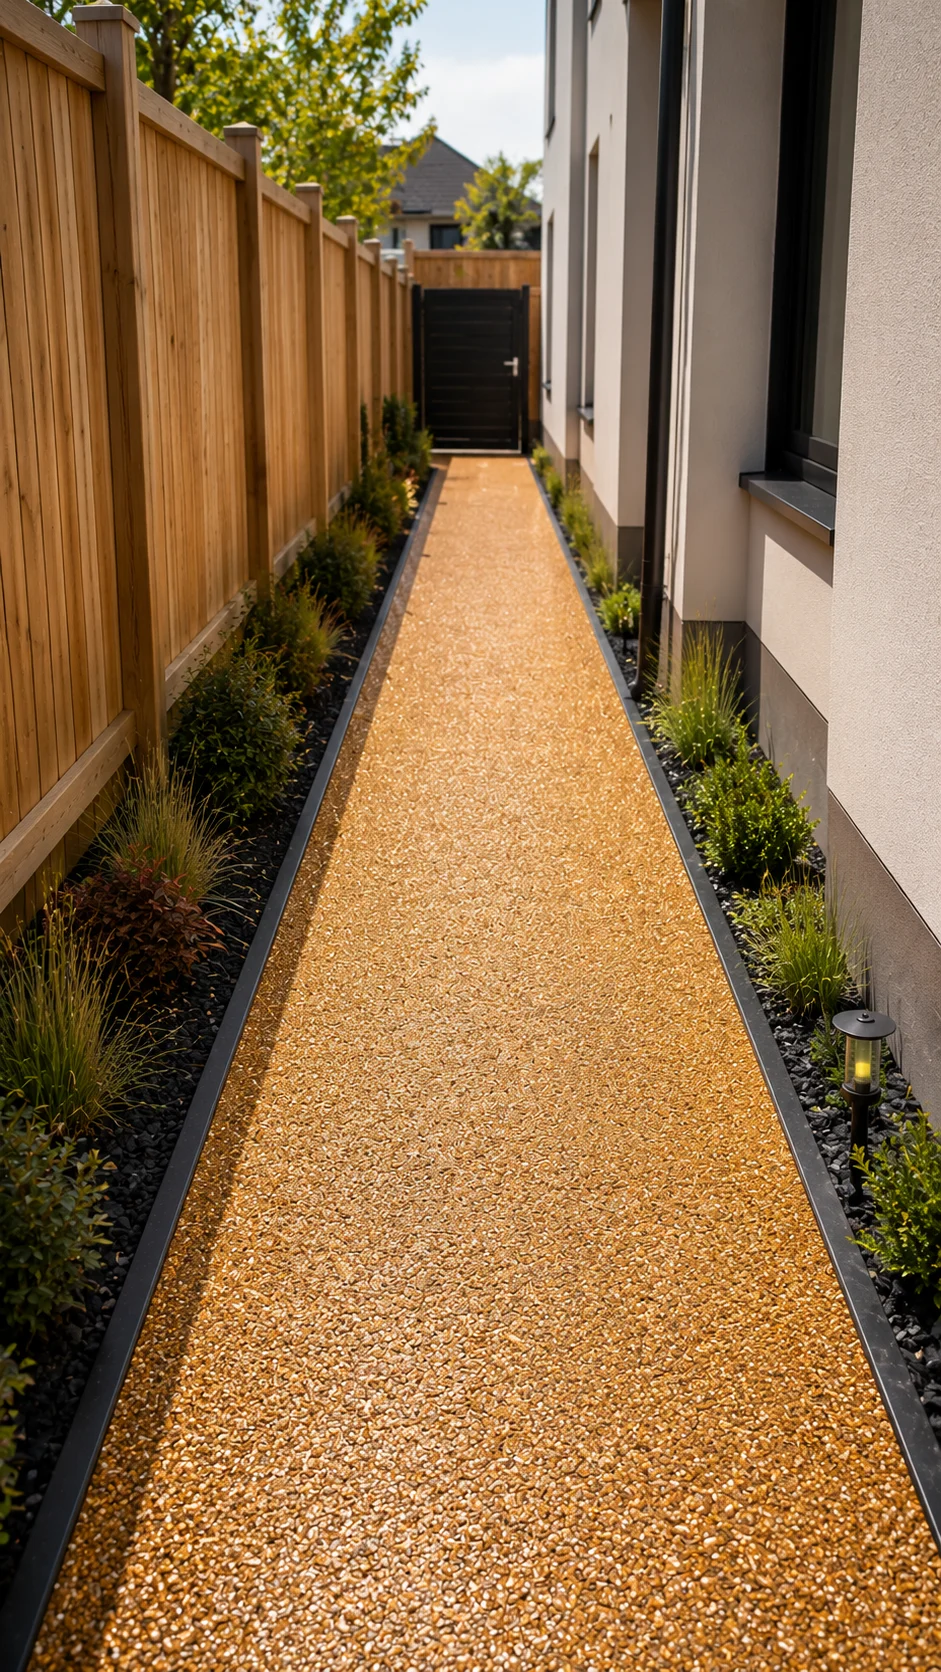
Budget: $200–$450
Resin-bound gravel is one of those materials that looks expensive but is surprisingly achievable as a DIY project. You mix a UV-stable resin with chosen aggregate, spread it over a prepared base, and end up with a smooth, permeable, almost jewel-like surface that drains freely and won’t scatter like loose gravel.
It’s a step up in skill level from the other styles on this list — you need to work quickly because the resin sets fast, and the surface preparation really matters. But the result looks genuinely beautiful and is extremely durable and low-maintenance once cured.
For a narrow side walkway, you can often complete the whole thing with a single mixing session, which makes the timing pressure manageable.
11: Stepping Stone and Creeping Plant Combination
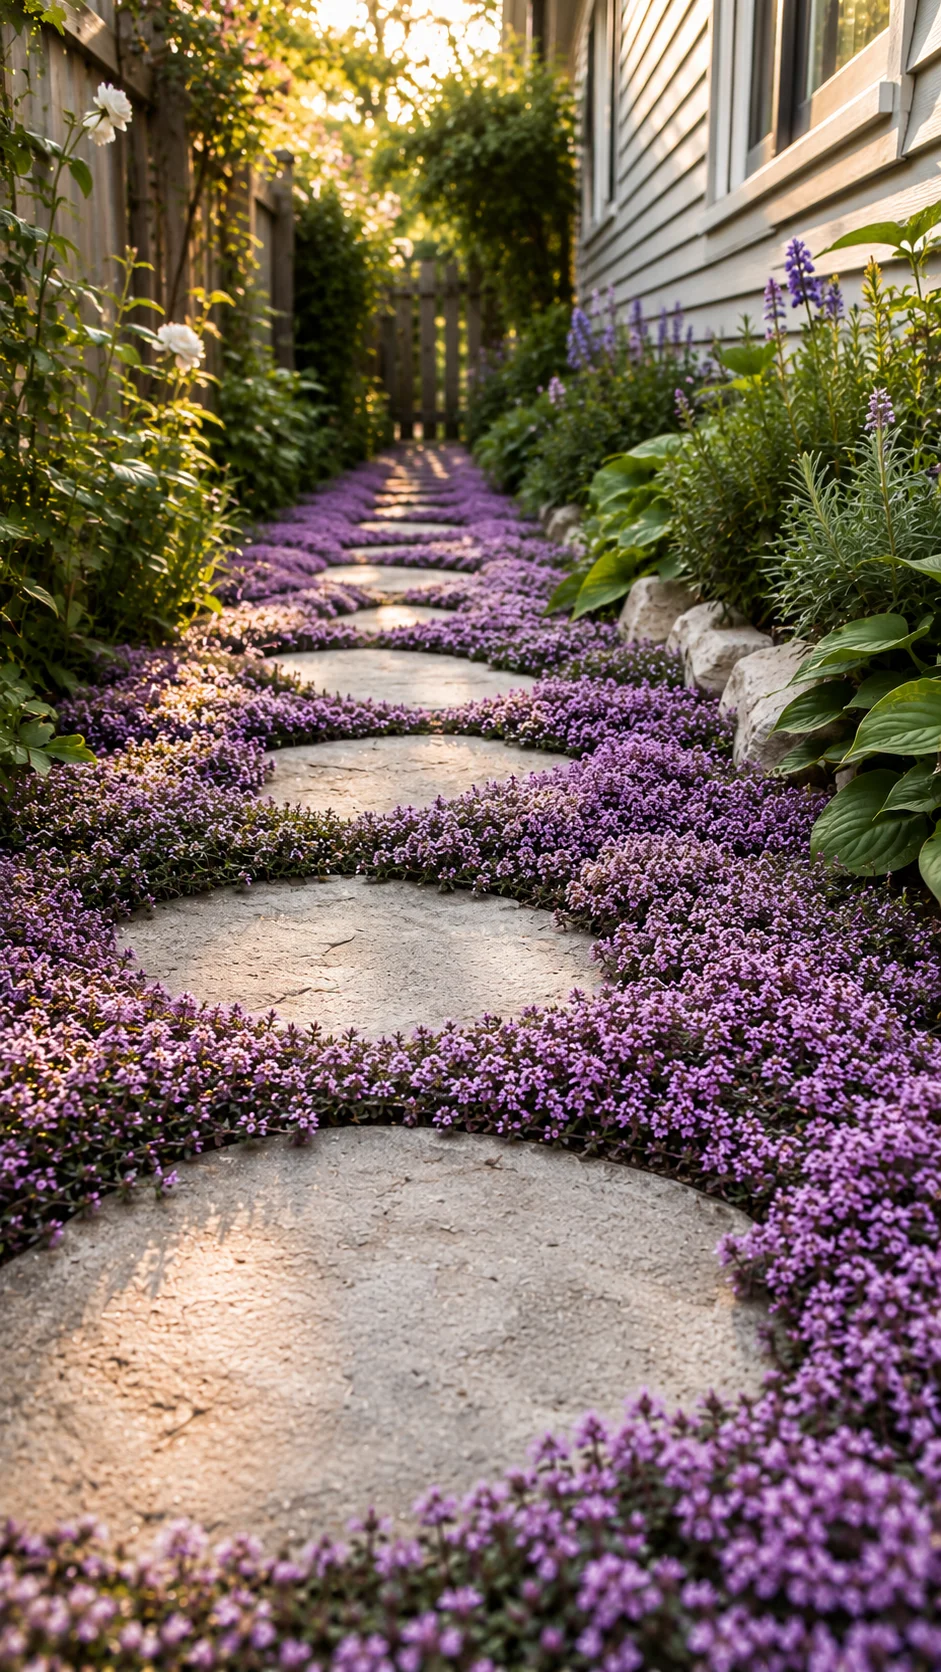
Budget: $40–$100
If there’s a single style on this list that gives you the most visual reward per dollar spent, it might be this one. Large, flat stepping stones — concrete or natural — placed with deliberate gaps, then planted between with creeping plants like thyme, chamomile, blue star creeper, or baby’s tears.
In year one, it looks nice. In year two, the plants have filled in, and it looks like something from a garden magazine. By year three, it has the kind of settled, established character that takes decades to achieve on a formal lawn.
The plants you choose matter. Creeping thyme is incredibly tough and releases a gentle scent when walked on. Baby’s tears is lush and soft-looking but can be tender in cold winters. Do a quick search for what performs in your climate zone before buying.
12: Wooden Deck Boards as a Raised Walkway
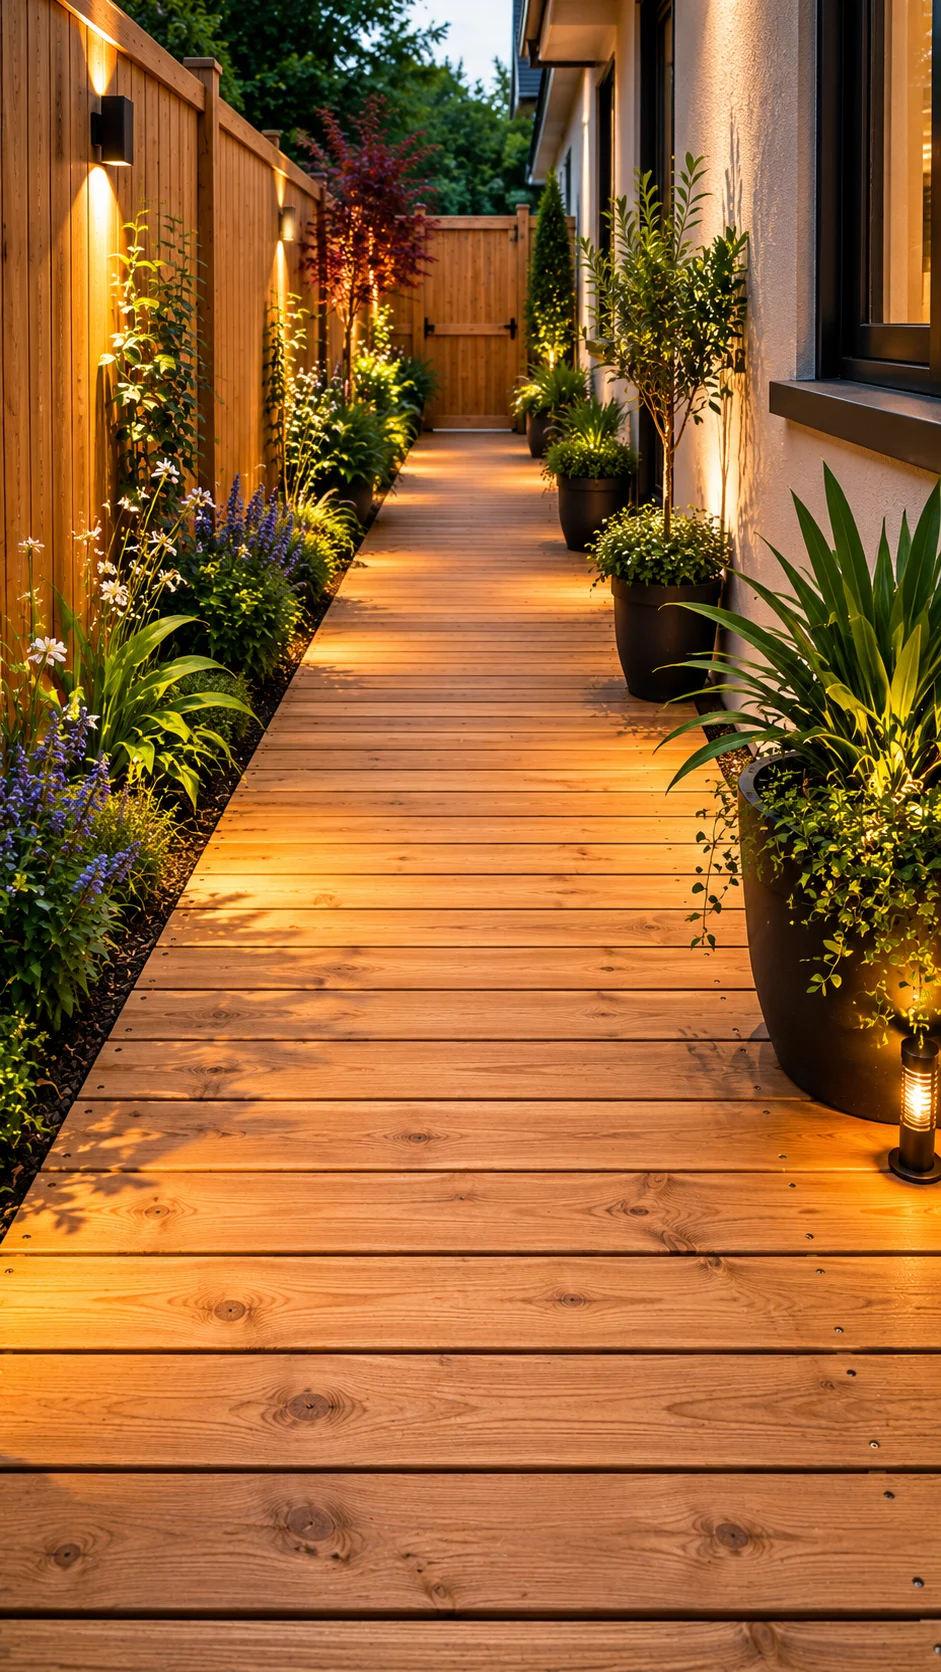
Budget: $150–$400
In wet climates or areas where drainage is genuinely tricky, raising the surface is sometimes the best solution. Simple deck boards — either pressure-treated pine or composite decking — laid across sleeper joists create a clean, slightly elevated walkway that keeps your feet completely dry and transforms a damp, gloomy side passage into something that feels warm and welcoming.
This style is especially good in narrow passages where a fence on one side and the house wall on the other means very little natural drainage. The raised structure allows air to circulate underneath and water to flow away without getting your path saturated.
Use composite decking if budget allows — it costs more upfront but doesn’t need staining or sealing and won’t rot or splinter. For a budget option, pressure-treated pine is fine, but budget for an annual coat of decking oil to keep it looking its best.
Mistakes I Made (So You Don’t Have To)
I want to be honest about the things that went wrong in my own sidewalk projects, because they’re the kind of mistakes that seem obvious in hindsight but are genuinely easy to make when you’re excited and ready to get started.
- Skipping the weed barrier. The first path I laid — a simple stepping stone in a gravel job — I decided the landscape fabric was unnecessary because I’d dug out all the weeds already. By the end of that first summer, grass and bindweed had pushed through every gap. I pulled the whole thing up, added proper woven geotextile, and relaid it. Double the work, double the time. Never skip the barrier.
- Buying the cheapest gravel available. I bought ungraded mixed aggregate because it was half the price of pea gravel. It looked like rubble from a demolition site. Beautiful in the skip lorry; awful on my path. Spend the extra money on a graded, consistent decorative aggregate, and the whole project lifts instantly.
- Not levelling before starting. My side yard had about a 3-inch drop from one end to the other over 35 feet — barely noticeable when you walked it, but significant when you’re laying pavers. I didn’t account for it properly, which meant my edges looked slightly off at one end. Always check the level across the full length and build in a consistent, planned slope of about 1% toward drainage, rather than an accidental and uneven one.
- Installing solar lights was terrible. I bought a pack of 10 solar path lights from a discount shop, excited to illuminate my new walkway. They were essentially useless after the first month. The batteries deteriorated, they barely lit up even on a good day, and three stopped working entirely within six weeks. Invest in two or three quality solar lights rather than ten cheap ones. Brands like Aootek or Litom have a decent reputation for budget-range solar garden lighting.
- Forgetting about the fence side. I spent all my effort on the path surface itself and basically ignored the fence that runs alongside it. It was weathered, slightly grey, and covered in old vine tangles. Once the path was done, the contrast made the fence look even worse than it had before. Plan the whole corridor — fence, wall, planting, and path — as a single project, even if you tackle it in stages.
Budget Breakdown at a Glance
Here’s a quick reference table for all 12 styles, based on a typical 40-foot by 3.5-foot sidewalk. Prices assume you’re sourcing materials yourself and doing the installation as a DIY project. Local prices will vary.
| # | Style | Est. Materials Cost | Difficulty |
|---|---|---|---|
| 1 | Pea Gravel + Timber Edging | $50–$120 | Easy |
| 2 | Irregular Flagstone | $80–$180 | Easy–Medium |
| 3 | Stepping Stones in Mulch | $60–$150 | Easy |
| 4 | Herringbone Pavers | $150–$350 | Medium |
| 5 | Bark Chip Natural Path | $30–$90 | Very Easy |
| 6 | Reclaimed Brick | $200–$500 | Medium |
| 7 | Decomposed Granite + Metal Edge | $100–$250 | Easy–Medium |
| 8 | Grass + Stepping Stone Ribbon | $120–$300 | Easy |
| 9 | Concrete Sleeper Edged Gravel | $80–$200 | Easy |
| 10 | Resin-Bound Gravel | $200–$450 | Medium–Hard |
| 11 | Stepping Stone + Creeping Plants | $40–$100 | Easy |
| 12 | Deck Board Raised Walkway | $150–$400 | Medium |
Tools You Actually Need
You don’t need a garage full of specialist equipment for most of these projects. Here’s what genuinely gets used:
- A good spade and a mattock or grubbing hoe
For removing existing vegetation and rough levelling. A spade alone won’t cut it for breaking up compacted ground or clearing roots. A cheap mattock from a hardware store is one of the most useful purchases I’ve made.
- A long spirit level (4-foot minimum) and a string line
For checking the level across the length of your path and keeping the edges straight. A string line with line pins is less than $10 and prevents all kinds of visual errors that are very difficult to fix after the materials are laid.
- A tamper or plate compactor
For compacting your base material. Hand tampers work for small areas; for a full-length walkway, renting a plate compactor for half a day makes a real difference. Check your local tool hire shops — they’re usually available easily.
- A rubber mallet
Essential for setting pavers or flagstones without cracking them. Never use a metal hammer directly on stone or concrete.
- A wheelbarrow and a contractor’s grade tarp
For moving material and keeping things tidy. A tarp to put material on protects your lawn and driveway during the build and makes cleanup much faster.
- A garden hose or watering can with a rose head
For settling gravel, wetting the DG before compaction, and watering in any plants you add. Sounds obvious, but you want it ready before you start rather than running back and forth to the tap mid-project.
For planning and visualisation, a few free tools worth knowing about: the Google Maps satellite view (great for checking your side yard dimensions before you go measure in person), and the IKEA Place app — technically for furniture, but oddly useful for visualising scale and proportion of outdoor features in photos of your space. For more serious planning, the free tier of SketchUp is worth an afternoon to learn if you want to mock up your path design before committing.
How to Pick the Right Style for Your Home?
With 12 options in front of you, it’s easy to feel a bit overwhelmed. Here’s a simple way to narrow it down:
- Match the house style first
Reclaimed brick belongs with Victorian or Edwardian homes. Decomposed granite suits contemporary or California-casual architecture. Resin-bound gravel works with modern new-builds. Bark and stepping stones fit any cottage or naturalistic garden. If you’re not sure, look at the existing materials on your home’s exterior and work with them, not against them.
- Factor in your drainage situation honestly
If the side yard stays wet, choose permeable materials (gravel, bark, flagstone on sand) or go raised (deck boards). Solid concrete or tightly-jointed pavers over a poor drainage situation will just hold water and look worse over time.
- Think about use, not just looks
Heavy use — bins, wheelbarrow, muddy dogs — needs a firm, hard-wearing surface like pavers or compacted DG. A path that’s walked lightly, mainly for access to a back gate, can be as soft and natural as you like.
- Start simpler than you think you need to
Seriously. A beautifully done, simple gravel path with crisp edging looks better than a poorly executed complex one every time. Master the basics before you go for the resin-bound finish.
The Plants That Make Every Style Better
Almost any of the 12 styles on this list can be elevated significantly with thoughtful planting along the edges. You don’t need to fill the space — in fact, restraint is usually better. Here are the ones I keep returning to:
Lavender — Works against a sunny fence or wall, smells incredible, attracts bees, and provides soft purple colour through most of the summer. It also tolerates a bit of drought and neglect, which is ideal for a side passage you might not water consistently.
Japanese Forest Grass (Hakonechloa) — For shaded side passages, this golden-chartreuse ornamental grass is transformative. It glows in low light and has a flowing, graceful texture that adds movement and softness.
Ferns — The best plants for truly shaded north-facing passageways. Hardy ferns like Dryopteris or Polystichum are remarkably tough and can make a dark side passage look lush and deliberately planted in a way that almost nothing else manages.
Creeping Jenny (Lysimachia nummularia) — Fast-spreading, bright lime-green, tolerates damp shade. Perfect for softening the edges of any hard-surface path. The golden variety ‘Aurea’ is particularly striking.
Climbing Hydrangea — A long game plant, but if you have a wall or fence on one side, a climbing hydrangea planted and trained against it will, within a few years, completely transform the character of the passageway. Slow to establish, but breathtaking once it does.
Wrapping It Up
When I finally finished redoing my own side walkway — pea gravel, timber edging, a run of creeping thyme filling the gaps between a few well-placed flagstones at the entrance — I stood at the front corner of the house and looked down it.
It looked like someone who cared about their home lived there.
That sounds like a small thing, but it genuinely isn’t. The side of a house is what you see every time you come home. It’s what your guests see as they walk around to the back. It’s the path the kids take with muddy boots and the route your dog takes on his morning patrol of the fence line. Making it something pleasant to look at and walk through changes those small daily moments in a way that feels disproportionately good for how much it costs.
You don’t need a landscaper. You don’t need expensive materials. You need a free afternoon, a clear plan, and the willingness to accept that it might take one more Saturday than you originally thought.
Start with whichever of the 12 styles matched your situation best. Get the prep right. Be patient with any plants you add. And take the before photos. You’ll be really glad you did.

Shahid Nawaz is a home and garden content writer at Garden Skillz with over 4 years of experience researching and writing about gardening, plant care, and DIY home improvement. He specializes in turning complex horticultural topics into practical, easy-to-follow guides for beginners and experienced growers alike. Shahid has written extensively on flowering plants, indoor greenery, and seasonal garden care.