I still remember the first time I tried making a miniature. It was a rainy Sunday afternoon, I had a hot cup of tea going cold on my desk, and I was halfway through watching a YouTube video of someone building a tiny bookshelf out of popsicle sticks. My immediate reaction was — that looks ridiculously easy, I can do that.
Spoiler: my first attempt was a disaster.
The “bookshelf” ended up looking more like a sad little raft. The glue went everywhere, my measurements were off by almost a centimeter (which is HUGE in the miniature world), and I had painted it before it was even dry. But here’s the thing — I couldn’t stop. Something about making tiny, perfectly detailed little things is just deeply satisfying in a way that’s hard to explain unless you’ve tried it.
That was about four years ago. Since then, I’ve built hundreds of miniature pieces — everything from tiny kitchen scenes to miniature garden patios. I’ve messed up plenty of them, learned a lot of lessons the hard way, and figured out which projects are genuinely beginner-friendly and which ones just look easy on Pinterest but will make you want to throw your craft table out the window.
This article is for the people who are curious but don’t know where to start. These 10 projects are beginner-tested, budget-friendly, and — most importantly — actually doable on your first try.
Why Is Miniature Making Having Such a Big Moment Right Now?
Before we dive in, I want to say this quickly because I think it matters: miniature crafting isn’t just for collectors or hobbyists with fancy workshop setups. It’s genuinely one of the most accessible crafts you can pick up.
You don’t need a big space. You don’t need expensive tools. Most of what you need, you probably already have lying around your house — cardboard, glue, paint, fabric scraps, toothpicks, you name it.
And there’s something almost meditative about working small. When you’re focused on gluing a one-inch door hinge or painting tiny floor tiles, your brain kind of switches off from everything else. A lot of people I know who got into miniatures did it for stress relief and just never stopped.
So whether you’re here because you saw something gorgeous on Instagram or you’re looking for a new hobby to fill your evenings, welcome. Let’s get you started properly.
What You’ll Need Before You Start?
You don’t need to go crazy buying supplies before your first project. Here’s the basic starter kit that covers almost everything on this list:
- Craft glue or super glue — I prefer a thin-tip super glue for precision. Gorilla Glue’s super glue gel is great for beginners because it’s a little slower-setting, giving you time to adjust.
- A cutting mat and craft knife — Seriously, don’t skip the mat. Your kitchen table will thank you.
- Acrylic paints — A basic set of 12–24 colors is more than enough. Apple Barrel and Craft Smart are affordable and work perfectly.
- Popsicle sticks and toothpicks — These are the bread and butter of miniature making.
- Cardboard and foam board — Save those cereal boxes and shipping boxes.
- A ruler and pencil — Measure twice, cut once. This rule matters even more on a miniature scale.
- Fine-tip brushes — Get a pack with at least a few very thin detail brushes.
- Tweezers — You’ll use these more than you think.
That’s it to start. Let’s get into the projects.
Project 1: The Tiny Popsicle Stick Bookshelf

This is the project that started it all for me, and it’s the one I recommend to absolutely everyone who’s brand new.
What you need: Popsicle sticks, craft glue, sandpaper, acrylic paint (brown or wood tones), a ruler, and a pencil.
How to make it:
Start by deciding your scale. Most beginner miniaturists work in 1:12 scale, which means 1 inch = 1 foot in real life. A standard bookshelf is about 6 feet tall, so yours will be about 6 inches tall. That’s a good, workable size for your first try.
Lay four popsicle sticks side by side and glue them together to form the back panel. Let it dry completely — this is where I messed up my first time by rushing.
For the sides, glue two sticks vertically on each edge. Then cut shorter pieces (you can score and snap popsicle sticks pretty easily) for the shelves. Space them evenly, glue them in, and let the whole thing cure for a few hours.
Once dry, lightly sand any rough edges. Then paint it! I like to do a base coat of brown, let it dry, and then lightly dry-brush a slightly lighter color over the top for a wood-grain effect.
Beginner mistake to avoid: Don’t try to make it perfect. Tiny imperfections actually add character and make it look more realistic. Embrace them.
Time needed: About 2–3 hours, including drying time.
Project 2: A Miniature Succulent Garden
This one is endlessly satisfying and ridiculously cute. Plus, you get to keep it on your desk forever.
What you need: Air-dry clay (I use DAS or Creative Paperclay), a small terracotta pot or bottle cap, toothpicks, green and brown paint, fine sand or dirt.
How to make it:
Roll small balls of clay in varying sizes — these will be the succulents. For a basic rosette succulent, flatten one ball slightly and use a toothpick to press petal shapes around the edge. Layer smaller flattened pieces on top, getting smaller as you go toward the center.
Make 3–5 little succulents in different shapes. A tall, spiky one can be made by rolling a thin log of clay and poking texture lines into it. Let everything dry completely — at least 24 hours for air-dry clay.
Once dry, paint them! Succulents look best with a green base, then a subtle hint of purple, red, or blue at the tips. This sounds complicated, but it takes about 10 minutes.
Mix a small amount of craft glue with sand or fine dirt and press it into the bottom of your pot. This is your “soil.” While still slightly tacky, press in your succulents and arrange them however you like.
Pro tip I learned the hard way: Don’t paint air-dry clay before it’s completely dry. It traps moisture inside, and the clay can crack later.
Time needed: 2 hours of hands-on time, plus 24 hours drying.
Project 3: Miniature Fairy Doors
These are genuinely magical-looking, and they’re SO much easier than they appear.
What you need: Cardboard or foam board, craft sticks or thin dowels, wood glue, brown paint, a small button or bead for a doorknob, and sandpaper.
How to make it:
Cut a door shape from your cardboard — an arch at the top looks the most whimsical. About 4 inches tall works well. Cut two or three thin strips of craft stick to lay across the front as wood planks, gluing them horizontally.
For the door frame, cut thin strips and glue them around the edges. Add a tiny button or bead as a doorknob. Let it all dry.
Now paint it in layers: base coat of dark brown, dry-brush a lighter wood color over it, then maybe a wash of very diluted dark brown in the cracks to add depth. This technique is called “weathering,” and it takes about five minutes but makes everything look ten times more realistic.
You can mount these at the base of a real tree in your garden, in a potted plant, or in a fairy garden display. They look incredible.
Fun variation: Make a tiny round hobbit-style door. Cut a perfect circle, add a cross-brace, and paint it green. Nobody can resist a hobbit door.
Time needed: 1.5–2 hours.
Project 4: Miniature Terracotta Pots
Perfect if you’re building a miniature garden scene or patio.
What you need: Air-dry clay, a chopstick or pencil, orange-brown paint, a sponge or crumpled paper towel.
How to make it:
Roll a ball of clay about the size of a marble. Push your thumb into the center and slowly pinch and rotate to form the pot shape. You want the walls relatively even in thickness. Flare the top edge out slightly, just like a real terracotta pot.
Use your chopstick to add a small indented line near the top rim — this mimics the rim detail on real pots. Set it aside to dry completely.
Once dry, paint it with a mix of orange and brown. The trick to getting that authentic terracotta look is sponge-painting a slightly darker shade in patches after the base coat dries. It gives it that aged, slightly uneven, sun-baked look.
Make a dozen of these in different sizes and arrange them in a little cluster. It looks absolutely gorgeous as a display piece.
Mistake I made: I tried to rush the drying by putting them near a heat source, and they cracked. Air-dry clay needs to dry slowly at room temperature. Just be patient.
Time needed: 30 minutes hands-on, 24 hours drying.
Project 5: A Miniature Wooden Fence
This is one of those projects that transforms any miniature garden scene from “cute” to “completely believable.”
What you need: Popsicle sticks or coffee stirrers, craft glue, scissors or a craft knife, white or brown paint.
How to make it:
Cut your popsicle sticks to equal heights — about 3 inches for a standard garden fence in 1:12 scale. Cut a pointed tip on top if you want a classic picket fence look. You can do this by making two diagonal cuts meeting at a point.
Cut two slightly longer horizontal pieces to act as the rails. Lay them flat, equally spaced. Then glue your vertical fence pieces across them at even intervals. Use a ruler to measure the gaps — consistency is what makes it look professional.
Let it dry flat, then paint it white for a classic look or leave it natural/brown for a rustic wooden fence. A light weathering wash makes it look incredibly realistic.
Use case: These are perfect for fairy gardens, dollhouse scenes, or even as decorative picture frame elements. I once made a whole little front yard scene with a fence, a mailbox, and a garden path. It took a weekend, and it’s still one of my favorite pieces.
Time needed: 2 hours.
Project 6: Miniature Stone Pathway
This sounds fancy, but the materials are literally free.
What you need: Air-dry clay or salt dough, a small stick or pencil, grey and brown paint, a sponge.
How to make it:
Roll your clay out flat, about half a centimeter thick. Use a small stick or the flat end of a pencil to press irregular rectangle and square shapes into the surface — these become your “stones.” You’re not cutting them apart, just creating the impression of individual stones in a single slab.
Once dry, paint the whole thing grey. While still slightly wet, dab a slightly lighter grey and a touch of brown unevenly across the surface with a sponge. This creates the natural variation you see in real stone paths.
Finish with a light dry-brush of white across the raised edges. This catches the light just like a real stone does.
You can cut these into sections to arrange in a curved path through a miniature garden, or use them as-is as a small patio area.
Extra touch: Sprinkle a tiny bit of fine green flock (available at craft stores or model train shops) into the “cracks” between the stones before the final wash dries. It looks like moss and is almost embarrassingly effective.
Time needed: 1 hour hands-on, 24 hours drying.
Project 7: Miniature Lantern From a Jam Jar
This one is my personal favorite, and it always gets compliments when people see it.
What you need: A tiny glass jar (think baby food jar or a small spice jar), thin wire, wire cutters or scissors, a small LED tea light candle, optional twine or ribbon.
How to make it:
Clean your jar completely. Wrap thin wire around the neck of the jar several times and twist it to secure. Then bend a longer piece of wire into a handle arch and attach it to the coil around the neck.
Drop in a tiny battery-operated LED tea light. These are everywhere now — craft stores, online, even dollar stores carry them in multi-packs. Close the lid.
Wrap a little twine or ribbon around the neck for decoration. That’s literally it.
The effect when you turn off the lights is stunning — that warm little glow looks exactly like a real lantern. You can hang these from a miniature pergola, set them on a fairy garden shelf, or arrange several in a cluster.
Scale tip: The smaller the jar, the more magical it looks. Those tiny 4oz jelly jars are perfect.
Time needed: 20 minutes.
Project 8: Miniature Rustic Wheelbarrow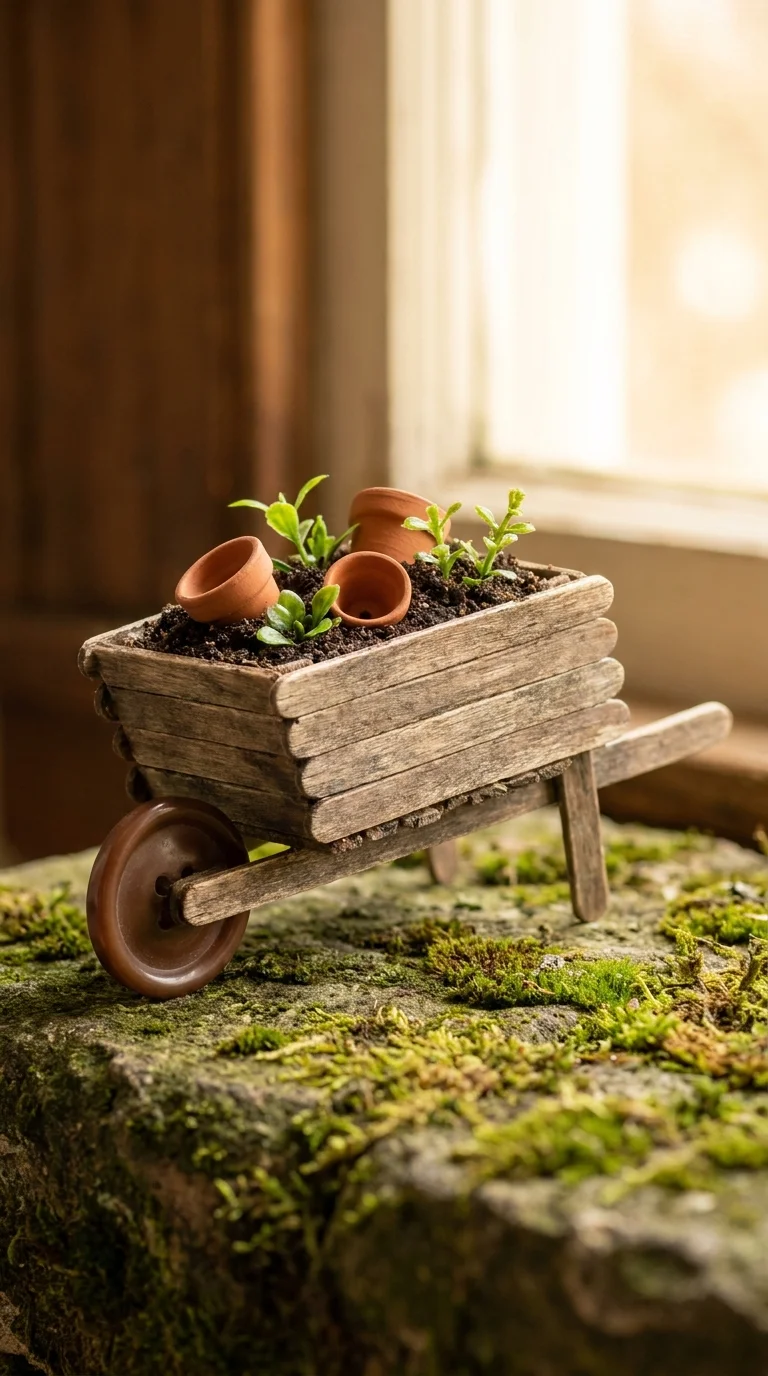
This one takes a bit more patience, but the result is completely worth it.
What you need: Popsicle sticks, thin cardboard, a large button (for the wheel), a thick toothpick or thin dowel, wood glue, brown paint.
How to make it:
Build the tray of the wheelbarrow first: cut two slightly triangular popsicle stick pieces for the sides (wider at the back, narrowing to the front). Lay popsicle sticks across the bottom, trimmed to fit. Glue the sides on.
For the handles, glue two popsicle sticks extending past the back of the tray, angling slightly apart.
The wheel is where the button comes in — find a large, flat button with a cross pattern on the face (it looks like a wheel with spokes). Glue it to a short piece of thick toothpick, which becomes the axle. Attach this to the front underside of the tray.
A small piece of bent cardboard or craft stick under the front acts as the wheel support/fork.
Paint it all brown, then weather it with a darker wash and light dry-brushing. You can fill it with tiny “soil” and a few of your miniature succulents or terracotta pots.
This took me three tries to get right — the proportions were off the first two times. Don’t get discouraged. By the third one, I had it nailed and made four more as gifts.
Time needed: 3–4 hours.
Project 9: Miniature Painted Canvas Art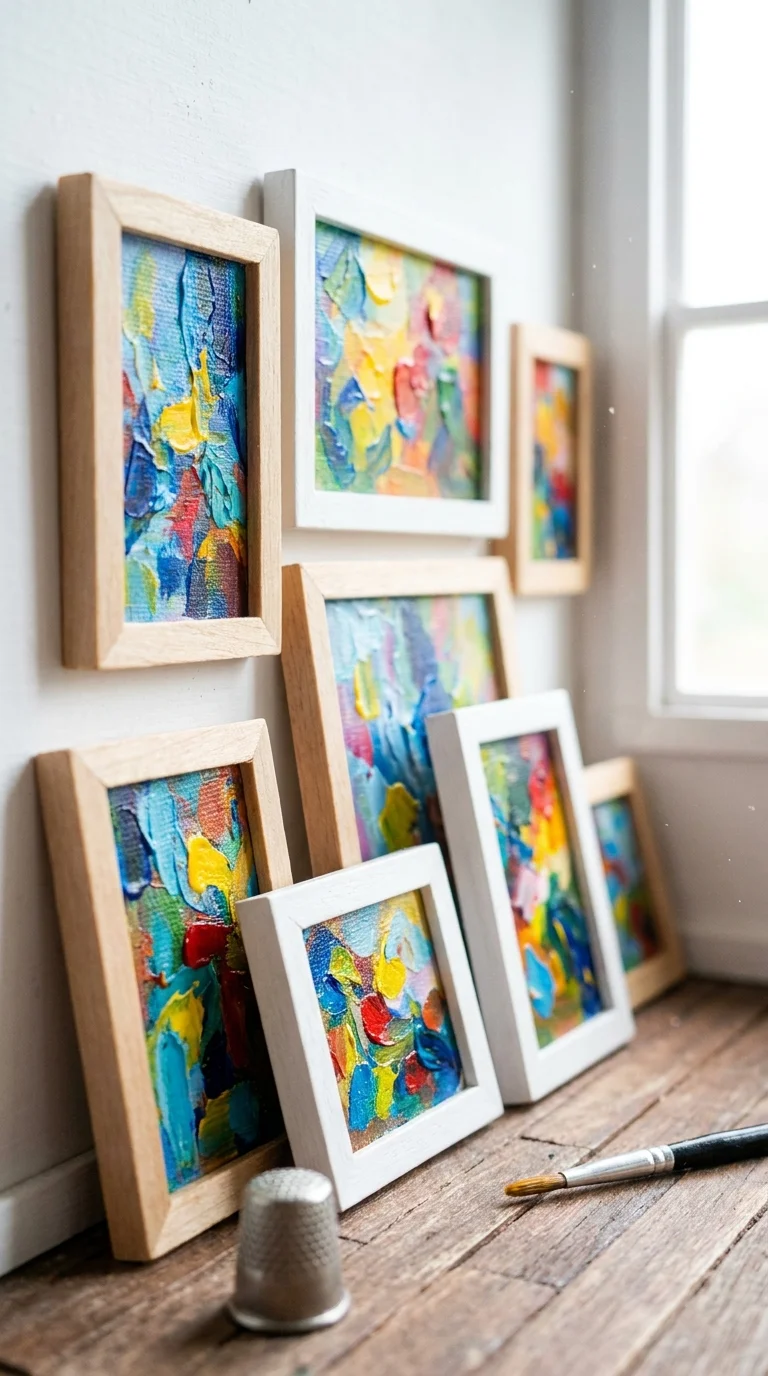
This is perfect if you’re making a dollhouse interior and want tiny paintings on the walls.
What you need: Popsicle sticks or balsa wood, a small piece of canvas fabric or thick paper, craft glue, acrylic paint, very fine brushes.
How to make it:
Cut four small popsicle stick pieces and glue them into a tiny rectangle frame. Cut your canvas fabric to fit, stretch it slightly, and glue it to the back of the frame. Let it dry.
Now paint something tiny on the front. And here’s where beginners always psych themselves out — you do NOT need to paint something detailed or realistic.
Abstract art looks incredible in miniature and requires zero artistic skill. Splashes of color, geometric shapes, or color-block designs look stunning and take five minutes. You can also do a simple landscape — a strip of blue at the top for sky, a strip of green at the bottom for ground, maybe a rough yellow blob for a sun. From a normal viewing distance, it reads as a real painting.
Frame it in a slightly darker shade of the popsicle stick color, and it looks completely professional.
Make several: A tiny gallery wall in a miniature room with five or six small paintings is one of the most charming things you can create.
Time needed: 45 minutes per canvas.
Project 10: A Miniature Garden Potting Bench
This is your graduation project — slightly more involved than the others, but if you’ve made it through the list, you’re absolutely ready for it.
What you need: Popsicle sticks, balsa wood strips (available at any craft store), craft glue, sandpaper, brown paint, tiny accessories (miniature tools, pots, plants you’ve already made).
How to make it:
The bench is essentially a small table with a shelf underneath and a back panel. Start with the legs — four equal-length pieces of balsa strip, about 4 inches tall. Join the front two legs and the back two legs, each with a horizontal cross-brace near the bottom (this will hold the lower shelf).
The work surface is popsicle sticks laid side by side and glued together, then glued across the four legs. The lower shelf is the same construction, resting on the lower cross-braces.
For the back panel, glue a few popsicle sticks vertically, side by side. Add a small horizontal piece near the top to give it structure. Attach this to the back of the bench.
Add small hooks (bent wire or tiny eye screws) to the back panel for hanging miniature tools.
Paint the whole thing in a weathered wood finish: base brown, lighter dry-brush, optional dark wash in the details. Arrange your miniature pots, tools, and plants on the surface and shelf.
This is one of those pieces that immediately becomes the centerpiece of any miniature garden display. It tells a whole story on its own — someone was just here, potting plants, getting their hands dirty. That narrative quality is what makes miniature making so addictive.
Time needed: 4–5 hours.
The Biggest Mistakes Beginners Make (And How to Avoid Them)
Having been there myself and watched a lot of beginners in online forums and local craft groups go through similar frustrations, here are the real pitfalls:
Rushing the drying time. This ruins more projects than anything else. Glue that isn’t fully dry won’t hold properly. Paint over wet glue bubbles and peels. Air-dry clay that’s still damp inside will crack. Give everything adequate time. When in doubt, wait longer.
Skipping the weathering step. This is the step that separates “looks like a craft project” from “looks like the real thing.” Even the most basic dry-brushing technique makes a massive difference. Look up a simple tutorial — it takes five minutes to learn and you’ll use it on everything forever.
Buying too much stuff before you start. I see this constantly. Someone gets excited, spends $80 on supplies, feels overwhelmed, and never starts. Begin with the basics. You can always get more specialized materials once you know what you actually enjoy making.
Making it too perfect. Real things aren’t perfect. Real wood has grain, knots, and slight variations. Real stone is uneven. Real garden pots get a little dirty and mossy. Lean into imperfection. It’s actually easier, AND it looks better.
Working without a dedicated mat or surface. You will get glue on things. You will drip paint. Set up a proper work surface — a silicone mat, a cutting mat, even just a large piece of cardboard — before you start any project.
What to Do With Your Miniatures Once You’ve Made Them?
This is actually something a lot of beginners don’t think about going in, and then they end up with a collection of little things and no idea what to do with them.
Here are some of the best ways to display and use your miniature projects:
Fairy gardens in pots or planters. Take a large terracotta planter, fill it with soil or moss, and arrange your miniature pieces throughout. Add a fairy door at the base, a tiny pathway, some miniature pots, and a fence. It becomes a living, growing diorama that changes with the seasons.
Shadowbox displays. A deep picture frame or an old printer paper box makes a perfect backdrop for a miniature room or outdoor scene. These look incredible on walls.
Dollhouse room makeovers. If you have an old dollhouse (or find one at a thrift store — they’re everywhere), your miniature projects can completely transform it.
Gifts. Handmade miniature pieces make genuinely unique gifts. I’ve given a miniature potting bench with accessories to a gardener friend, and she still has it on her windowsill three years later.
Helpful Resources and Communities
Once you catch the miniature bug, you’ll want to learn more. Here are some places that have genuinely helped me:
YouTube is incredible for this hobby. Search for creators like “Dollhouse Decorating Miniatures” or “Craft with Cartwright.” There are thousands of free tutorials.
Reddit’s r/miniatures community is welcoming and full of both beginners and experienced makers who love sharing their work and answering questions.
The Micro Mark catalog (micromark.com) is a rabbit hole of tiny tools and materials. Don’t visit it unless you’re okay spending money — fair warning.
Pinterest is great for inspiration, but take the difficulty estimates with a grain of salt. Many “easy” pins are not actually easy. Look for tutorials with step-by-step photos rather than just a finished product.
Starting Small Really Is the Secret
I want to leave you with the one thing I wish someone had told me when I started: the goal of your first miniature project is not to make something perfect. The goal is to make something finished.
Because once you finish that first little popsicle stick bookshelf or that tiny succulent pot, something clicks. You understand scale in a way you didn’t before. You know how the glue behaves. You know what paint coverage looks like on a surface this small. Every project after that is easier.
The people who get really good at miniature making are not the ones with the most natural talent — they’re the ones who made a lot of imperfect little things and kept going anyway.
Start with Project 1 or Project 2 this weekend. Give yourself a couple of hours and no expectations. And if it turns out wonky and weird, welcome to the club. We all started there.
If you give any of these projects a try, I’d genuinely love to know how they went. Drop a comment below — especially if you made a happy accident that turned out better than you planned. Those are always my favorite stories.

Shahid Nawaz is a home and garden content writer at Garden Skillz with over 4 years of experience researching and writing about gardening, plant care, and DIY home improvement. He specializes in turning complex horticultural topics into practical, easy-to-follow guides for beginners and experienced growers alike. Shahid has written extensively on flowering plants, indoor greenery, and seasonal garden care.